**01** **---** Bruno 介绍 ======== **一句话介绍Bruno**:一款全新且创新的 API 客户端,平替Postman。承诺一直离线使用,支持用 Git 或其他任何版本控制系统来进行API版本控制和协作。 
**? 项目信息**\* \* \* \* ``` #Github地址https://github.com/usebruno/bruno#项目官网https://www.usebruno.com/ ``` 发布一年半不到的时间,目前已经荣获了19K+的Star。 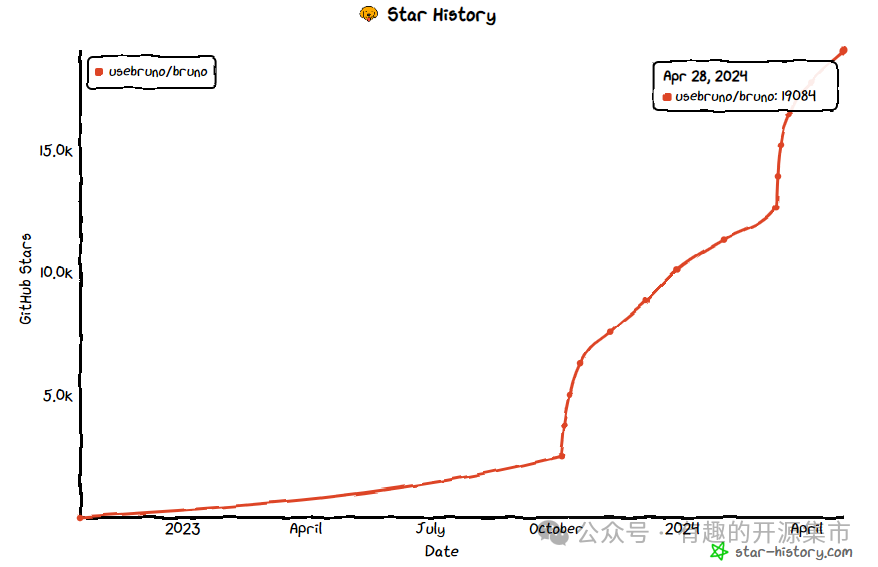 ?**功能特性**
* Bruno 采用一种简单的标记语言,提供界面、CLI,简单易用; * 测试集合中的 API 请求采用纯文本文件方式存储; * 支持 API 测试集合保存在Git代码存储库,通过版本控制系统管理和团队共享。API 测试上的协作可以通过Git请求来完成,使测试人员更轻松了解API的更改。 * 仅限支持离线使用。永不添加云同步功能。保护数据隐私,所以测试数据本地留存。 **? 和Postman对比** ----------------- * **测试集如何保存和团队协作使用** Postman采用云存储(上传云端共享),或者导出JSON共享。 Bruno 采用Git存储共享和控制。 * **API 请求是如何发出的** Postman Web App 使用专有代理服务器发出 API 请求。 Bruno 直接从本地计算机发出 API 请求。 * **在线和离线** Postman 需要在线登录使用。 Bruno 专为离线使用而设计。 * **团队协作** Postman 团队协作功能需付费。 Bruno 是免费且开源,可以使用 git 版本控制来协作。 * **测试集运行** Postman 本地测试集运行有次数限制,不然就需要付费才行。 Bruno 可以无限次地运行集合。 **02** **---** Bruno 安装 ======== **一、下载安装文件进行安装** * 下载地址: * ``` https://www.usebruno.com/downloads ``` 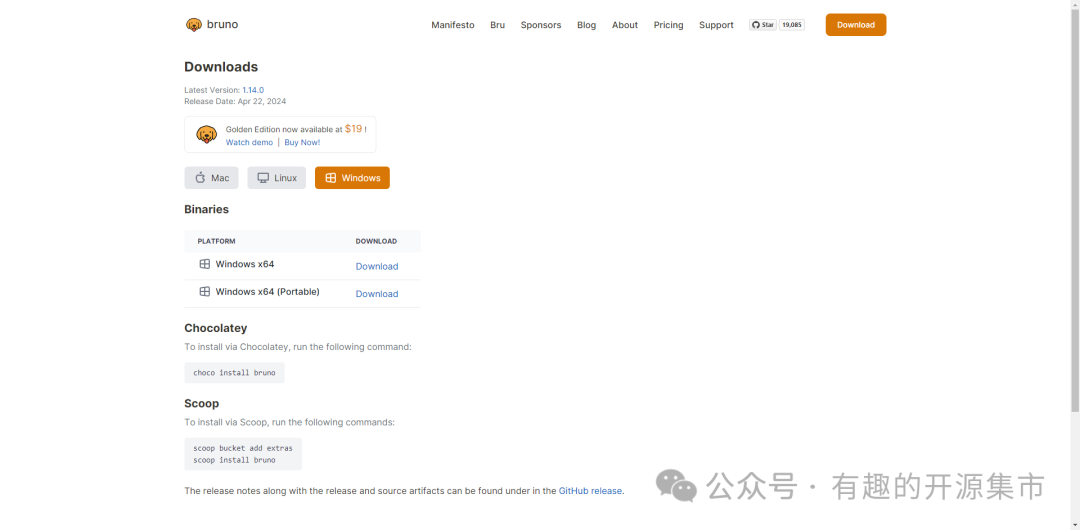 **二、通过包管理器安装** \* \* \* \* \* \* \* \* \* \* \* \* \* \* \* \* \* \* \* \* \* ``` # 在 Mac 电脑上用 Homebrew 安装brew install bruno # 在 Windows 上用 Chocolatey 安装choco install bruno # 在 Windows 上用 Scoop 安装scoop bucket add extrasscoop install bruno # 在 Linux 上用 Snap 安装snap install bruno # 在 Linux 上用 Apt 安装sudo mkdir -p /etc/apt/keyringssudo gpg --no-default-keyring --keyring /etc/apt/keyrings/bruno.gpg --keyserver keyserver.ubuntu.com --recv-keys 9FA6017ECABE0266 echo "deb [signed-by=/etc/apt/keyrings/bruno.gpg] http://debian.usebruno.com/ bruno stable" | sudo tee /etc/apt/sources.list.d/bruno.list sudo apt updatesudo apt install bruno ``` **03** **---** Bruno 界面使用 ========== * **打开默认界面**  * **创建测试集** 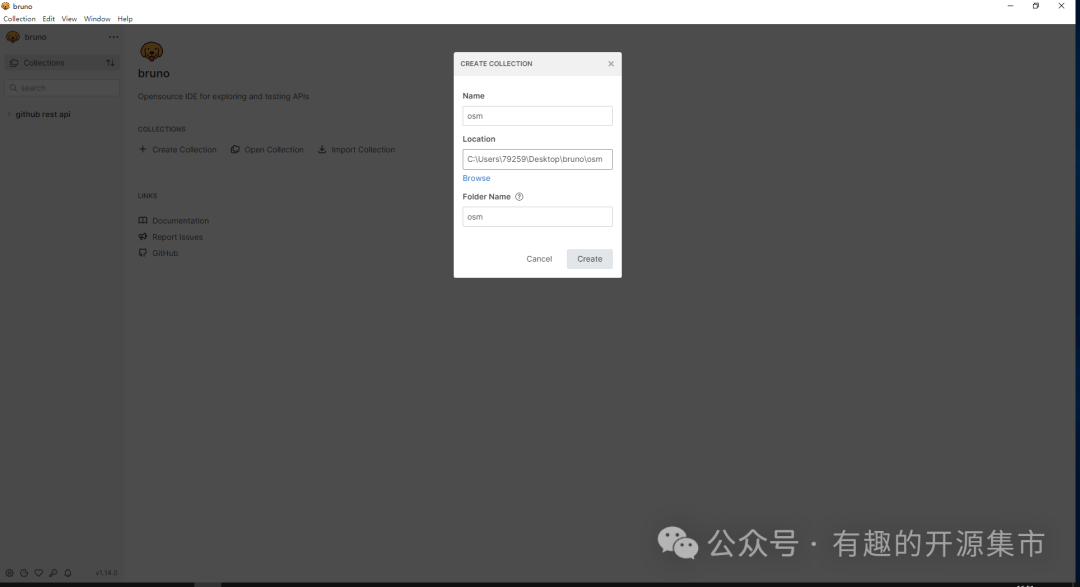 * **导入测试集** 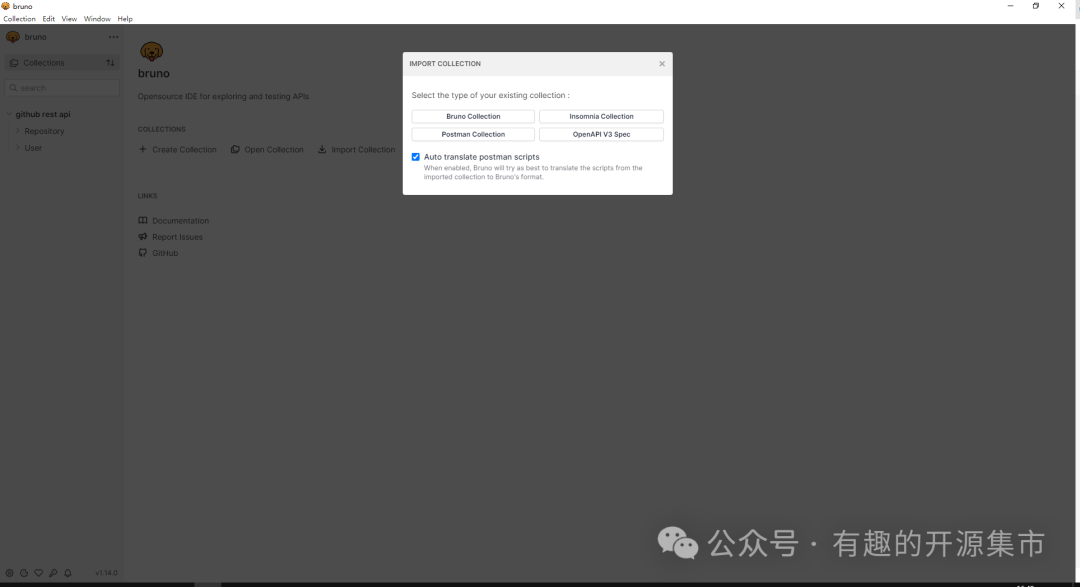 * **在测试集下创建请求** 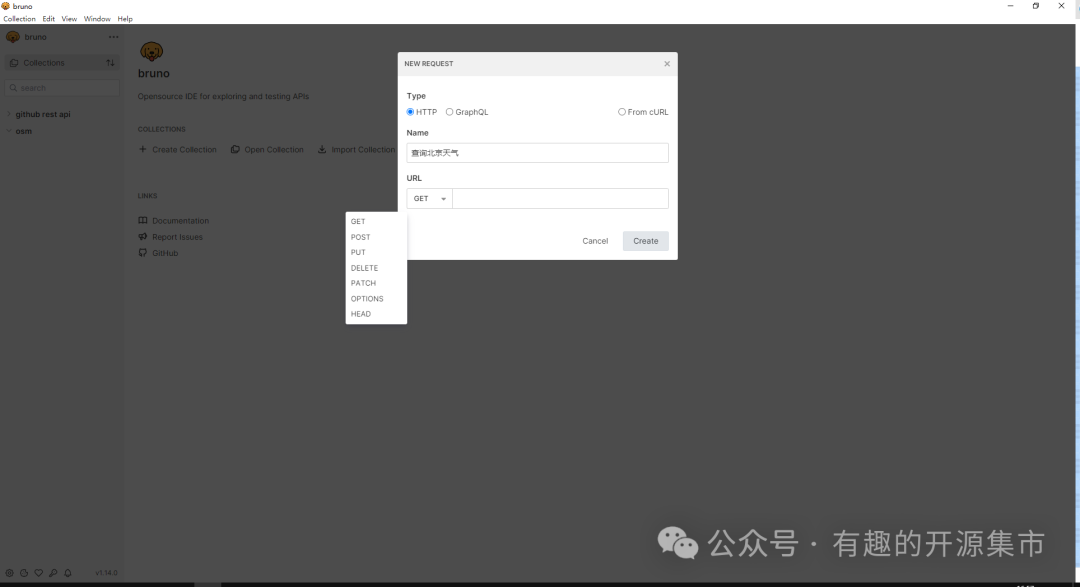*比如创建一个查询北京天气的接口* 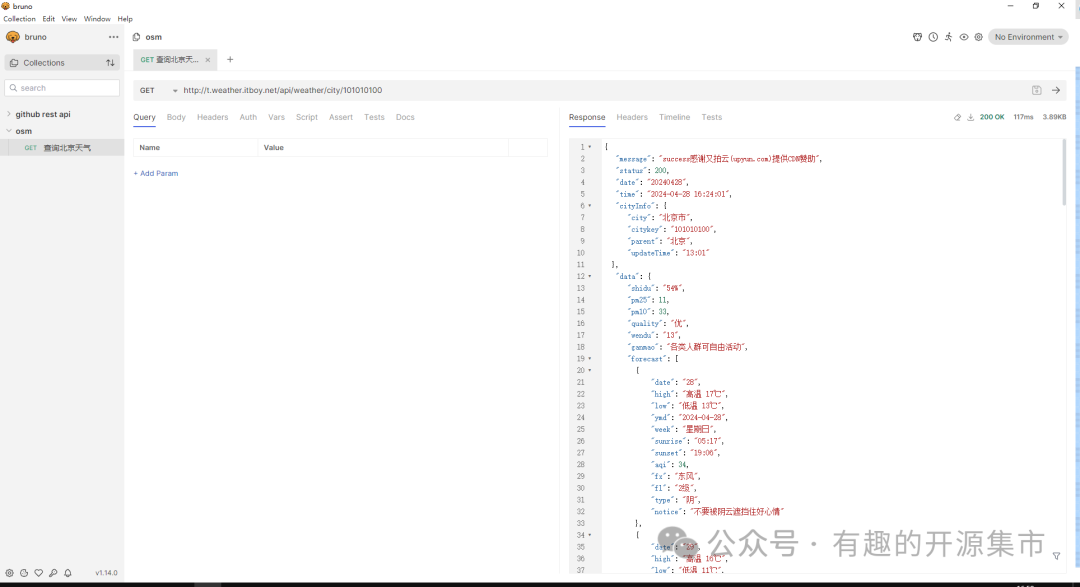*运行结果* * ##### **API 请求转成代码** 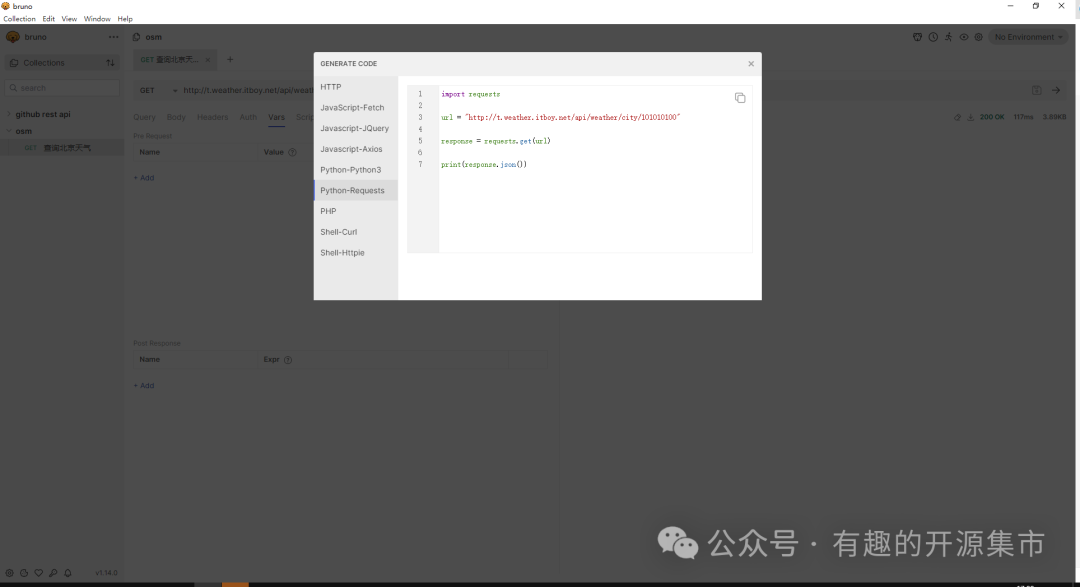 * **编写断言** ##### 1、声明方式编写断言 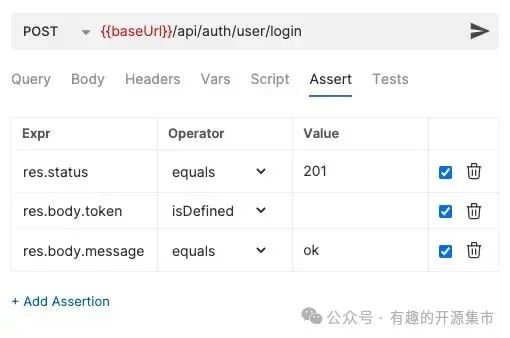 比如判断上海天气是否为"优" 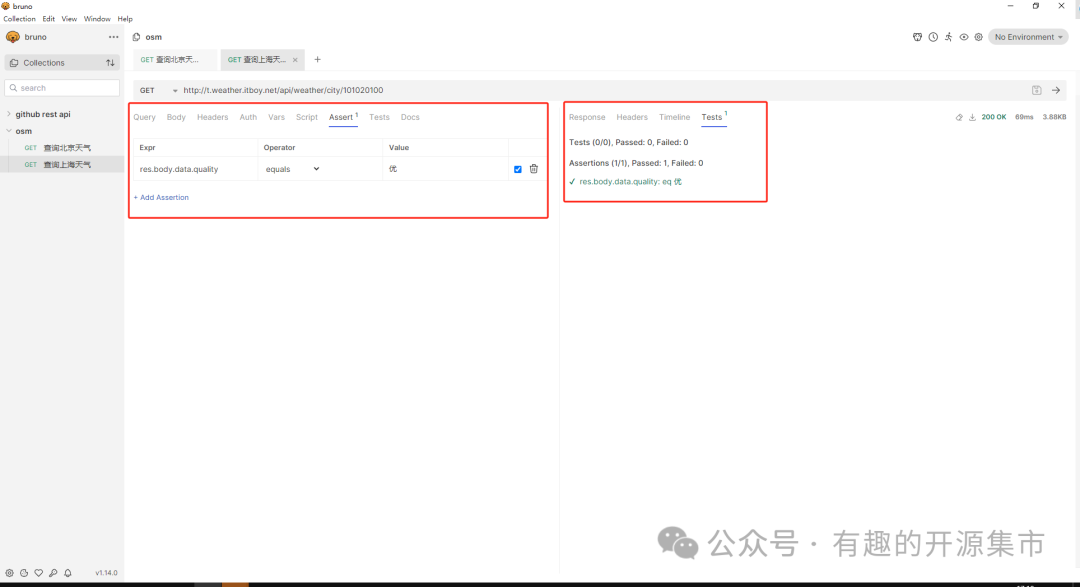 ##### 2、脚本编写断言 ##### 如果声明方式编写断言不能满足需求,可以采用脚本编写断言,比如判断状态码是否为200: * * * * * ``` test("返回码为200", function() { const data = res.getBody(); expect(res.getStatus()).to.equal(200);}); ```  * **创建环境变量** 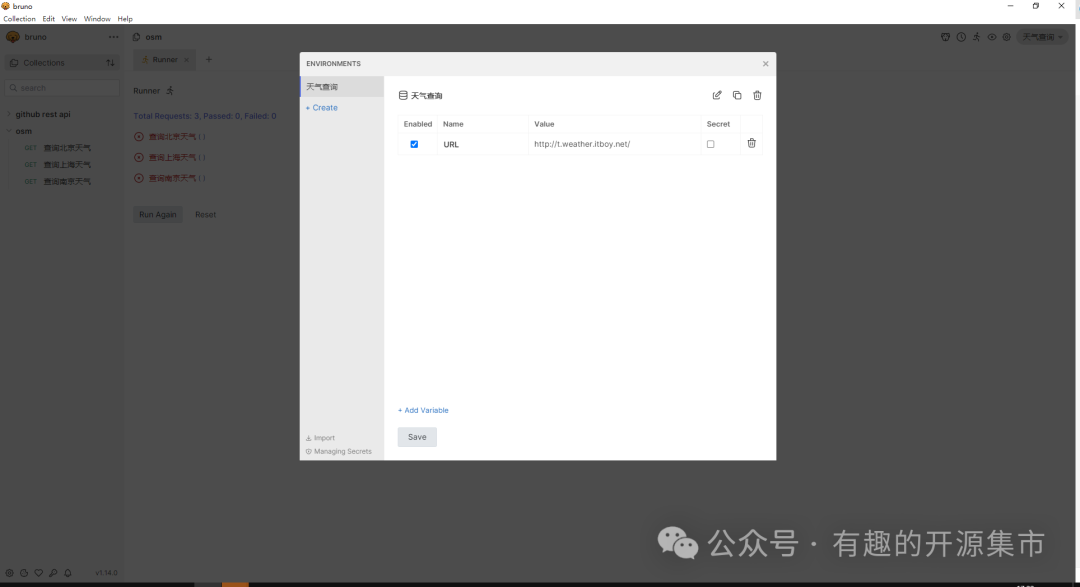 在请求中使用{{URL}}替换地址  * **运行 Git 中测试集** 官方提供了一个DEMO: \* ``` https://github.com/usebruno/github-rest-api-collection ``` 使用时,下载代码,然后导入Bruno中: \* \* \* \* ``` # Clone this repo git clone https://github.com/usebruno/github-rest-api-collection.git # open the folder in bruno ``` 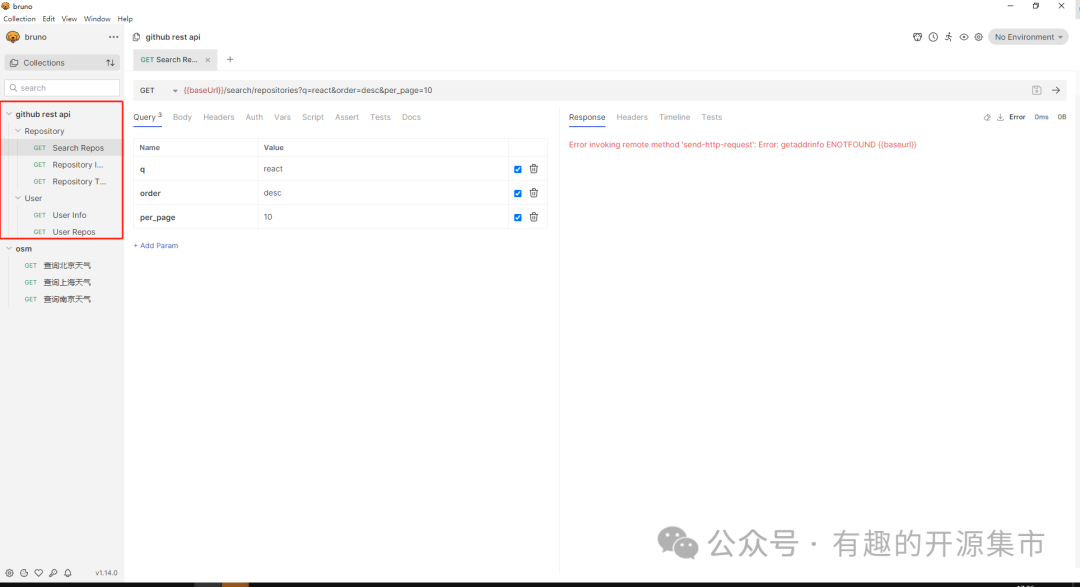 * **批量运行测试集** 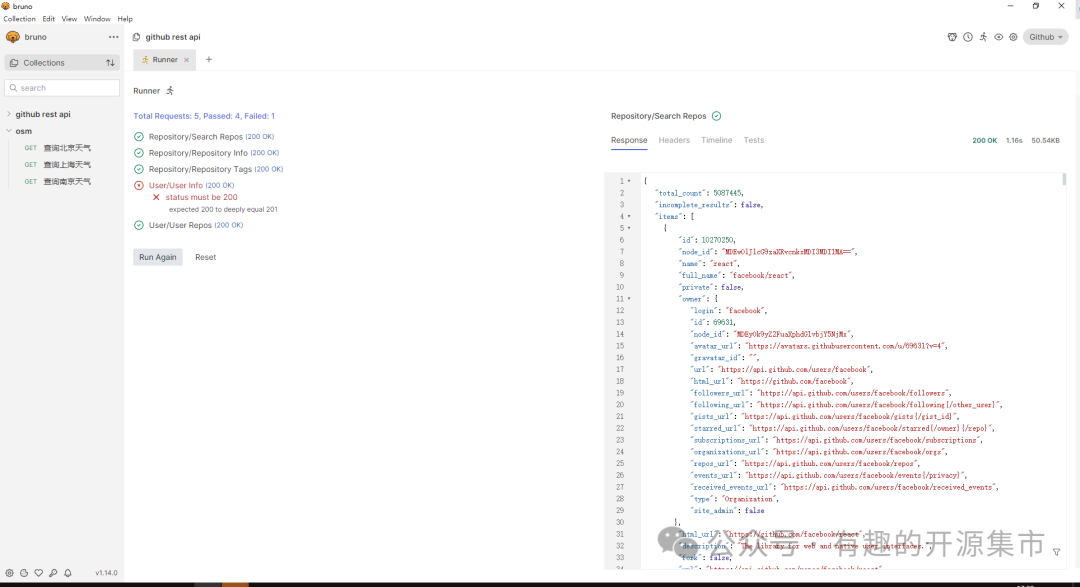 * **基于Git可以实现版本管理** 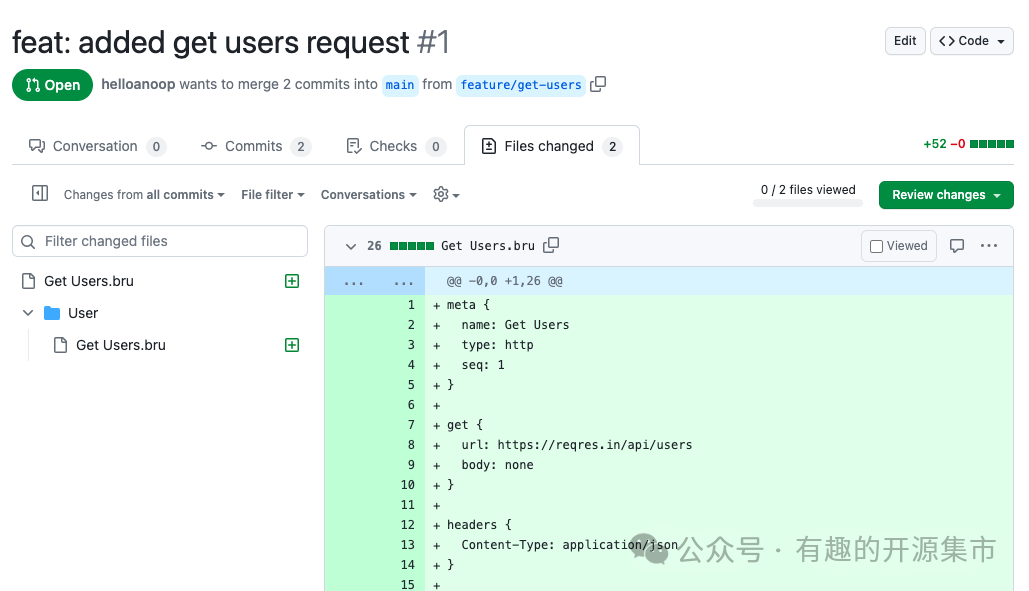**03** **---** Bruno CLI 使用 ============ 通过 Bruno CLI,可以使用简单的命令行命令轻松运行 API 集合。可以更轻松地在不同环境中测试 API、自动化测试流程,并将 API 测试与持续集成和部署工作流程集成。 * **安装Bruno命令行** * ``` npm install -g @usebruno/cli ``` * **导航到 API 集合所在的目录,然后运行**运行集合中的所有请求:\*\*\*\* * ``` bru run ``` * **通过指定其文件名来运行单个请求:** * ``` bru run request.bru ``` * **运行文件夹中的所有请求:** * ``` bru run folder ``` * **如果需要使用环境,可以使用 --env 选项指定:** * ``` bru run folder --env Local ``` * **使用 --env-var 选项将环境变量传递到测试集:** * ``` bru run folder --env Local --env-var JWT_TOKEN=1234 ``` * **收集 API 测试的结果,可以指定 --output 选项:** * ``` bru run folder --output results.json ``` * **其他参数选项** 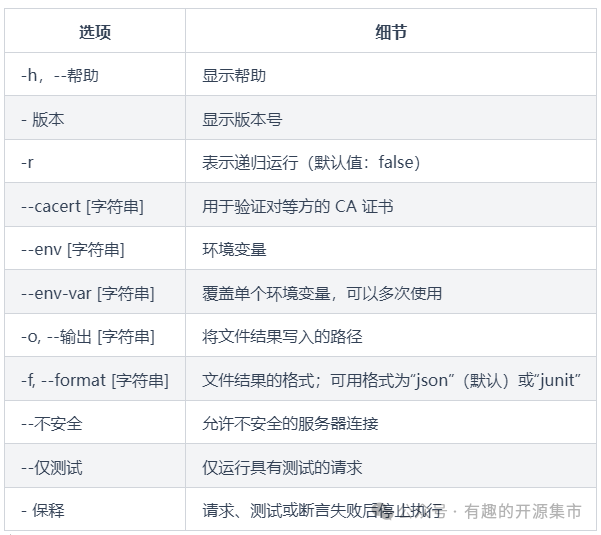**04** **---** Bruno vscode 插件 =============== vscode 应用中直接安装Bruno 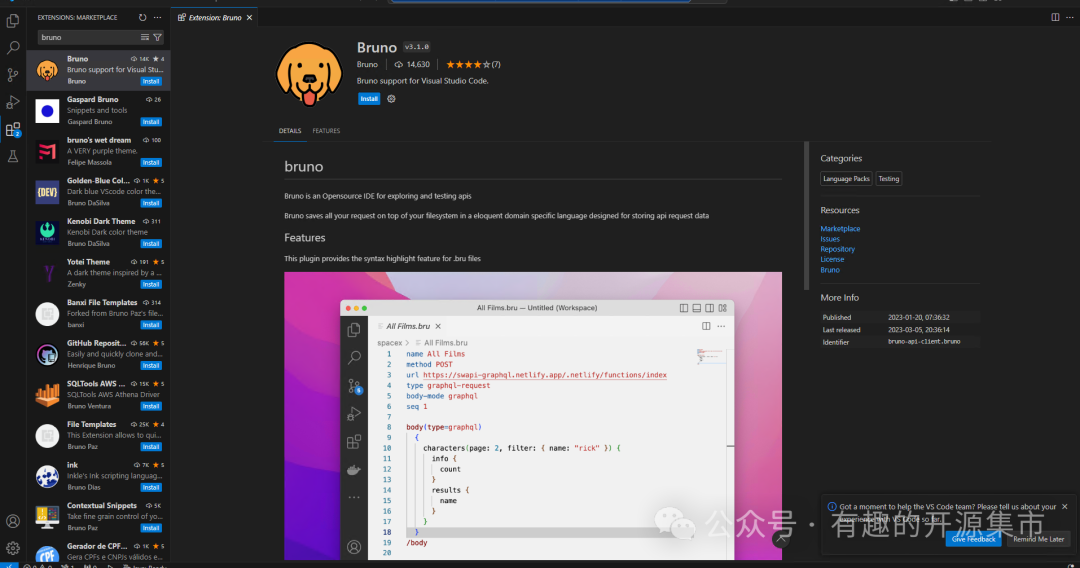 该插件为 .bru 文件提供语法高亮功能 **05** **---** 最后 === 工欲善其事,必先利其器,拥有一款优秀的 API 工具能够帮助测试人员和企业大幅度提升测试效率。正如 Bruno 官网所说,Bruno 希望重新定义 API 测试客户端。如果你已经受够了 Postman 的限制或者正在寻找其他的 API 测试工具,那么不防试试 Bruno ,希望给你一个不一样的 API 测试体验。 五一假期前最后一天工作日,收拾好心情,开始happy,祝大家五一假期快乐!