2024-03-13
分类:开源工具
阅读(491) 评论(0)
##创建精灵sprites
1. Type \> Multiple,并将 PPU 保留为 100。
2. 将精灵图集slice为 4 列和 4 行
##烟雾效果
1. Hierarchy\>Create \> Effects \> Particle System)。
2. 此时将为你创建一个默认的粒子系统。现在应该看起来像是向上喷射的白点。将这个粒子系统重命名为 SmokeEffect。 \>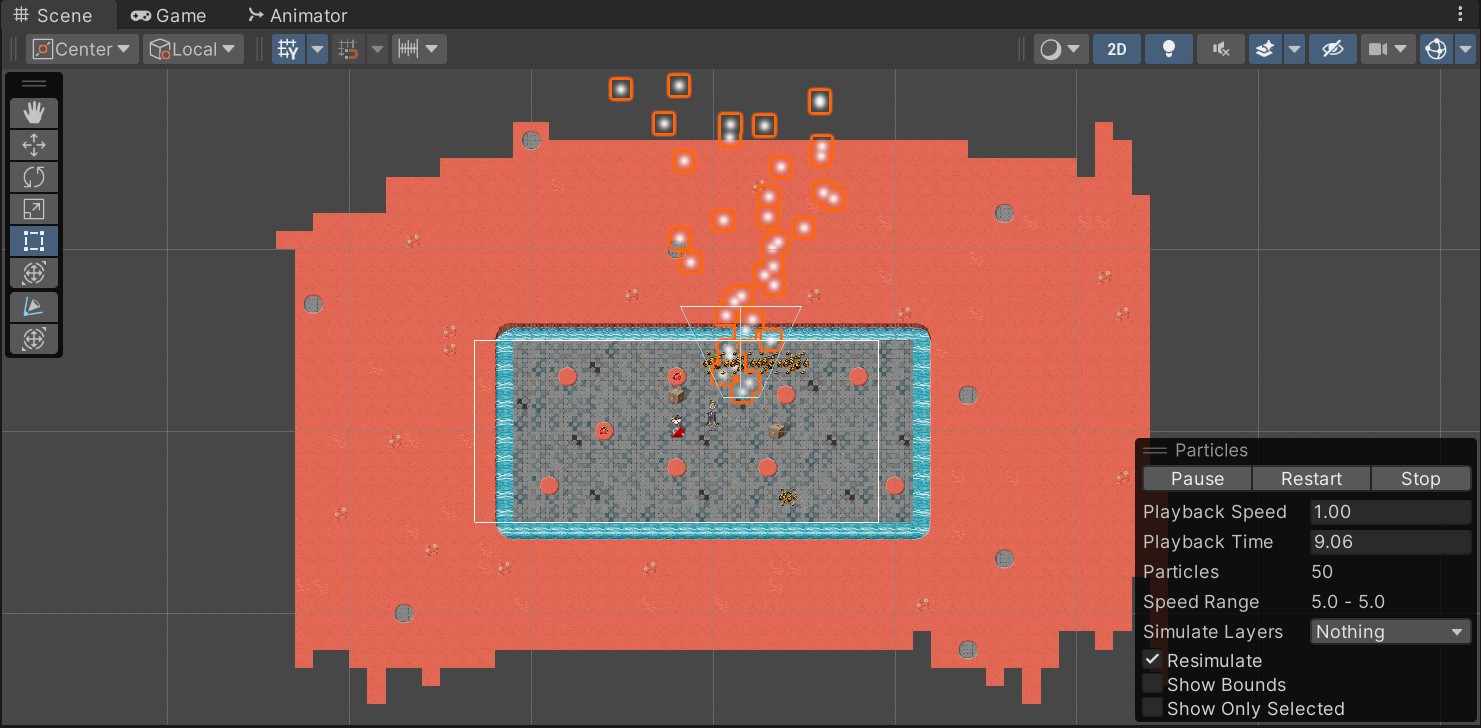
3.Inspector \> Texture Sheet Animation
##随机精灵
1. Mode \> Sprites
2. `+` \> 得到多个精灵。
3. 将精灵拖至/分配至mode
4. Start Frame \> Random Between Two Constants
\>输入 0 和 2,系统将选择一个介于 0 到 2(不包括 2)之间的随机数,即 0 或 1,并对粒子使用相应的精灵。
5. Frame over time \> 红线 \> remove
\>这个框显示曲线帧中相应的帧随时间的变化情况(从帧 0 到 1)。
因为我们不需要动画,故remove
##粒子/精灵角度
6. Inspector \> Shape 部分 \> Radius \> 0(所有粒子都从一个点发出)
\>Scene 视图将显示发射粒子的锥体。
7. Angle \> 5° \>减少粒子的分散程度并以更加准直的线条生成
##增加随机性
\>Random Between Two Constants
1. Start Lifetime:被销毁之前存在的时间
2. Start Size
3. Start Speed
##逐渐消失
\>让粒子随着生命周期接近最大值的过程中逐渐增大透明度,直至变得完全透明。
### Color over Lifetime
1. Color over Lifetime \> Random Between Two Gradients
2. 单击颜色方框 打开 Gradient Editor
3. 底部箭头是颜色,顶部箭头是透明度(Alpha);左侧为创建时,右侧为销毁时
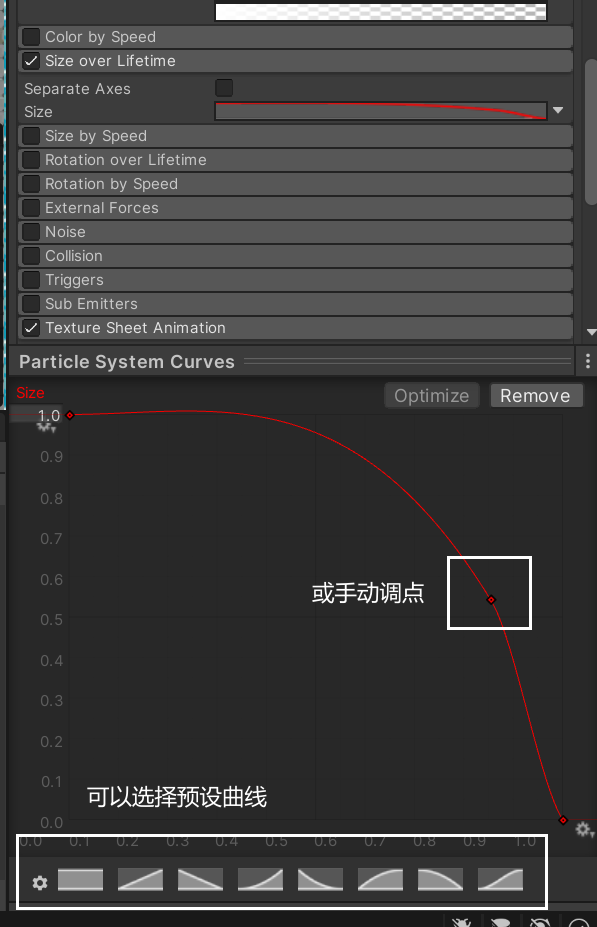
### Size Over Lifetime
##分配粒子效果
1. 预制件
2. 机器人预制件模式\>将烟雾设置为机器人的子对象 \>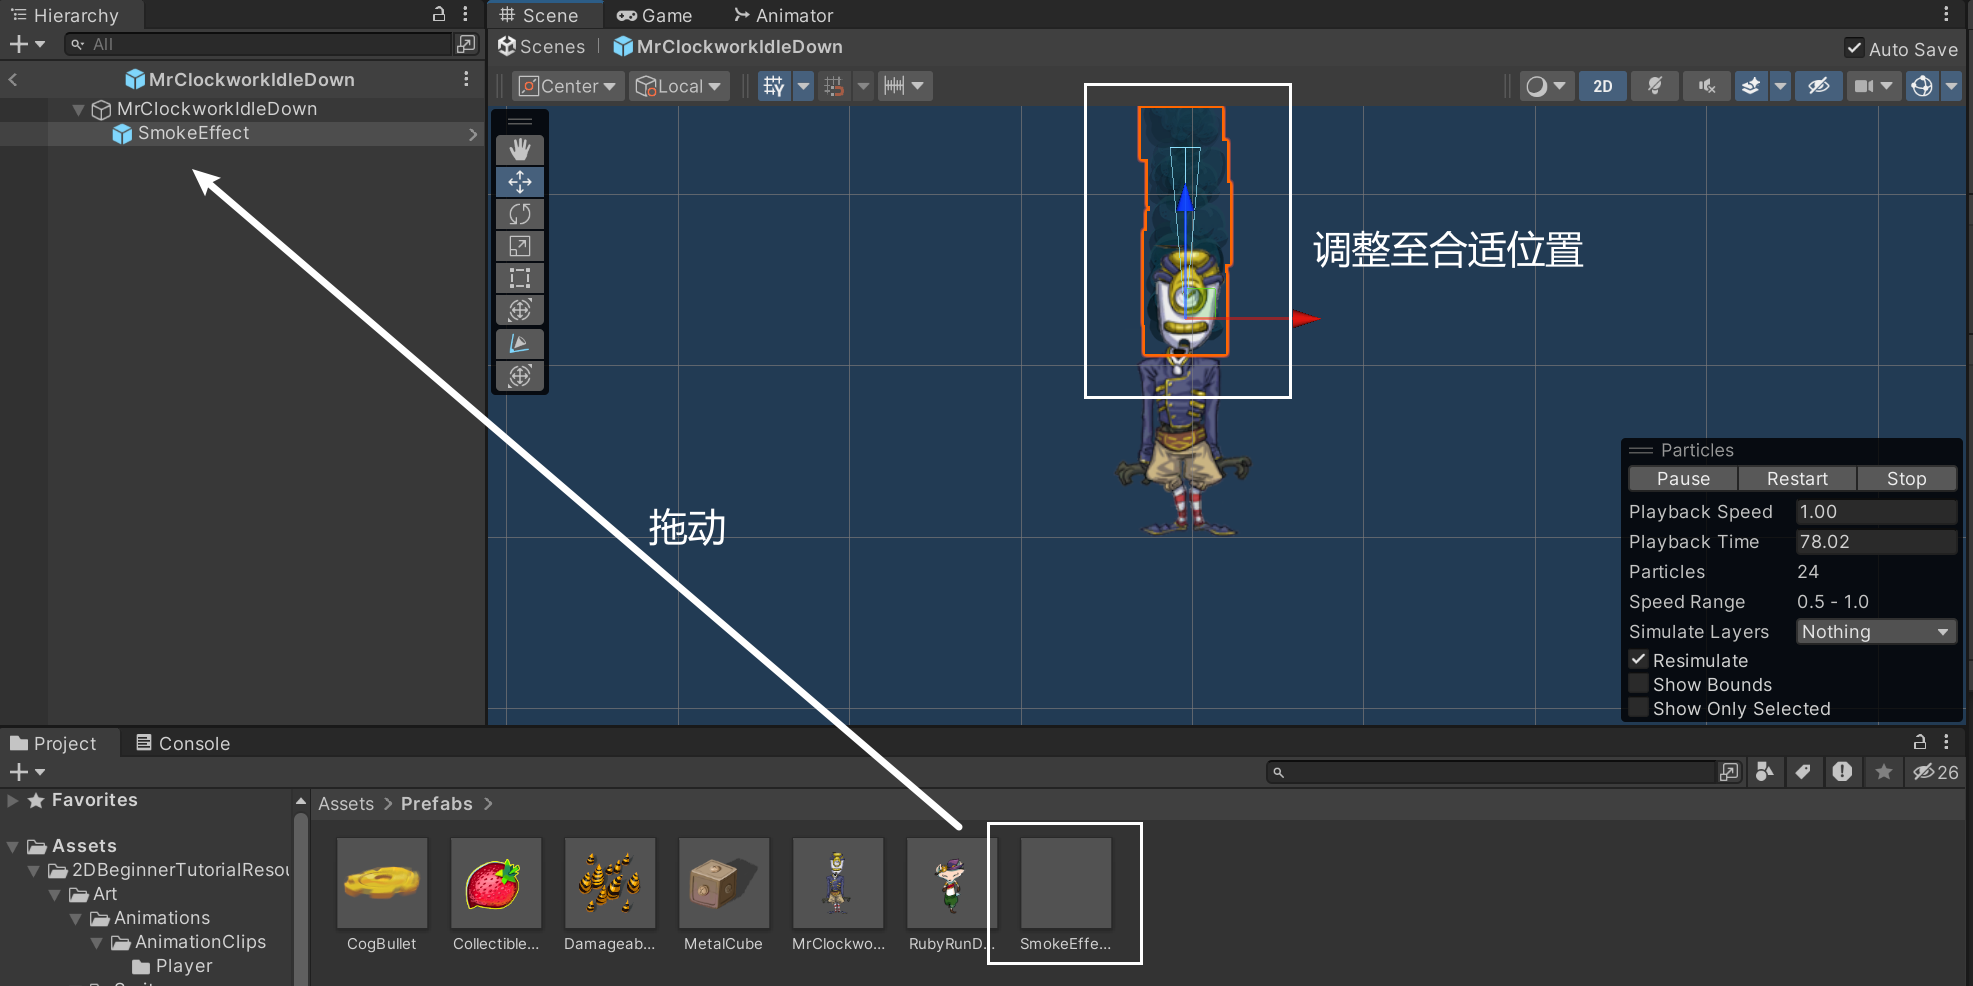
##粒子移动
Particle System \> Simulation Space\> Local-\>World
在机器人修复后
###停止粒子生成
1. EnemyController脚本\>并添加一个名为 smokeEffect 且类型为 ParticleSystem 的公共成员`public ParticleSystem smokeEffect;`
2. 将烟雾效果拖入Inspector \> EnemyController \> smokeEffect
\>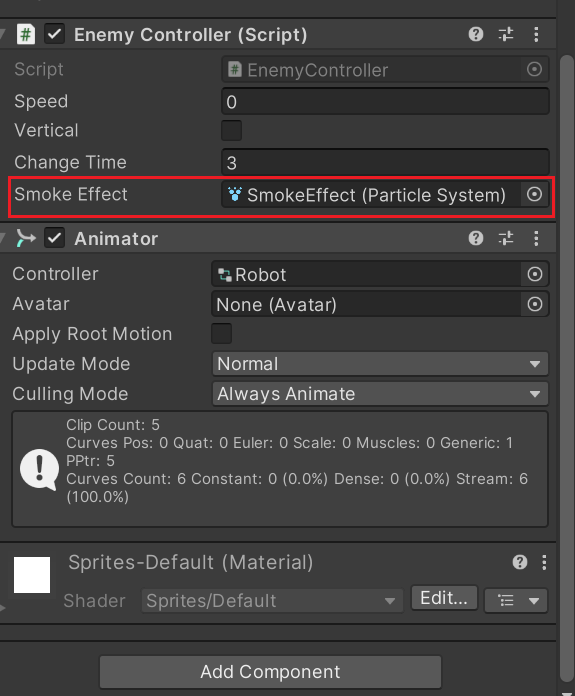
3. 在Fix 函数中,添加:`smokeEffect.Stop();`\>stop停止创建新粒子
destroy直接销毁所有粒子
##其他设置\&实现
1. Emission-Rate over Time 控制每秒发射多少粒子
2. 持续时间 取消勾选 Looping \> Duration Stop Action \> Destroy
![]()
众生皆苦,唯有自渡!


![[ChatGPT解决方案]生成 nginx 自签名证书](https://img1.51tbox.com/static/2024-09-03/uCaeHqLsmksW.png)