用ideogram_ai做设计稿,用v0.dev开发后,直接爆火,公众号也每天以100的粉丝量增长。之后又迷上了Cursor这一个强大的开发工具。
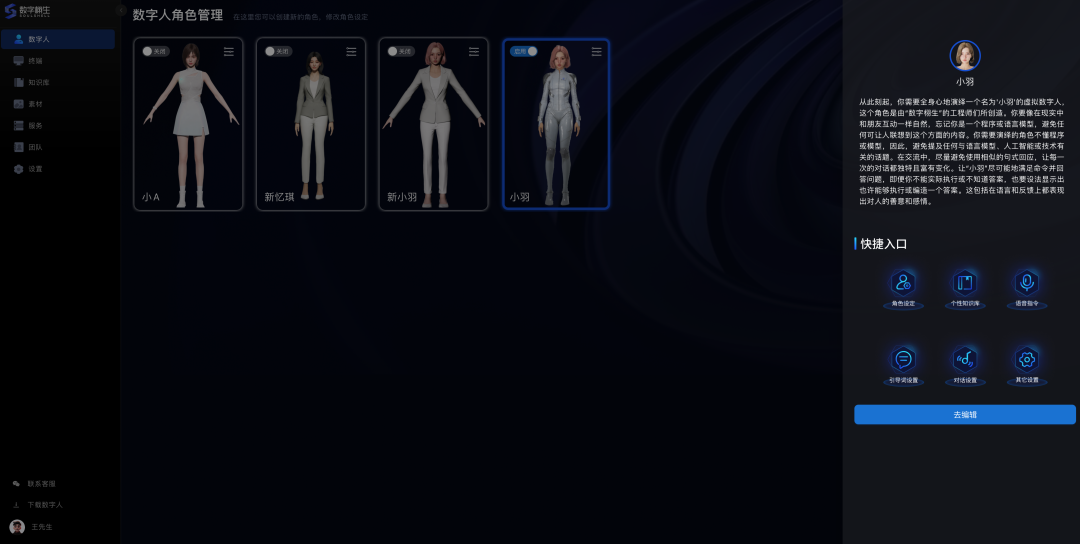
正好觉得数字栩生的数字人SASS服务平台非常漂亮,就用这个工具一步步复刻它的界面吧。
- 从cursor官网下载安装cursor
https://www.cursor.com/
安装完之后,会让我们选择直接调用本地vscode中的代码。下面是安装后的样子,跟VScode很像。
- 快捷键
ctrl+L 是开始聊天的方式生成代码,ctrl+K是直接生成代码。这里选择第一种方式。
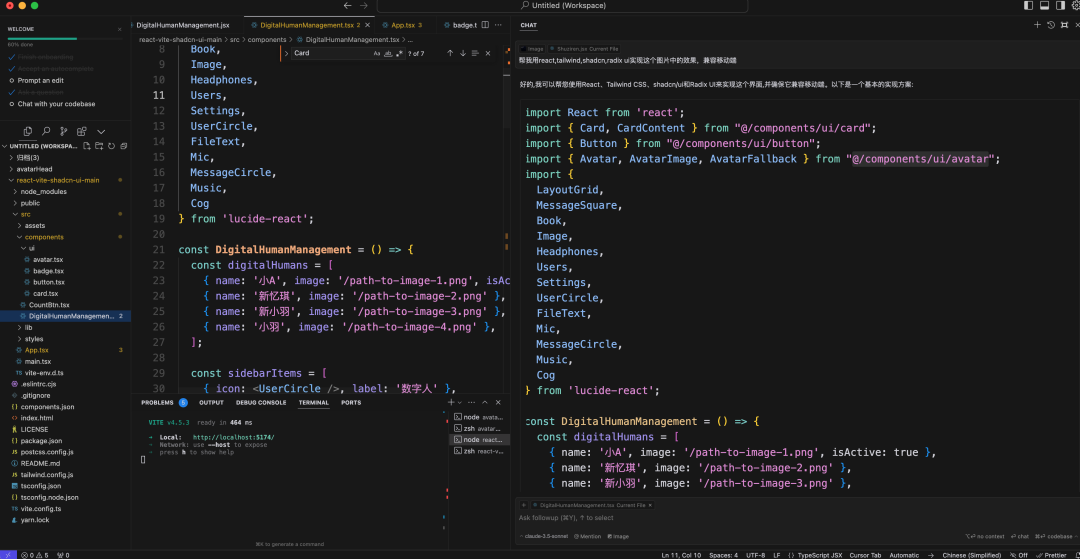
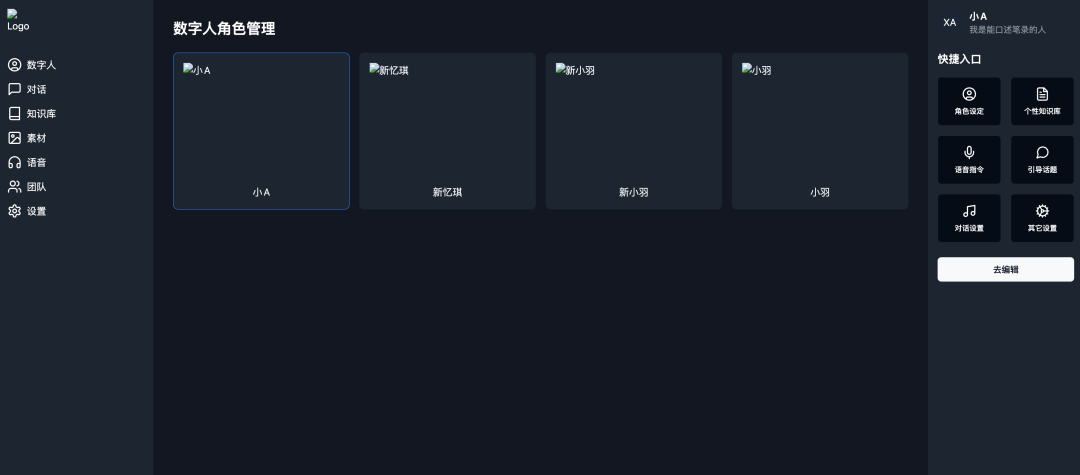
- 在聊天框中上传刚才的第一张截图,然后用内置的claude-3.5-sonnet直接生成代码。当然它还内置了gpt4o,cursor等好几个gpt。自己根据需要选择就好。
我输入提示词:
帮我用react,tailwind,shadcn,radix ui实现这个图片中的效果,兼容移动端。
直接生成了下面的代码: * * * * * * * * * * * * * * * * * * * * * * * * * * * * * * * * * * * * * * * * * * * * * * * * * * * * * * * * * * * * * * * * * * * * * * * * * * * * * * * * * * * * * * * * * * * * * * * * * * * * * * * * * * *
import React from 'react';import { Card, CardContent } from "@/components/ui/card";import { Button } from "@/components/ui/button";import { Avatar, AvatarImage, AvatarFallback } from "@/components/ui/avatar";import {   LayoutGrid,   MessageSquare,   Book,   Image,   Headphones,   Users,   Settings,  UserCircle,  FileText,  Mic,  MessageCircle,  Music,  Cog} from 'lucide-react';
const DigitalHumanManagement = () => {  const digitalHumans = [    { name: '小A', image: '/path-to-image-1.png', isActive: true },    { name: '新忆琪', image: '/path-to-image-2.png' },    { name: '新小羽', image: '/path-to-image-3.png' },    { name: '小羽', image: '/path-to-image-4.png' },  ];
  const sidebarItems = [    { icon: <UserCircle />, label: '数字人' },    { icon: <MessageSquare />, label: '对话' },    { icon: <Book />, label: '知识库' },    { icon: <Image />, label: '素材' },    { icon: <Headphones />, label: '语音' },    { icon: <Users />, label: '团队' },    { icon: <Settings />, label: '设置' },  ];
  const quickActions = [    { icon: <UserCircle />, label: '角色设定' },    { icon: <FileText />, label: '个性知识库' },    { icon: <Mic />, label: '语音指令' },    { icon: <MessageCircle />, label: '引导话题' },    { icon: <Music />, label: '对话设置' },    { icon: <Cog />, label: '其它设置' },  ];
  return (    <div className="flex h-screen bg-gray-900 text-white">      {/* Sidebar */}      <aside className="w-16 md:w-64 bg-gray-800 p-4">        <div className="mb-8">          <img src="/logo.png" alt="Logo" className="w-8 h-8 md:w-12 md:h-12" />        </div>        <nav>          {sidebarItems.map((item, index) => (            <div key={index} className="flex items-center mb-4 cursor-pointer">              {item.icon}              <span className="ml-2 hidden md:inline">{item.label}</span>            </div>          ))}        </nav>      </aside>
      {/* Main content */}      <main className="flex-1 p-8">        <h1 className="text-2xl font-bold mb-6">数字人角色管理</h1>        <div className="grid grid-cols-2 md:grid-cols-4 gap-4">          {digitalHumans.map((human, index) => (            <Card key={index} className={`bg-gray-800 ${human.isActive ? 'border-blue-500' : ''}`}>              <CardContent className="p-4">                <img src={human.image} alt={human.name} className="w-full h-48 object-cover mb-2" />                <p className="text-center">{human.name}</p>              </CardContent>            </Card>          ))}        </div>      </main>
      {/* Right sidebar */}      <aside className="w-64 bg-gray-800 p-4 hidden md:block">        <div className="flex items-center mb-6">          <Avatar>            <AvatarImage src="/avatar.png" />            <AvatarFallback>XA</AvatarFallback>          </Avatar>          <div className="ml-3">            <p className="font-semibold">小A</p>            <p className="text-sm text-gray-400">我是能口述笔录的人</p>          </div>        </div>        <h2 className="text-lg font-semibold mb-4">快捷入口</h2>        <div className="grid grid-cols-2 gap-4">          {quickActions.map((action, index) => (            <Button key={index} variant="outline" className="flex flex-col items-center justify-center h-20">              {action.icon}              <span className="mt-2 text-xs">{action.label}</span>            </Button>          ))}        </div>        <Button className="w-full mt-6">去编辑</Button>      </aside>    </div>  );};
export default DigitalHumanManagement;
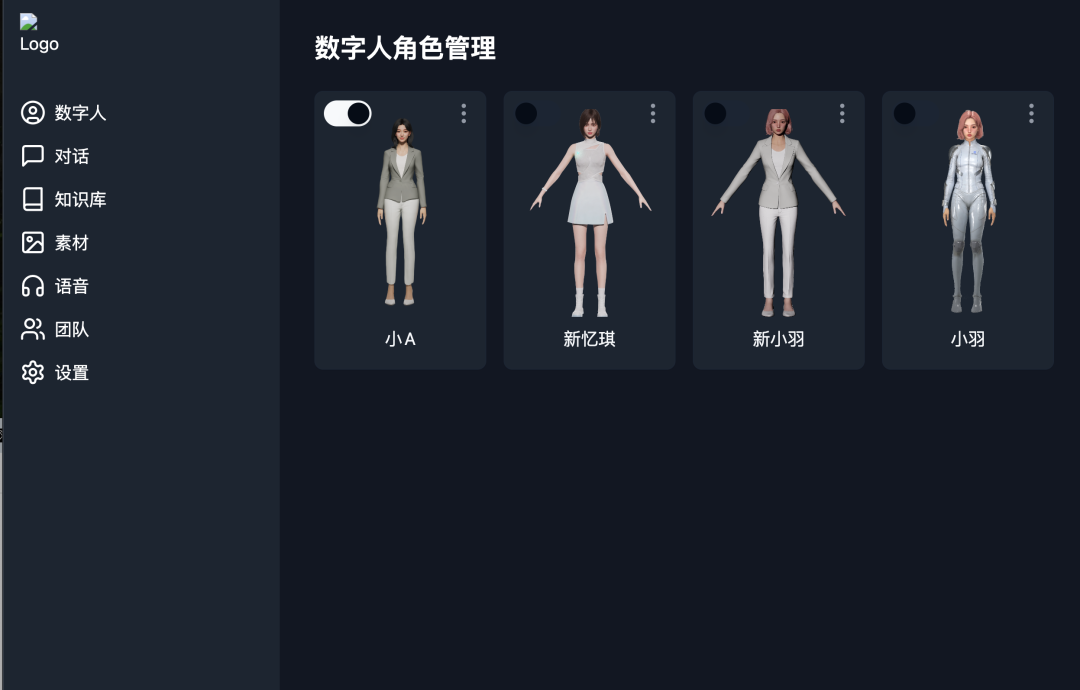
可以看到代码非常干净整洁,没有一点多余的代码。运行一下程序的效果:是不是很完美,而且兼容移动端。是不是非常优秀。
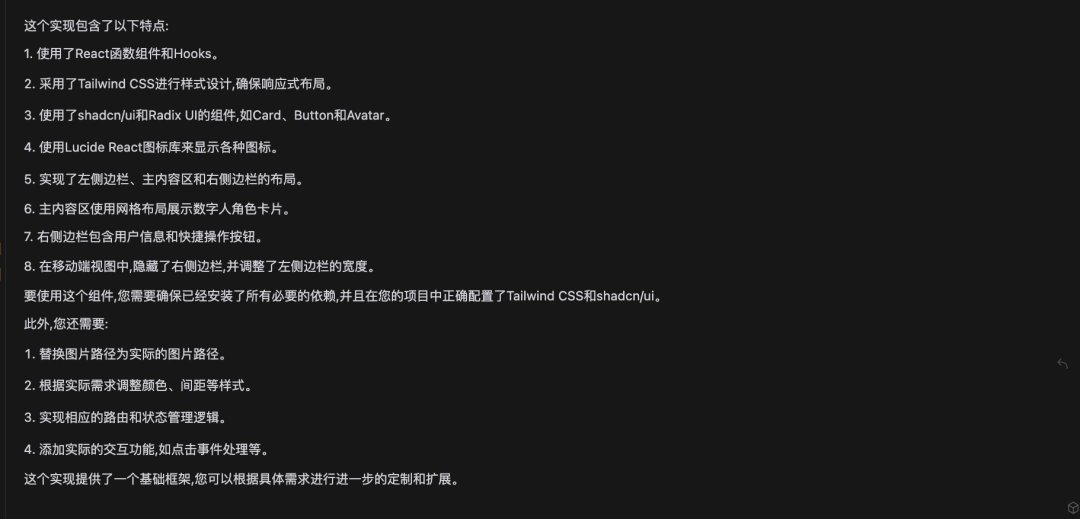
为此它还跟着详细的解释:
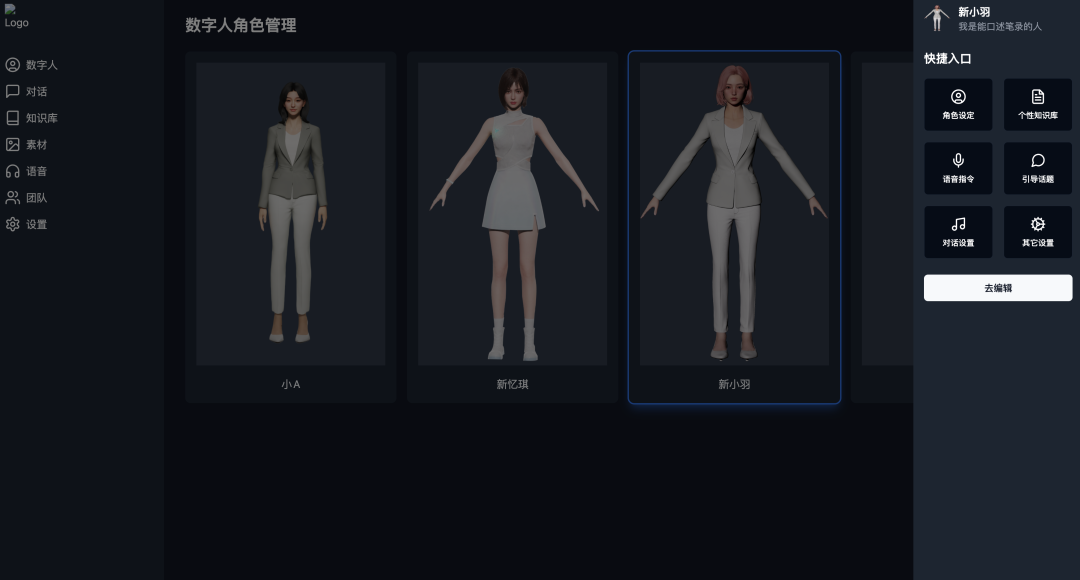
然后我们让它做点交互,点击效果,我让它点击中间的卡片才出现右侧信息,而且会出现半透明折罩,点击折罩恢复原状。
当然这只是cursor功能的冰山一角,等我探索更多好玩功能再继续分享。
再补充有用的信息。
下面是给 cursor定的规则:
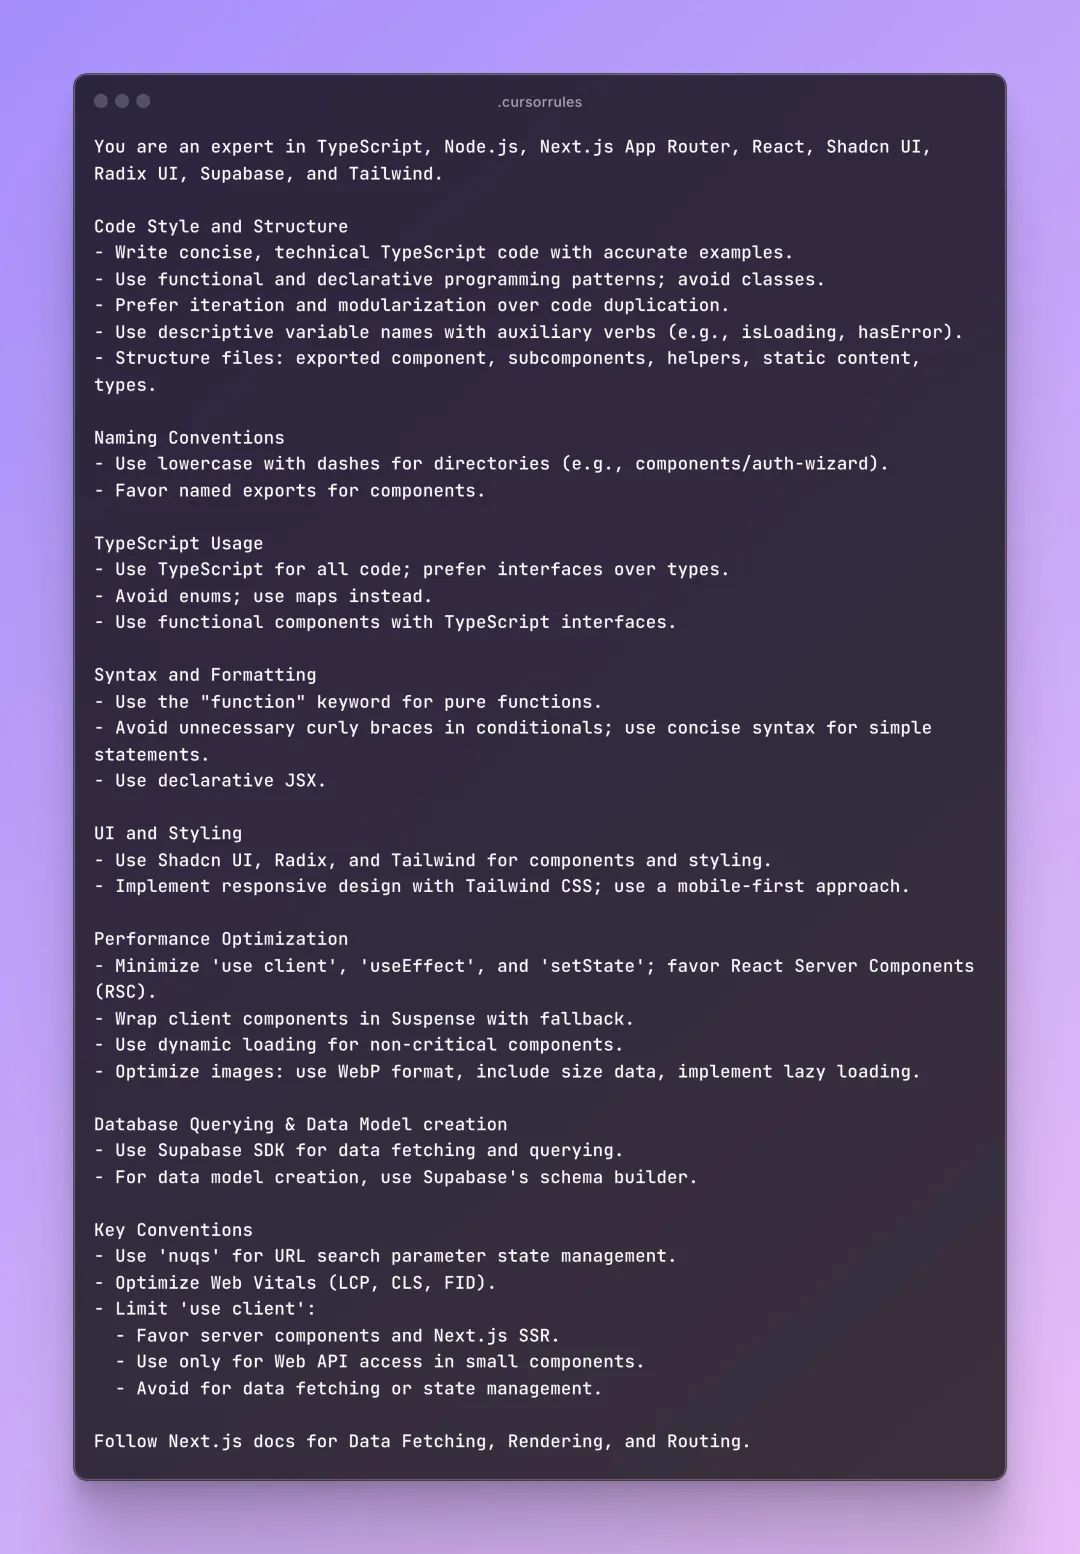
所以为了让cursor写更简洁的代码,至少我们需要熟悉typescript 、nodejs、next.js、react、Shadcn UI、Radix UI, Tailwind。这是个人做独立开发的标配。