使用 SpringBoot3.3 + SpEL 让复杂权限控制变得很简单!
在现代应用开发中,权限控制是一个至关重要的部分。复杂的业务场景往往要求灵活且细粒度的权限控制,而 Spring Expression Language (SpEL) 为我们提供了强大的表达式支持,使得权限控制的实现变得更加简便和直观。本文将详细讲解如何在 Spring Boot 3.3 中使用 SpEL 实现复杂权限控制,并结合代码示例进行深入探讨。
运行效果:

若想获取项目完整代码以及其他文章的项目源码,且在代码编写时遇到问题需要咨询交流,欢迎加入下方的知识星球。
项目环境配置
首先,我们需要设置项目的基本环境,包括 Maven 依赖和 Spring Boot 的配置文件。
pom.xml 配置
<?xml version="1.0" encoding="UTF-8"?>
<project xmlns="http://maven.apache.org/POM/4.0.0" xmlns:xsi="http://www.w3.org/2001/XMLSchema-instance"
	xsi:schemaLocation="http://maven.apache.org/POM/4.0.0 https://maven.apache.org/xsd/maven-4.0.0.xsd">
	<modelVersion>4.0.0</modelVersion>
	<parent>
		<groupId>org.springframework.boot</groupId>
		<artifactId>spring-boot-starter-parent</artifactId>
		<version>3.3.3</version>
		<relativePath/> <!-- lookup parent from repository -->
	</parent>
	<groupId>com.icoderoad</groupId>
	<artifactId>spelpermissions</artifactId>
	<version>0.0.1-SNAPSHOT</version>
	<name>spelpermissions</name>
	<description>Demo project for Spring Boot</description>

	<properties>
		<java.version>17</java.version>
	</properties>
	<dependencies>
		<!-- Spring Boot Web -->
        <dependency>
            <groupId>org.springframework.boot</groupId>
            <artifactId>spring-boot-starter-web</artifactId>
        </dependency>

        <!-- Thymeleaf 模板引擎 -->
        <dependency>
            <groupId>org.springframework.boot</groupId>
            <artifactId>spring-boot-starter-thymeleaf</artifactId>
        </dependency>

        <!-- Spring Security -->
        <dependency>
            <groupId>org.springframework.boot</groupId>
            <artifactId>spring-boot-starter-security</artifactId>
        </dependency>

        <!-- Lombok -->
        <dependency>
            <groupId>org.projectlombok</groupId>
            <artifactId>lombok</artifactId>
            <scope>provided</scope>
        </dependency>

		<dependency>
			<groupId>org.springframework.boot</groupId>
			<artifactId>spring-boot-starter-test</artifactId>
			<scope>test</scope>
		</dependency>
	</dependencies>

	<build>
		<plugins>
			<plugin>
				<groupId>org.springframework.boot</groupId>
				<artifactId>spring-boot-maven-plugin</artifactId>
			</plugin>
		</plugins>
	</build>

</project>
application.yaml 配置
server:
  port: 8080

spring:
  thymeleaf:
    cache: false
    prefix: classpath:/templates/
    suffix: .html
  security:
    user:
      name: admin
      password: admin
使用 SpEL 实现复杂权限控制
SpEL 提供了灵活的表达式支持,可以直接在注解中使用,结合 Spring Security 的 @PreAuthorize 注解,可以非常方便地实现基于业务逻辑的权限控制。
定义权限模型
首先,我们定义一个简单的权限模型,假设我们有用户(User)和资源(Resource),并且只有拥有特定权限的用户可以访问某些资源。
package com.icoderoad.spelpermissions.entity;

import java.util.List;

import lombok.AllArgsConstructor;
import lombok.Data;
import lombok.NoArgsConstructor;

@Data
@AllArgsConstructor
@NoArgsConstructor
public class User {

    private String username;

    private List<String> roles;

}

package com.icoderoad.spelpermissions.entity;

import lombok.AllArgsConstructor;
import lombok.Data;
import lombok.NoArgsConstructor;

@Data
@AllArgsConstructor
@NoArgsConstructor
public class Resource {

	private String resourceName;

	private String requiredRole;

}
权限校验逻辑
接下来,我们在服务层编写权限校验逻辑,并使用 SpEL 在控制层进行权限控制。
package com.icoderoad.spelpermissions.service;

import java.util.ArrayList;
import java.util.List;

import org.springframework.stereotype.Service;

import com.icoderoad.spelpermissions.entity.Resource;
import com.icoderoad.spelpermissions.entity.User;

@Service
public class ResourceService {

    // 模拟资源列表(在实际应用中,这些资源可能会从数据库中获取)
    private final List<Resource> resources = new ArrayList<>();

    public ResourceService() {
        // 初始化一些示例资源
        resources.add(new Resource("Resource1", "ROLE_USER"));
        resources.add(new Resource("Resource2", "ROLE_ADMIN"));
        resources.add(new Resource("Resource3", "ROLE_USER"));
        resources.add(new Resource("Resource4", "ROLE_ADMIN"));
    }

    // 获取所有资源
    public List<Resource> getAllResources() {
        return resources;
    }

    // 获取单个资源
    public Resource getResource(String resourceName) {
        return resources.stream()
                .filter(resource -> resource.getResourceName().equals(resourceName))
                .findFirst()
                .orElse(null);
    }

    // 检查用户是否有权限访问某个资源
    public boolean hasPermission(User user, Resource resource) {
        return user.getRoles().contains(resource.getRequiredRole());
    }
}
用户服务类实现
为了获取用户的详细信息,我们需要实现 UserService 类,负责处理用户登录、查找等业务逻辑。
package com.icoderoad.spelpermissions.service;

import java.util.Arrays;

import org.springframework.stereotype.Service;

import com.icoderoad.spelpermissions.entity.User;

@Service
public class UserService {

    // 模拟从数据库获取用户信息
    public User findUserByUsername(String username) {
        // 假设我们有两个用户:admin 和 user
        if ("admin".equals(username)) {
            return new User(username, Arrays.asList("ROLE_ADMIN", "ROLE_USER"));
        } else if ("user".equals(username)) {
            return new User(username, Arrays.asList("ROLE_USER"));
        } else {
            return null; // 未找到用户
        }
    }
}
Spring Security 配置
创建一个自定义的 AccessDeniedHandler 类,用于处理访问拒绝的情况。
package com.icoderoad.spelpermissions.handler;

import java.io.IOException;

import org.springframework.security.access.AccessDeniedException;
import org.springframework.security.web.access.AccessDeniedHandler;
import org.springframework.stereotype.Component;

import jakarta.servlet.RequestDispatcher;
import jakarta.servlet.ServletException;
import jakarta.servlet.http.HttpServletRequest;
import jakarta.servlet.http.HttpServletResponse;

@Component
public class CustomAccessDeniedHandler implements AccessDeniedHandler {

    @Override
    public void handle(HttpServletRequest request, HttpServletResponse response,
                       AccessDeniedException accessDeniedException) throws IOException, ServletException {
        // 设置响应状态码
        response.setStatus(HttpServletResponse.SC_FORBIDDEN);

        // 转发到 accessDenied.html 页面
        RequestDispatcher dispatcher = request.getRequestDispatcher("/accessDenied");
        dispatcher.forward(request, response);
    }
}
为了处理用户登录和权限验证,我们需要配置 Spring Security。
package com.icoderoad.spelpermissions.config;

import org.springframework.beans.factory.annotation.Autowired;
import org.springframework.context.annotation.Bean;
import org.springframework.context.annotation.Configuration;
import org.springframework.security.config.annotation.method.configuration.EnableGlobalMethodSecurity;
import org.springframework.security.config.annotation.web.builders.HttpSecurity;
import org.springframework.security.config.annotation.web.configuration.EnableWebSecurity;
import org.springframework.security.core.userdetails.User;
import org.springframework.security.core.userdetails.UserDetails;
import org.springframework.security.core.userdetails.UserDetailsService;
import org.springframework.security.provisioning.InMemoryUserDetailsManager;
import org.springframework.security.web.SecurityFilterChain;
import org.springframework.security.web.access.AccessDeniedHandler;

@Configuration
@EnableWebSecurity
@EnableGlobalMethodSecurity(prePostEnabled = true) // 启用方法级权限控制
public class SecurityConfig {

	@Autowired
    private AccessDeniedHandler customAccessDeniedHandler; // 自动注入现有的 CustomAccessDeniedHandler


    @Bean
    public SecurityFilterChain securityFilterChain(HttpSecurity http) throws Exception {
        http
            .authorizeHttpRequests()
                .requestMatchers("/res/**").authenticated() // 保护资源页面
                .anyRequest().permitAll() // 允许其他所有请求
            .and()
            .formLogin()
                .loginPage("/res/login") // 指定登录页面
                .defaultSuccessUrl("/res") // 登录成功后跳转的页面
                .permitAll()
            .and()
            .logout()
            .permitAll()
	        .and()
	        .exceptionHandling()
	            .accessDeniedHandler(customAccessDeniedHandler); // 配置自定义的 AccessDeniedHandler


        return http.build();
    }

    @Bean
    public UserDetailsService userDetailsService() {
        UserDetails user = User.withDefaultPasswordEncoder()
            .username("user")
            .password("password")
            .roles("USER")
            .build();

        UserDetails admin = User.withDefaultPasswordEncoder()
            .username("admin")
            .password("password")
            .roles("ADMIN", "USER")
            .build();

        return new InMemoryUserDetailsManager(user, admin);
    }

}
这个配置类的主要目的是设置基本的安全配置,包括路径保护、表单登录、登出处理以及自定义的权限拒绝处理。它使用了 Spring Security 提供的标准功能,并通过 @EnableGlobalMethodSecurity 启用了方法级别的权限控制。
Controller 类的实现
我们首先实现用户登录、获取资源列表和获取用户权限的控制器类。
package com.icoderoad.spelpermissions.controller;

import java.util.List;

import org.springframework.beans.factory.annotation.Autowired;
import org.springframework.security.access.prepost.PreAuthorize;
import org.springframework.security.core.annotation.AuthenticationPrincipal;
import org.springframework.security.core.userdetails.UserDetails;
import org.springframework.stereotype.Controller;
import org.springframework.ui.Model;
import org.springframework.web.bind.annotation.GetMapping;
import org.springframework.web.bind.annotation.PathVariable;
import org.springframework.web.bind.annotation.RequestMapping;

import com.icoderoad.spelpermissions.entity.Resource;
import com.icoderoad.spelpermissions.entity.User;
import com.icoderoad.spelpermissions.service.ResourceService;
import com.icoderoad.spelpermissions.service.UserService;

@Controller
@RequestMapping("/res")
public class ResourceController {

    @Autowired
    private ResourceService resourceService;

    @Autowired
    private UserService userService;

    // 获取资源列表并渲染到页面
    @GetMapping
    public String listResources(Model model, @AuthenticationPrincipal UserDetails userDetails) {
        // 获取当前登录用户
        User user = userService.findUserByUsername(userDetails.getUsername());

        // 查询所有资源
        List<Resource> resources = resourceService.getAllResources();

        model.addAttribute("resources", resources);
        model.addAttribute("username", user.getUsername());

        return "resources"; // 返回 Thymeleaf 模板页面
    }

    // 获取单个资源,并使用 @PreAuthorize 注解进行权限验证
    @GetMapping("/{resourceName}")
    @PreAuthorize("@resourceService.hasPermission(authentication, #resourceName, 'VIEW')")
    public String getResource(@PathVariable String resourceName, Model model) {
        Resource resource = resourceService.getResource(resourceName);

        model.addAttribute("resource", resource);
        return "resourceDetail"; // 返回资源详情页面
    }


    // 用户登录页面
    @GetMapping("/login")
    public String login() {
        return "login"; // 返回登录页面
    }
}
@PreAuthorize("@resourceService.hasPermission(authentication, #resourceName, 'VIEW')") 是 Spring Security 提供的一个注解,用于方法级别的权限控制。它利用了 Spring Expression Language (SpEL) 来执行复杂的权限检查。以下是这个注解的详细说明:
组成部分
-
@PreAuthorize注解:- 用于方法级别的权限控制。它允许在方法调用之前检查权限,如果检查失败,方法将不会执行。
-
@resourceService.hasPermission(authentication, #resourceName, 'VIEW'):-
这是一个 SpEL 表达式,用于指定权限检查的逻辑。
-
@resourceService是 Spring 上下文中的一个 Bean。它表示ResourceService类的实例。这个实例通常在 Spring 上下文中被管理,并且可以通过注入或引用来访问。 -
hasPermission是ResourceService类中的一个方法,用于检查当前用户是否有权限执行某项操作。 -
authentication是当前的认证对象,代表当前登录的用户。Spring Security 自动将这个对象注入到 SpEL 表达式中。 -
#resourceName是方法参数中的一个变量,代表资源的名称。SpEL 表达式通过#符号访问方法参数。 -
'VIEW'是硬编码的字符串,表示所需的权限类型(在这个例子中是查看权限)。
-
视图控制类
package com.icoderoad.spelpermissions.controller;

import org.springframework.stereotype.Controller;
import org.springframework.web.bind.annotation.GetMapping;

@Controller
public class IndexController {

    @GetMapping("/")
    public String index() {
        return "login";
    }

    @GetMapping("/accessDenied")
    public String accessDenied() {
        return "accessDenied"; // 返回 Thymeleaf 模板名
    }

}
登录和权限处理的前端页面
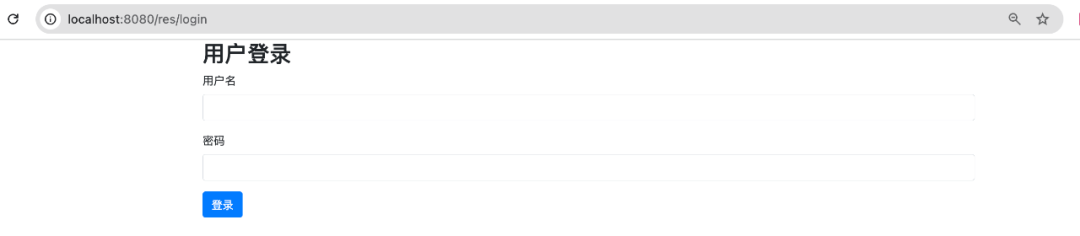
登录页面 login.html
我们为用户登录创建一个简单的登录页面。
<!DOCTYPE html>
<html xmlns:th="http://www.thymeleaf.org">
<head>
    <title>登录</title>
    <link rel="stylesheet" href="https://stackpath.bootstrapcdn.com/bootstrap/4.5.2/css/bootstrap.min.css">
</head>
<body>
<div class="container">
    <h2>用户登录</h2>
    <form th:action="@{/login}" method="post">
        <div class="form-group">
            <label for="username">用户名</label>
            <input type="text" class="form-control" id="username" name="username" required>
        </div>
        <div class="form-group">
            <label for="password">密码</label>
            <input type="password" class="form-control" id="password" name="password" required>
        </div>
        <button type="submit" class="btn btn-primary">登录</button>
    </form>
</div>
</body>
</html>
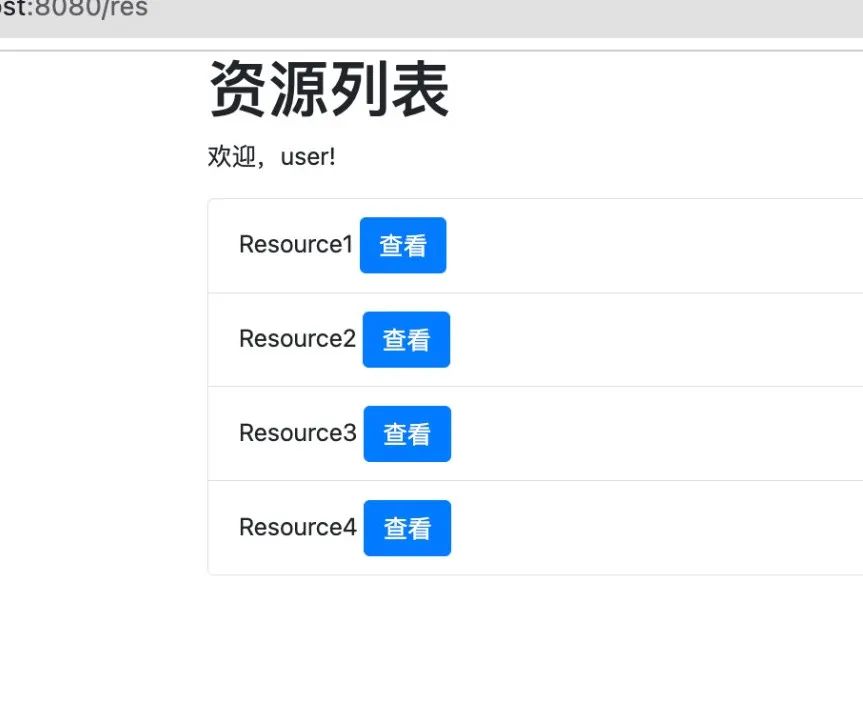
资源列表页面 resources.html
当用户成功登录后,会被重定向到资源列表页面。
<!DOCTYPE html>
<html xmlns:th="http://www.thymeleaf.org">
<head>
    <title>资源管理</title>
    <link rel="stylesheet" href="https://stackpath.bootstrapcdn.com/bootstrap/4.5.2/css/bootstrap.min.css">
</head>
<body>
<div class="container">
    <h1>资源列表</h1>
    <p>欢迎,<span th:text="${username}"></span>!</p>
    <ul class="list-group">
        <li class="list-group-item" th:each="resource : ${resources}">
            <span th:text="${resource.resourceName}"></span>
            <a th:href="@{/res/{resourceName}(resourceName=${resource.resourceName})}" class="btn btn-primary">
                查看
            </a>
        </li>
    </ul>
</div>
</body>
</html>
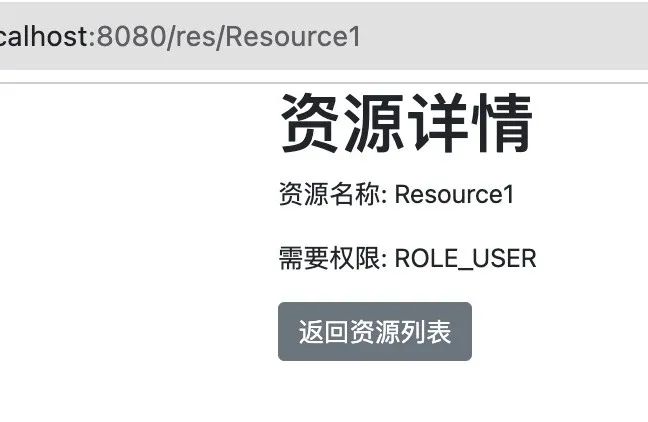
资源详情页面 resourceDetail.html
当用户点击某个资源后,如果用户有权限访问,则会展示该资源的详细信息。
<!DOCTYPE html>
<html xmlns:th="http://www.thymeleaf.org">
<head>
    <title>资源详情</title>
    <link rel="stylesheet" href="https://stackpath.bootstrapcdn.com/bootstrap/4.5.2/css/bootstrap.min.css">
</head>
<body>
<div class="container">
    <h1>资源详情</h1>
    <p>资源名称: <span th:text="${resource.resourceName}"></span></p>
    <p>需要权限: <span th:text="${resource.requiredRole}"></span></p>
    <!-- 返回资源列表按钮 -->
    <a href="/res" class="btn btn-secondary">返回资源列表</a>
</div>
</body>
</html>
访问被拒绝页面 accessDenied.html
如果用户没有访问权限,将显示一个权限拒绝页面。
<!DOCTYPE html>
<html xmlns:th="http://www.thymeleaf.org">
<head>
    <title>访问被拒绝</title>
    <link rel="stylesheet" href="https://stackpath.bootstrapcdn.com/bootstrap/4.5.2/css/bootstrap.min.css">
</head>
<body>
<div class="container">
    <h1>访问被拒绝</h1>
    <p>抱歉,您没有权限访问此资源。</p>
   <!-- 返回资源列表按钮 -->
    <a href="/res" class="btn btn-secondary">返回资源列表</a>
</div>
</body>
</html>
使用 Thymeleaf 结合 Bootstrap 实现一个简单的前端页面,用于展示资源列表和用户权限。
** HTML 模板**
<!DOCTYPE html>
<html xmlns:th="http://www.thymeleaf.org">
<head>
    <title>Resource Management</title>
    <link rel="stylesheet" th:href="@{/css/bootstrap.min.css}">
</head>
<body>
<div class="container">
    <h1>资源列表</h1>
    <ul class="list-group">
        <li class="list-group-item" th:each="resource : ${resources}">
            <span th:text="${resource.resourceName}"></span>
            <button class="btn btn-primary" th:onclick="'location.href=\'/api/resources/' + ${resource.resourceName} + '\'" >
                查看
            </button>
        </li>
    </ul>
</div>
<script th:src="@{/js/bootstrap.min.js}"></script>
</body>
</html>
在这个示例中,用户可以点击按钮查看特定资源的详细信息。如果用户没有相应的权限,则会返回一个错误页面。
总结
通过本文的介绍,我们学习了如何使用 Spring Boot 3.3 和 SpEL 实现复杂的权限控制。通过 SpEL 强大的表达式支持,我们可以在业务逻辑中灵活地定义和执行权限校验,使得复杂的权限控制变得更加简洁和直观。同时,我们也探讨了如何在前后端集成实现权限管理的功能。
使用 SpEL 实现权限控制是一种非常强大的方式,它不仅支持基本的权限判断,还可以通过自定义表达式满足各种复杂的业务需求。在实际应用中,可以根据不同的场景灵活应用这一技术,以提高系统的安全性和灵活性。