环境:SpringBoot3.2.5
1. 回顾定义接口方式
1.1 常规定义* * * * * * * *
@RestController@RequestMapping("/users")public class UsersController { @PostMapping() public Object save(@RequestBody Users users) { // ... }}
99.9999%的人都是这样定义接口。
1.2 好奇定义
*
*
*
*
*
*
*
*
*
*
*
*
@Component("/games/api")public class CustomController implements Controller {
  @Override  public ModelAndView handleRequest(HttpServletRequest request, HttpServletResponse response) throws Exception {    response.setContentType("text/html;charset=utf8");    PrintWriter out = response.getWriter() ;    out.print("<h1>Controller接口</h1>") ;    out.close() ;    return null ;  }}
这也就是看到时学习下,谁会用到工作中?
1.3 装逼定义* * * * * * * * *
@Component("/zhuangbi/api")public class ControllerHttpRequestHandler implements HttpRequestHandler { public void handleRequest(HttpServletRequest request, HttpServletResponse response) throws ServletException, IOException { response.setContentType("text/html;charset=utf8"); PrintWriter out = response.getWriter() ; out.print("<h1>你好,HttpRequestHandler</h1>") ; out.close() ; }}
这不就是在写Servlet吗!谁还记得如何编写Servlet?
以上是在Spring MVC中定义API接口的几种方式(纯Servlet就算了)。接下来我将介绍另外一种定义Controller接口的方式。
注意:接下来定义接口的方式需要在Spring6.0以上版本
2. 新的定义方式
从Spring6开始新增了一个新注解**@HttpExchange**。该注解将一个类或具体方法声明为HTTP 接口。接口的细节通过注解的属性以及方法参数定义。如下示例:
声明接口
*
*
*
*
*
*
*
*
*
*
*
*
*
*
*
@HttpExchange("/persons")interface PersonService {
  @GetExchange("/{id}")  Person getPerson(@PathVariable Long id);
  @PostExchange  void add(@RequestBody Person person) ;}// Person对象public class Person {  private Long id ;  private String name ;  // getters, setters}
实现接口* * * * * * * * * * * *
@RestControllerpublic class PersonController implements PersonService {
  public Person getPerson(@PathVariable Long id) {    return new Person(id, "姓名 - " + id) ;  }
  @ResponseStatus(HttpStatus.CREATED)  public void add(@RequestBody Person person) {    // TODO  }}
在该实现类上与普通Controller声明一样使用**@RestController**注解。

除了上面使用的**@GetExchange和@PostExchange**,还有下面这几个注解:
-
@DeleteExchange
-
@PatchExchange
-
@PutExchange
与@RequestMapping一样,这里的**@HttpExchange**注解也可以直接使用到方法上,如下:
*
*
*
*
@HttpExchange(value = "/list", method = "GET")default List<Person> listPerson() { return List.of(new Person(666L, "李四")) ;} ;
在接口中声明一个默认的方法。
3. @HttpExchange真正目的
@HttpExchange的主要目的是使用生成的代理抽象HTTP客户端代码。如下示例
还是使用上面的PersonService接口定义,通过该接口生成代理类 * * * * * * * * * * * * * *
@Configurationpublic class PersonServiceClient {
  @Bean  PersonService personServiceProxy() {    RestClient restClient = RestClient.builder().baseUrl("http://localhost:8088").build();    RestClientAdapter adapter = RestClientAdapter.create(restClient);    HttpServiceProxyFactory factory = HttpServiceProxyFactory.builderFor(adapter).build();
    PersonService personService = factory.createClient(PersonService.class);    return personService ;  }
}
将PersonService创建代理对象,通过JDK代理。注意:这里的RestClient必须使用Spring6.1以上版本,如果你不是那你可以换成RestTemplate. * * * * * * *
@Resourceprivate PersonService personServiceProxy ;@GetMapping("/persons")public List<Person> list() { return this.personServiceProxy.listPerson() ;}
目标服务接口如下:
*
*
*
*
*
*
*
*
@GetMapping("/persons/list")public List<Person> list() { return Arrays.asList( new Person(1L, "张三", 20, "3@qq.com"), new Person(2L, "李四", 25, "4@qq.com"), new Person(3L, "王五", 55, "6666@qq.com") ) ;}
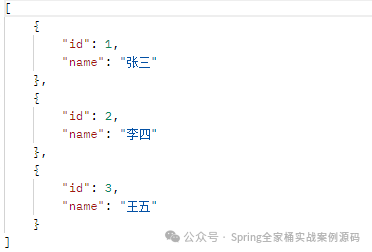
输出结果

以上是本篇文章的全部内容
推荐文章
SpringBoot3.3.0版本发布了!速看都更新了什么?


 51工具盒子


