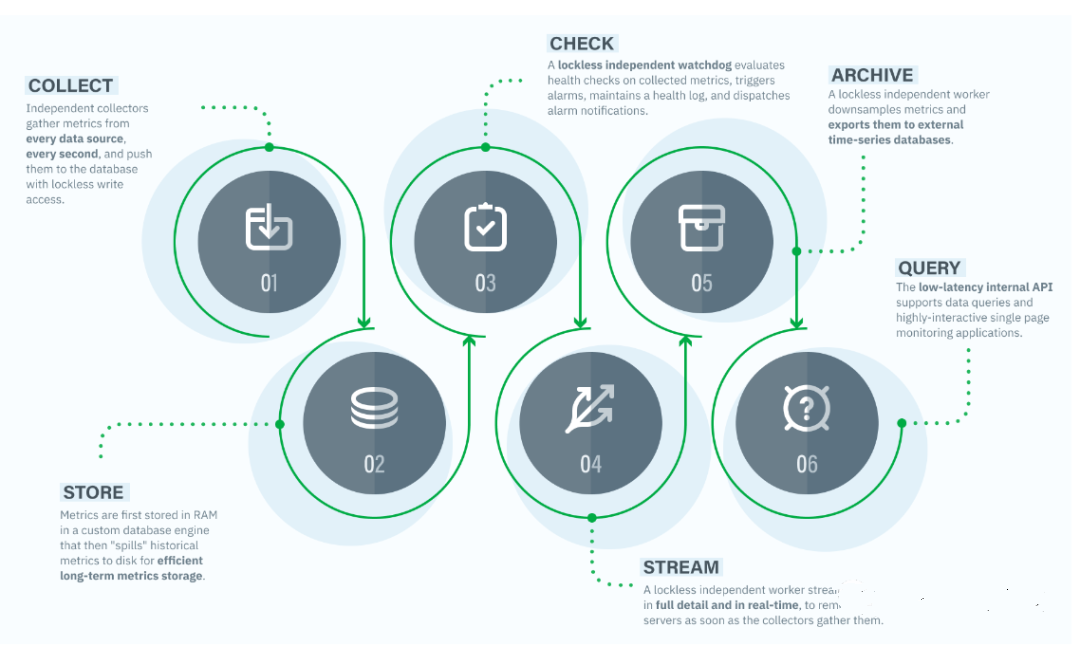
NetBox 是一个开源 IP 地址 (IPAM) 和数据中心基础设施管理 (DCIM) Web 应用程序,用于管理和记录计算机网络和 IP 地址。DigitalOcean 的网络工程团队最初构思了它,它使用Django Python框架编写,使用PostgreSQL数据库进行数据存储,它还使用 Redis 数据库来缓存查询。
本教程将教您如何在 Ubuntu 22.04 服务器和 Nginx 作为反向代理服务器上安装 NetBox 工具。
先决条件
-
运行 Ubuntu 22.04 的服务器。
-
具有 sudo 权限的非根用户。
-
完全限定的域名 (FQDN),例如
netbox.example.com. -
确保一切都已更新。
$ sudo apt update $ sudo apt upgrade
-
您的系统需要的软件包很少。
$ sudo apt install wget curl nano software-properties-common dirmngr apt-transport-https gnupg2 ca-certificates lsb-release ubuntu-keyring unzip -y
其中一些软件包可能已经安装在您的系统上。
第 1 步 - 配置防火墙
第一步是配置防火墙。Ubuntu 默认带有 ufw (Uncomplicated Firewall)。
检查防火墙是否正在运行。
$ sudo ufw status
您应该得到以下输出。
Status: inactive
允许 SSH 端口,以便防火墙在启用时不会中断当前连接。
$ sudo ufw allow OpenSSH
也允许 HTTP 和 HTTPS 端口。
$ sudo ufw allow http
$ sudo ufw allow https
启用防火墙
$ sudo ufw enable
Command may disrupt existing ssh connections. Proceed with operation (y|n)? y
Firewall is active and enabled on system startup
再次检查防火墙的状态。
$ sudo ufw status
您应该会看到类似的输出。
Status: active

To                         Action      From
--                         ------      ----
OpenSSH                    ALLOW       Anywhere
80/tcp                     ALLOW       Anywhere
443                        ALLOW       Anywhere
OpenSSH (v6)               ALLOW       Anywhere (v6)
80/tcp (v6)                ALLOW       Anywhere (v6)
443 (v6)                   ALLOW       Anywhere (v6)
第 2 步 - 安装和配置 PostgreSQL
NetBox 适用于 PostgreSQL 11 及更高版本。Ubuntu 22.04 默认附带 PostgreSQL 14。我们将在教程中使用 PostgreSQL 15。
运行以下命令以添加 PostgreSQL GPG 密钥。
$ curl https://www.postgresql.org/media/keys/ACCC4CF8.asc | gpg --dearmor | sudo tee /usr/share/keyrings/postgresql-key.gpg >/dev/null
将 APT 存储库添加到您的源列表中。
$ sudo sh -c 'echo "deb [signed-by=/usr/share/keyrings/postgresql-key.gpg arch=amd64] http://apt.postgresql.org/pub/repos/apt $(lsb_release -cs)-pgdg main" > /etc/apt/sources.list.d/pgdg.list'
更新系统存储库。
$ sudo apt update
现在,您可以使用以下命令安装 PostgreSQL。
$ sudo apt install postgresql postgresql-contrib
该postgresql-contrib软件包包含一些额外的实用程序。
检查 PostgreSQL 服务的状态。
$ sudo systemctl status postgresql
? postgresql.service - PostgreSQL RDBMS
     Loaded: loaded (/lib/systemd/system/postgresql.service; enabled; vendor preset: enabled)
     Active: active (exited) since Tue 2022-11-27 9:10:35 UTC; 5s ago
    Process: 30544 ExecStart=/bin/true (code=exited, status=0/SUCCESS)
   Main PID: 30544 (code=exited, status=0/SUCCESS)
        CPU: 2ms

Dec 27 9:10:35 netbox systemd[1]: Starting PostgreSQL RDBMS...
Dec 27 9:10:35 netbox systemd[1]: Finished PostgreSQL RDBMS.
您可以看到该服务已默认启用并运行。
启动 PostgreSQL 外壳。
$ sudo -i -u postgres psql
创建 NetBox 数据库。
postgres=# CREATE DATABASE netbox;
创建 NetBox 用户并选择一个强密码。
postgres-# CREATE USER netbox WITH PASSWORD 'Your_Password';
将数据库所有者更改为 NetBox 用户。
postgres-# ALTER DATABASE netbox OWNER TO netbox;
退出外壳。
postgres-# \q
验证您的凭据是否有效。
$ psql --username netbox --password --host localhost netbox
Password for user netbox:
psql (15.1 (Ubuntu 15.1-1.pgdg22.04+1))
SSL connection (protocol: TLSv1.3, cipher: TLS_AES_256_GCM_SHA384, bits: 256, compression: off)
Type "help" for help.

netbox=>
通过键入退出 shell \q。
第 3 步 - 安装和配置 Redis
Ubuntu 附带 Redis 6.0.16。对于我们的教程,我们将从官方存储库安装最新版本。
导入官方 Redis GPG 密钥。
$ curl -fsSL https://packages.redis.io/gpg | sudo gpg --dearmor -o /usr/share/keyrings/redis-archive-keyring.gpg
将 APT 存储库添加到您的源列表中。
echo "deb [signed-by=/usr/share/keyrings/redis-archive-keyring.gpg] https://packages.redis.io/deb $(lsb_release -cs) main" | sudo tee /etc/apt/sources.list.d/redis.list
更新系统存储库列表。
$ sudo apt update
发出以下命令以安装 Redis 服务器。
$ sudo apt install redis
确认 Redis 版本。
$ redis-server -v
Redis server v=7.0.7 sha=00000000:0 malloc=jemalloc-5.2.1 bits=64 build=2260280010e18db8
让我们使用以下命令验证服务连接。
$ redis-cli
您将切换到 Redis shell。
第一步是为 Redis 默认用户设置密码。替换Your_Redis_Password为您选择的强密码。
127.0.0.1:6379> acl setuser default >Your_Redis_Password
测试 Redis 身份验证。
127.0.0.1:6379> AUTH Your_Redis_Password
好的
Ping 服务。
127.0.0.1:6379> ping
PONG
通过键入退出服务exit。
第 4 步 - 下载 NetBox
NetBox 需要 Python Django 才能工作。安装 NetBox 的第一步是安装所需的 Python 包。运行以下命令以安装所需的 Python 包。
$ sudo apt install -y python3 python3-pip python3-venv python3-dev build-essential libxml2-dev libxslt1-dev libffi-dev libpq-dev libssl-dev zlib1g-dev
检查 Python 版本。
$ python3 -V
Python 3.10.6
为 NetBox 安装创建基本目录。
$ sudo mkdir -p /opt/netbox/
切换到目录。
$ cd /opt/netbox
将 NetBox 的 GitHub 存储库的主分支克隆到当前目录。
$ sudo git clone -b master --depth 1 https://github.com/netbox-community/netbox.git 。
该--depth 1标志仅检索存储库的最新提交。如果你想下载整个提交历史,你可以省略这个标志。
从发布页面检查最新版本的NetBox,并使用 Git 检查它。在编写本教程时,3.4.1是可用的最新版本。
$ git config --global --add safe.directory /opt/netbox
$ sudo git checkout v3.4.1
在签出之前,您需要将该目录添加到 Git 的安全目录列表中。这是最新 Git 版本中提供的新安全功能。
下一步是为 NetBox 创建系统用户和组。
$ sudo adduser --system --group netbox
授予用户对 NetBox 媒体目录的权限。
$ sudo chown --recursive netbox /opt/netbox/netbox/media/
第 5 步 - 配置 NetBox
切换到 NetBox 配置目录。
$ cd /opt/netbox/netbox/netbox/
复制示例配置文件以创建实际文件。
$ sudo cp configuration_example.py configuration.py
在继续配置之前,我们需要为 NetBox 创建一个密钥。记下密钥,因为我们需要它进行配置。
$ python3 ../generate_secret_key.py
dSSWi$Ar2cVvu1)V!B82sY1tJAQK9r) vzM8ReQRF7@C ^+$=1+(
打开配置文件进行编辑。
$ sudo nano configuration.py
找到ALLOWED_HOSTS变量并设置其值,如下所示。此变量包含可以访问此服务器的有效主机名和 IP 地址的列表。
ALLOWED_HOSTS = ['netbox.example.com', '<yourserverIP>']
下一步是编辑数据库详细信息。配置数据库详细信息如下。
DATABASE = {
    'NAME': 'netbox',              # Database name
    'USER': 'netbox',              # PostgreSQL username
    'PASSWORD': 'Your_Password',   # PostgreSQL password
    'HOST': 'localhost',           # Database server
    'PORT': '',                    # Database port (leave blank for default)
    'CONN_MAX_AGE': 300,           # Max database connection age
}
如图所示配置 Redis 配置。输入您在步骤 3 中设置的 Redis 密码。
REDIS = {
    'tasks': {
        'HOST': 'localhost',
        'PORT': 6379,
        # Comment out `HOST` and `PORT` lines and uncomment the following if using Redis Sentinel
        # 'SENTINELS': [('mysentinel.redis.example.com', 6379)],
        # 'SENTINEL_SERVICE': 'netbox',
        'PASSWORD': 'Your_Redis_Password',
        'DATABASE': 0,
        'SSL': False,
        # Set this to True to skip TLS certificate verification
        # This can expose the connection to attacks, be careful
        # 'INSECURE_SKIP_TLS_VERIFY': False,
    },
    'caching': {
        'HOST': 'localhost',
        'PORT': 6379,
        # Comment out `HOST` and `PORT` lines and uncomment the following if using Redis Sentinel
        # 'SENTINELS': [('mysentinel.redis.example.com', 6379)],
        # 'SENTINEL_SERVICE': 'netbox',
        'PASSWORD': 'Your_Redis_Password',
        'DATABASE': 1,
        'SSL': False,
        # Set this to True to skip TLS certificate verification
        # This can expose the connection to attacks, be careful
        # 'INSECURE_SKIP_TLS_VERIFY': False,
    }
}
将密钥的值添加到变量中。
SECRET_KEY = 'dSSWi$Ar2cVvu1)V!B82sY1tJAQK9r) vzM8ReQRF7@C ^+$=1+('
默认情况下,NetBox 使用本地文件系统来存储上传的文件。您可以通过安装库将文件存储在远程文件系统上django-storages。运行以下命令将django-storages包添加到 NetBox requirements.txt,然后在稍后的步骤中安装。我们还需要配置存储参数。取消注释配置文件的存储部分并继续执行以下操作。
STORAGE_BACKEND = 'storages.backends.s3boto3.S3Boto3Storage'
STORAGE_CONFIG = {
    'AWS_ACCESS_KEY_ID': 'Key ID',
    'AWS_SECRET_ACCESS_KEY': 'Secret',
    'AWS_STORAGE_BUCKET_NAME': 'netbox',
    'AWS_S3_REGION_NAME': 'eu-west-1',
}
还支持其他存储类型,包括 FTP、SFTP、Dropbox 和其他 S3 提供商。
通过按Ctrl + X 并在出现提示时 输入Y来保存文件。
第 6 步 - 安装 NetBox
运行 NetBox 升级脚本。
$ sudo /opt/netbox/upgrade.sh
升级脚本执行以下任务。
- 创建 Python 虚拟环境
- 安装所有必需的 Python 包
- 运行数据库模式迁移
- 在本地构建文档(供离线使用)
- 聚合磁盘上的静态资源文件
激活升级脚本创建的虚拟环境。
$ source /opt/netbox/venv/bin/activate
下一步是创建一个超级用户来访问 NetBox。但首先,切换到所需的目录。
(venv) $ cd /opt/netbox/netbox
创建超级用户。
(venv) $ python3 manage.py createsuperuser
您将获得以下输出。
Username (leave blank to use 'navjot'):
Email address: navjot@example.com
Password:
Password (again):
Superuser created successfully.
NetBox 包含一个housekeeping管理命令,用于处理重复出现的清理任务,例如清除旧会话和过期的更改记录。您可以手动运行该命令,也可以使用 cron 定期运行它。NetBox 提供了一个 shell 脚本来运行管理任务。运行以下命令,在 Cron daily 目录下为脚本创建一个软链接。这将确保该命令每天运行。
(venv) $ sudo ln -s /opt/netbox/contrib/netbox-housekeeping.sh /etc/cron.daily/netbox-housekeeping
最后一步是测试 NetBox 应用程序是否工作。但首先,我们需要打开 8000 端口进行测试。你可以使用任何端口。
(venv) $ sudo ufw allow 8000
启动 NetBox 的开发实例。
(venv) $ python3 manage.py runserver 0.0.0.0:8000 --insecure
如果成功,您将获得以下输出。
Performing system checks...

System check identified no issues (0 silenced).
December 27, 2022 - 09:27:37
Django version 4.1.4, using settings 'netbox.settings'
Starting development server at http://0.0.0.0:8000/
Quit the server with CONTROL-C.
您应该能够通过 URL 访问 NetBox http://<yourserverIP>:8000/:
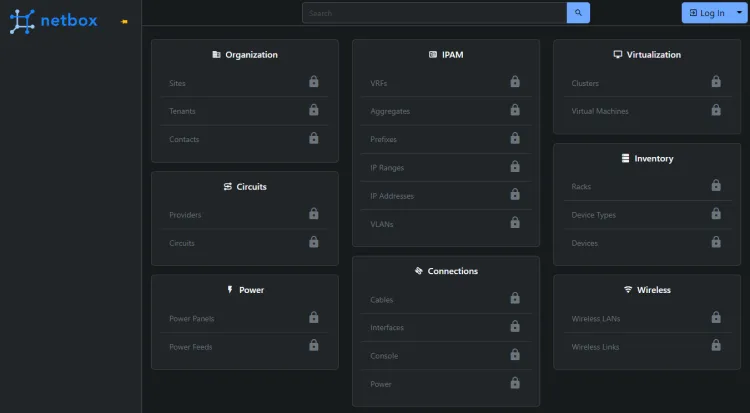
单击登录按钮打开登录页面并输入之前创建的超级用户凭据。
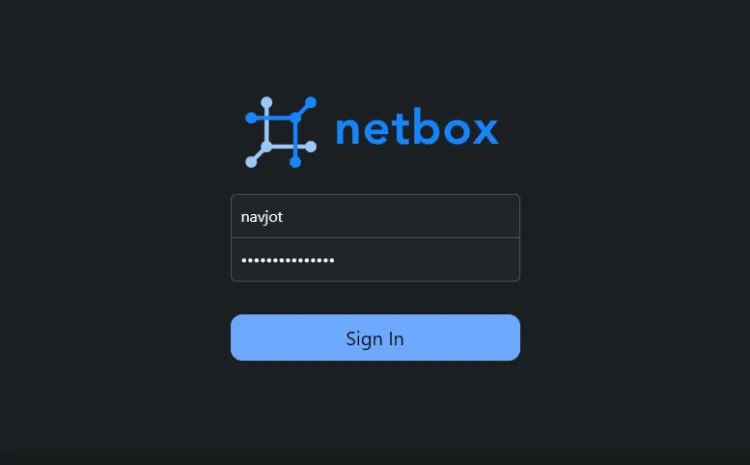
您将被带回 NetBox 仪表板。
按Ctrl + C键停止服务器。停用 Python 虚拟环境。
(venv) $ deactivate
第 7 步 - 配置 Gunicorn 并创建服务文件
NetBox 作为 HTTP 服务器后面的 WSGI 应用程序运行。NetBox 会自动安装 Gunicorn 服务器。在此步骤中,我们将配置 Gunicorn 并为 NetBox 创建一个服务文件,以便它可以在后台运行并跨系统重启。
NetBox 附带一个默认的 Gunicorn 配置文件。创建它的副本。
$ sudo cp /opt/netbox/contrib/gunicorn.py /opt/netbox/gunicorn.py
默认配置应该足以满足我们的目的。根据您的需要,您可以编辑该文件以更改主机名和端口号,或者通过更改线程、工作人员和请求数来提高性能。
下一步是将 NetBox 和 Gunicorn 服务文件复制到/etc/systemd/system目录中。
$ sudo cp -v /opt/netbox/contrib/*.service /etc/systemd/system/
重新加载服务守护进程。
$ sudo systemctl daemon-reload
启动并启用netbox和netbox-rq服务。
$ sudo systemctl start netbox netbox-rq
$ sudo systemctl enable netbox netbox-rq
检查 WSGI 服务的状态。
$ sudo systemctl status netbox
您将获得类似的输出。
? netbox.service - NetBox WSGI Service
     Loaded: loaded (/etc/systemd/system/netbox.service; enabled; vendor preset: enabled)
     Active: active (running) since Tue 2022-12-27 09:28:23 UTC; 17s ago
       Docs: https://docs.netbox.dev/
   Main PID: 4180 (gunicorn)
      Tasks: 6 (limit: 1030)
     Memory: 357.9M
        CPU: 7.747s
     CGroup: /system.slice/netbox.service
             ??4180 /opt/netbox/venv/bin/python3 /opt/netbox/venv/bin/gunicorn --pid /var/tmp/netbox.pid --pythonpath /opt/netbox/netbox --config /opt/netbox/gunicorn.py netbox.wsgi
             ??4181 /opt/netbox/venv/bin/python3 /opt/netbox/venv/bin/gunicorn --pid /var/tmp/netbox.pid --pythonpath /opt/netbox/netbox --config /opt/netbox/gunicorn.py netbox.wsgi
             ??4182 /opt/netbox/venv/bin/python3 /opt/netbox/venv/bin/gunicorn --pid /var/tmp/netbox.pid --pythonpath /opt/netbox/netbox --config /opt/netbox/gunicorn.py netbox.wsgi
             ??4183 /opt/netbox/venv/bin/python3 /opt/netbox/venv/bin/gunicorn --pid /var/tmp/netbox.pid --pythonpath /opt/netbox/netbox --config /opt/netbox/gunicorn.py netbox.wsgi
             ??4184 /opt/netbox/venv/bin/python3 /opt/netbox/venv/bin/gunicorn --pid /var/tmp/netbox.pid --pythonpath /opt/netbox/netbox --config /opt/netbox/gunicorn.py netbox.wsgi
             ??4185 /opt/netbox/venv/bin/python3 /opt/netbox/venv/bin/gunicorn --pid /var/tmp/netbox.pid --pythonpath /opt/netbox/netbox --config /opt/netbox/gunicorn.py netbox.wsgi

Dec 27 09:28:23 netbox systemd[1]: Started NetBox WSGI Service.
Dec 27 09:28:24 netbox gunicorn[4180]: [2022-12-27 09:28:24 +0000] [4180] [INFO] Starting gunicorn 20.1.0
Dec 27 09:28:24 netbox gunicorn[4180]: [2022-12-27 09:28:24 +0000] [4180] [INFO] Listening at: http://127.0.0.1:8001 (4180)
Dec 27 09:28:24 netbox gunicorn[4180]: [2022-12-27 09:28:24 +0000] [4180] [INFO] Using worker: gthread
Dec 27 09:28:24 netbox gunicorn[4181]: [2022-12-27 09:28:24 +0000] [4181] [INFO] Booting worker with pid: 4181
Dec 27 09:28:24 netbox gunicorn[4182]: [2022-12-27 09:28:24 +0000] [4182] [INFO] Booting worker with pid: 4182
Dec 27 09:28:24 netbox gunicorn[4183]: [2022-12-27 09:28:24 +0000] [4183] [INFO] Booting worker with pid: 4183
Dec 27 09:28:24 netbox gunicorn[4184]: [2022-12-27 09:28:24 +0000] [4184] [INFO] Booting worker with pid: 4184
Dec 27 09:28:24 netbox gunicorn[4185]: [2022-12-27 09:28:24 +0000] [4185] [INFO] Booting worker with pid: 4185
可以看到,Gunicorn 默认监听 8001 端口。在将 Nginx 配置为反向代理服务器时,此信息将很有用。
第 8 步 - 安装 Nginx
Ubuntu 22.04 附带旧版本的 Nginx。要安装最新版本,您需要下载官方 Nginx 存储库。
导入 Nginx 的签名密钥。
$ curl https://nginx.org/keys/nginx_signing.key | gpg --dearmor \
 | sudo tee /usr/share/keyrings/nginx-archive-keyring.gpg >/dev/null
添加 Nginx 稳定版本的存储库。
$ echo "deb [signed-by=/usr/share/keyrings/nginx-archive-keyring.gpg arch=amd64] \
http://nginx.org/packages/ubuntu `lsb_release -cs` nginx" \
    | sudo tee /etc/apt/sources.list.d/nginx.list
更新系统存储库。
$ sudo apt update
安装 Nginx。
$ sudo apt install nginx
验证安装。
$ nginx -v
nginx版本:nginx/1.22.1
启动 Nginx 服务器。
$ sudo systemctl start nginx
第 9 步 - 安装 SSL
我们需要安装 Certbot 来生成 SSL 证书。您可以使用 Ubuntu 的存储库安装 Certbot,也可以使用 Snapd 工具获取最新版本。我们将使用 Snapd 版本。
Ubuntu 22.04 默认安装了 Snapd。运行以下命令以确保您的 Snapd 版本是最新的。确保您的 Snapd 版本是最新的。
$ sudo snap install core
$ sudo snap refresh core
安装 Certbot。
$ sudo snap install --classic certbot
使用以下命令通过创建指向目录的符号链接来确保 Certbot 命令运行/usr/bin。
$ sudo ln -s /snap/bin/certbot /usr/bin/certbot
运行以下命令以生成 SSL 证书。
$ sudo certbot certonly --nginx --agree-tos --no-eff-email --staple-ocsp --preferred-challenges http -m name@example.com -d netbox.example.com
上面的命令会将证书下载到/etc/letsencrypt/live/netbox.example.com服务器上的目录中。
生成Diffie-Hellman 组证书。
$ sudo openssl dhparam -dsaparam -out /etc/ssl/certs/dhparam.pem 4096
要检查 SSL 续订是否正常工作,请试运行该过程。
$ sudo certbot renew --dry-run
如果您没有看到任何错误,则一切就绪。您的证书将自动更新。
第 10 步 - 配置 Nginx
打开文件/etc/nginx/nginx.conf进行编辑。
$ sudo nano /etc/nginx/nginx.conf
在行之前添加以下行include /etc/nginx/conf.d/*.conf;。
server_names_hash_bucket_size 64;
通过按Ctrl + X 并在出现提示时 输入Y来保存文件。
创建并打开文件/etc/nginx/conf.d/netbox.conf进行编辑。
$ sudo nano /etc/nginx/conf.d/netbox.conf
将以下代码粘贴到其中。
server {
  # Redirect any http requests to https
  listen         80;
  listen         [::]:80;
  server_name    netbox.example.com;
  return 301     https://$host$request_uri;
}

server {
  listen                    443 ssl http2;
  listen                    [::]:443 ssl http2;
  server_name               netbox.example.com;

  access_log                /var/log/nginx/netbox.access.log;
  error_log                 /var/log/nginx/netbox.error.log;

  # TLS configuration
  ssl_certificate           /etc/letsencrypt/live/netbox.example.com/fullchain.pem;
  ssl_certificate_key       /etc/letsencrypt/live/netbox.example.com/privkey.pem;
  ssl_trusted_certificate   /etc/letsencrypt/live/netbox.example.com/chain.pem;
  ssl_protocols             TLSv1.2 TLSv1.3;

  ssl_ciphers 'ECDHE-ECDSA-AES256-GCM-SHA384:ECDHE-RSA-AES256-GCM-SHA384:ECDHE-ECDSA-CHACHA20-POLY1305:ECDHE-RSA-CHACHA20-POLY1305:ECDHE-ECDSA-AES256-SHA384:ECDHE-RSA-AES256-SHA384';
  ssl_prefer_server_ciphers on;
  ssl_session_cache         shared:SSL:50m;
  ssl_session_timeout       1d;

  # OCSP Stapling ---
  # fetch OCSP records from URL in ssl_certificate and cache them
  ssl_stapling on;
  ssl_stapling_verify on;
  ssl_dhparam /etc/ssl/certs/dhparam.pem;

  client_max_body_size 25m;

  # Proxy everything over to the netbox server
  location /static/ {
    alias /opt/netbox/netbox/static/;
  }

  location / {
    proxy_set_header        X-Real-IP $remote_addr;
    proxy_set_header        X-Forwarded-Proto $scheme;
    proxy_set_header     X-Forwarded-Host $http_host;
    proxy_pass              http://127.0.0.1:8001;
  }
}
完成后按Ctrl + X 并在出现提示时 输入Y来保存文件。
验证 Nginx 配置文件语法。
$ sudo nginx -t
nginx: the configuration file /etc/nginx/nginx.conf syntax is ok
nginx: configuration file /etc/nginx/nginx.conf test is successful
重启 Nginx 服务。
$ sudo systemctl restart nginx
您现在可以通过 URL 访问 NetBox 仪表板https://netbox.example.com。
第 11 步 - 升级 NetBox
升级 NetBox 非常容易。这些步骤包括签出 Git 存储库的 master 分支,拉取最新的提交,然后签出新的稳定版本。
切换到 NetBox 目录。
$ cd /opt/netbox
检查主分支。
$ sudo git checkout master
从存储库中提取最新的提交。
$ sudo git pull origin master
检查新版本。如果 3.4.2 是较新的版本,您可以检查一下。
$ sudo git checkout v3.4.2
运行升级脚本。
$ sudo ./upgrade.sh
对于升级过程,脚本执行以下功能。
- 销毁并重建 Python 虚拟环境
- 安装所有必需的 Python 包(在 中列出
requirements.txt) - 安装来自
local_requirements.txt - 应用发布中包含的任何数据库迁移
- 在本地构建文档(供离线使用)
- 收集由 HTTP 服务提供的所有静态文件
- 从数据库中删除陈旧的内容类型
- 从数据库中删除所有过期的用户会话
重新启动 Gunicorn 和 NetBox 服务。
$ sudo systemctl restart netbox netbox-rq
 51工具盒子


