好久没有总结了,今天总结一下。
一.Vue.prototype
如果你要用到Vue.prototype你可以设置在全局变量中,用法也很简单。
比如:
Vue.prototype.$name=balala
使用很简单:console.log(this.$name) 后台就会打印balala。
$ 是在 Vue 所有实例中都可用的属性的一个简单约定。这样做会避免和已被定义的数据、方法、计算属性产生冲突。当然你也可以_(下划线)都可以。
二.简单配置
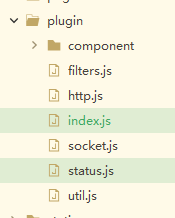
简单的文件配置,文件与pages同级

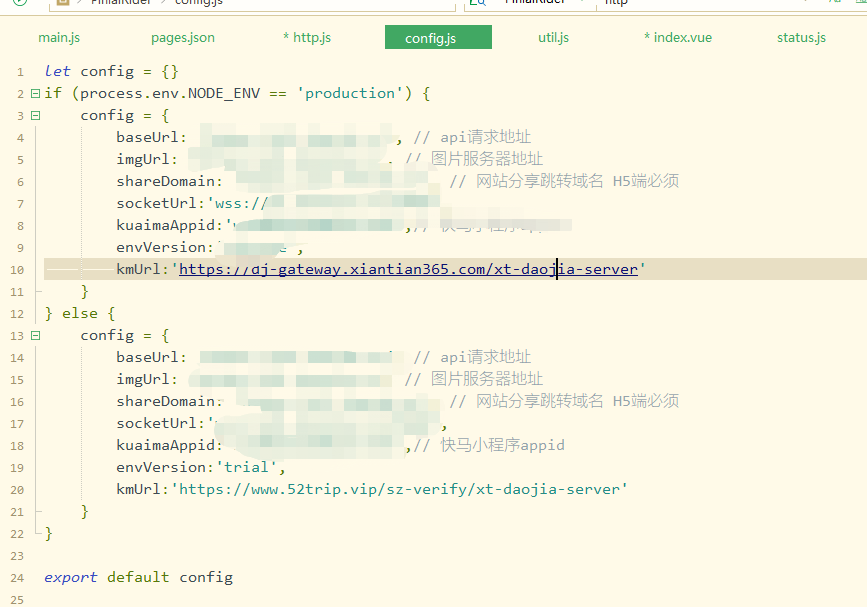
还有一个就是config.js,每个文件都有一个config.js
01.config.js
config.js 主要配置一些路径

02.http.js**
http.js就是对axios进行封装。
let http = {
    server(url, params, config) {
        // console.log(url, params, config)
        return new Promise((res, rej) => {
            let defaultData = {
                private_key: Config.privateKey,
                is_uniapp: 1,
                // #ifdef H5
                is_h5: 1,
                // #endif
                // #ifdef MP
                is_applet: 1,
                // #endif
            }
            let currentData = Object.assign(defaultData, params)
            let header = {
                'X-Requested-With': 'XMLHttpRequest',
            }
            if (uni.getStorageSync('token')) {
                header.Authorization = ${uni.getStorageSync('token')}
            }
            // 禁止连续点击
            if (config.btn) {
                config.btn.showLoading()
            }
            if (config.loading) {
                uni.showLoading({
                    title: '请求中...'
                });
            }
            let success = (result) => {
                if (result.statusCode != 200 && result.statusCode != 201) {
                    rej(result.data)
                    if (config.toast !== false) {
                        Util.showToast({ title: result.data.message })
                    }
                    if (result.statusCode == 423) {
                        uni.reLaunch({
                            url: '/pages/login/index'
                        });
                        store.dispatch('setToken','');
                        if (store.state.socket) {
                            store.state.socket.doClose();
                        }
                    }

                } else {
                    res(result.data)
                    if (config.toast) {
                        Util.showToast({ title: result.data.message })
                    }
                }
                if (config.btn) {
                    config.btn.hideLoading()
                }
                if (config.loading) {
                    uni.hideLoading();
                }
            }
            let ajaxConfig = {
                url: Config.baseUrl + '/api' + url,
                method: config.method,
                data: currentData,
                sslVerify: false,
                header: header,
                dataType: config.dataType || 'json',
                responseType: config.responseType || 'text',
                success,
                fail: (result) => {
                    rej(result.data)
                    if (config.toast !== false) {
                        Util.showToast({ title: result.data.message })
                    }
                },
                complete: () => {
                    if (config.btn) {
                        config.btn.hideLoading()
                    }
                    if (config.loading) {
                        uni.hideLoading();
                    }
                }
            }
            if (config.method !== 'File') {
                uni.request(ajaxConfig);
            } else {
                // 文件
                ajaxConfig.filePath = params.file;
                delete currentData.file
                delete currentData['Content-Type']
                ajaxConfig.formData = currentData;
                ajaxConfig.name = params.type || 'images';
                ajaxConfig.success = (res) => {
                    res.data = JSON.parse(res.data)
                    success(res)
                }
                uni.uploadFile(ajaxConfig);
            }
        })
    },
    $post(url, params, config) {
        return http.server(url, params, Object.assign({ method: 'POST' }, config))
    },
    $get(url, params, config) {
        return http.server(url, params, Object.assign({ method: 'GET' }, config))
    },
    $del(url, params, config) {
        return http.server(url, params, Object.assign({ method: 'DELETE' }, config))
    },
    $put(url, params, config) {
        return http.server(url, params, Object.assign({ method: 'PUT' }, config))
    },
    $uploadFile(url, params, config) {
        return http.server(url, params, Object.assign({ method: 'File' }, config))
    },
    $test(url, params, config) {
        var config = { ...config }
        var params = { ...params }
        return new Promise((res, rej) => {
            if (config.btn) {
                config.btn.showLoading()
            }
            setTimeout(() => {
                res(params)
                if (config.btn) {
                    config.btn.hideLoading()
                }
            }, 1500)
        })
    }
}
03.index.js
index.js就是我的全局文件
Vue.prototype.$get = http.$get
Vue.prototype.$post = http.$post
Vue.prototype.$del = http.$del
Vue.prototype.$put = http.$put
Vue.prototype.$test = http.$test
Vue.prototype.$uploadFile = http.$uploadFile
Vue.prototype.$util = Util
吧http里面封装好的方法全局注册,
使用方法this.$XXX就可以了
简单展示一下
login() {
            let data = {
                ...this.form
            }

            this.$post('/rider/login', data, { loading: true }).then(res => {
                this.setToken(res.data.token)
                this.setUserInfo(res.data.userInfo)
                this.socket.send({ mode: "say", user_id: res.data.userInfo.id })
                uni.reLaunch({
                    url: "/pages/index/index",
                });
                this.$toast('登录成功');
            })
        }
用起来非常的方便。
 51工具盒子


