文章已同步至掘金:https://juejin.cn/post/6844903960789123086
欢迎访问?,有任何问题都可留言评论哦~
MVVM = M数据模型(Model) + VM视图模型(ViewModel)+ V视图层(View)。
如果想要了解更多概念性知识的话,请移步:Vue MVVM理解及原理实现
MVVM 流程分析 {#mvvm-%E6%B5%81%E7%A8%8B%E5%88%86%E6%9E%90}
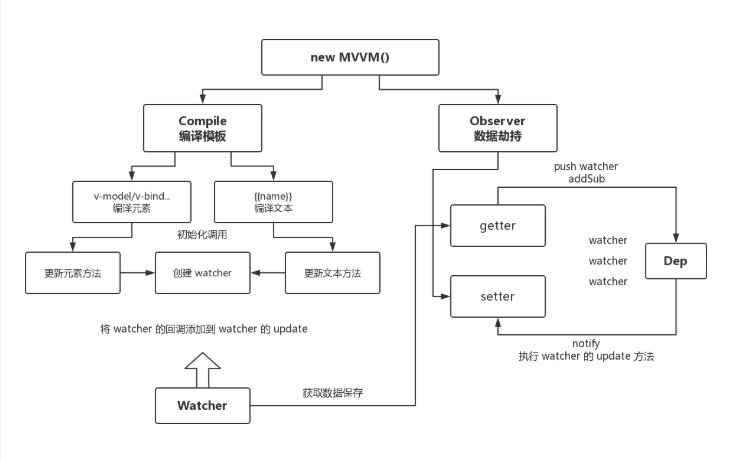
如上图所示:在 Vue 的 MVVM 设计中,我们主要针对 Compile(模板编译)、Observer(数据劫持)、Watcher(数据监听)和 Dep(发布订阅)几个部分来实现。
实现双向数据绑定步骤:
1.实现一个指令解析器Compile,对每个元素节点的指令进行扫描和解析,根据指令模板替换数据,以及绑定相应的更新函数
2.实现一个数据监听器Observer,能够对数据对象的所有属性进行监听,如有变动可拿到最新值并通知订阅者(Dep)
3.实现一个Watcher,作为连接Observer和Compile的桥梁,能够订阅并收到每个属性变动的通知,执行指令绑定的相应回调函数 (发布),从而更新视图
4.MVVM入口函数,整合以上三者
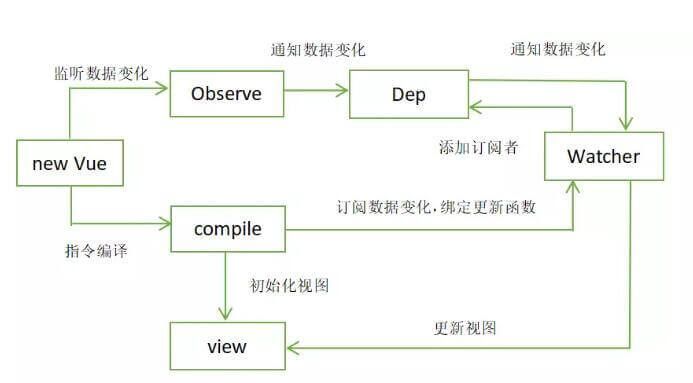
简易流程图:
参考文章:
MVVM 原理实现案例 {#mvvm-%E5%8E%9F%E7%90%86%E5%AE%9E%E7%8E%B0%E6%A1%88%E4%BE%8B}
做好准备工作
注:以下加注释的都为新增代码,一直到文章结尾,有的写过的代码我就不粘了,看看结构就知道该写哪里了
注意注意注意:有的代码我没粘,你可别删了,一点也别删,只关注我新增,加注释的代码就行
新建一个index.html用来引入我们写的MVVM,可以用来测试
再新建一个VueMVVM.js文件用来写MVVM的实现原理
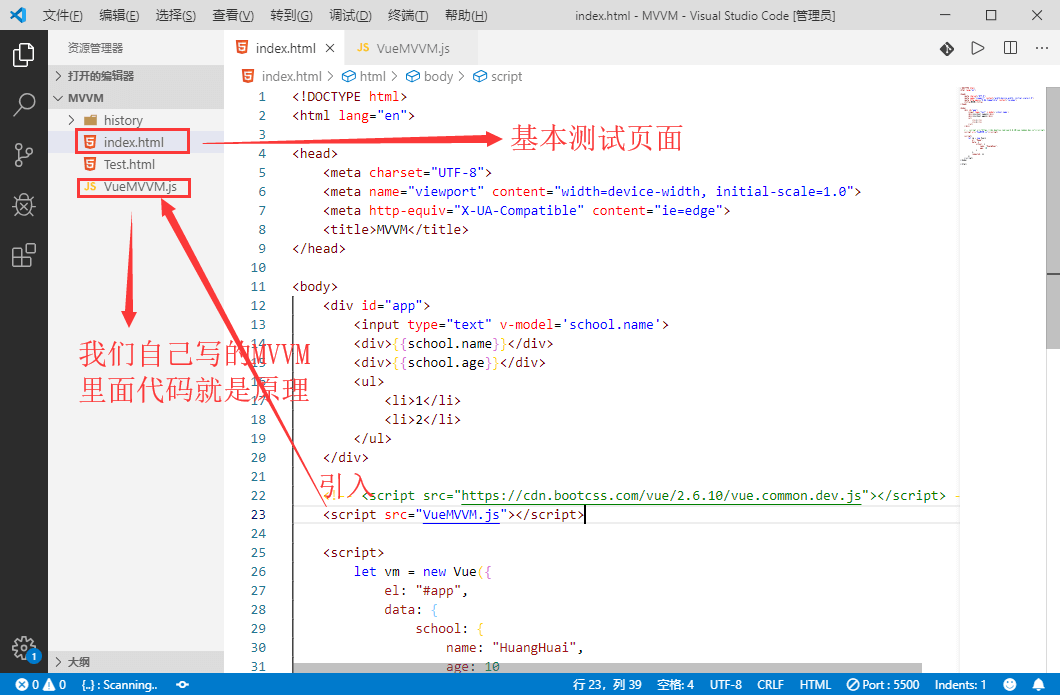
index.html代码:
<!DOCTYPE html>
<html lang="en">
<head>
    <meta charset="UTF-8">
    <title>MVVM</title>
</head>
<body>
    <div id="app">
        <input type="text" v-model='school.name'>
        <div>{{school.name}}</div>
        <div>{{school.age}}</div>
        <ul>
            <li>1</li>
            <li>2</li>
        </ul>
    </div>
    <!-- <script src="https://cdn.bootcss.com/vue/2.6.10/vue.common.dev.js"></script> -->
    <script src="VueMVVM.js"></script>
    <script>
        let vm = new Vue({
            el: "#app",
            data: {
                school: {
                    name: "HuangHuai",
                    age: 10
                }
            },
            computed: {}
        })
    </script>
</body>
</html>
更改数据,视图响应 {#%E6%9B%B4%E6%94%B9%E6%95%B0%E6%8D%AE%2C%E8%A7%86%E5%9B%BE%E5%93%8D%E5%BA%94}
在 Vue 中,对外只暴露了一个名为 Vue 的构造函数,在使用的时候 new 一个 Vue 实例,然后传入了一个 options 参数,类型为一个对象,包括当前 Vue 实例的作用域 el、模板绑定的数据 data 等等。
//编译模板
class Compiler{
    constructor(el,vm){
        this.el = this.isElementNode(el) ? el:document.querySelector(el)
        console.log(this.el);
    }
    //判断一个节点是否是元素节点
    isElementNode(node){
        return node.nodeType === 1;
    }
}
`//html要渲染成一张网页,要形成一颗dom树,在dom树上有两类节点:元素节点,文本节点,而属性节点不在dom树上
//Vue类
class Vue{
//只要new Vue,那么就会调用这个方法
constructor(options){
// 把 el 和 data 挂在 MVVM 实例上
this.$el = options.el;
this.$data = options.data;
// 如果$el存在,那么可以找到上面的Html模块
if(this.$el){
// 需要找到模块中需要替换数据的元素,编译模板
new Compiler(this.$el,this)
}
}
}
`
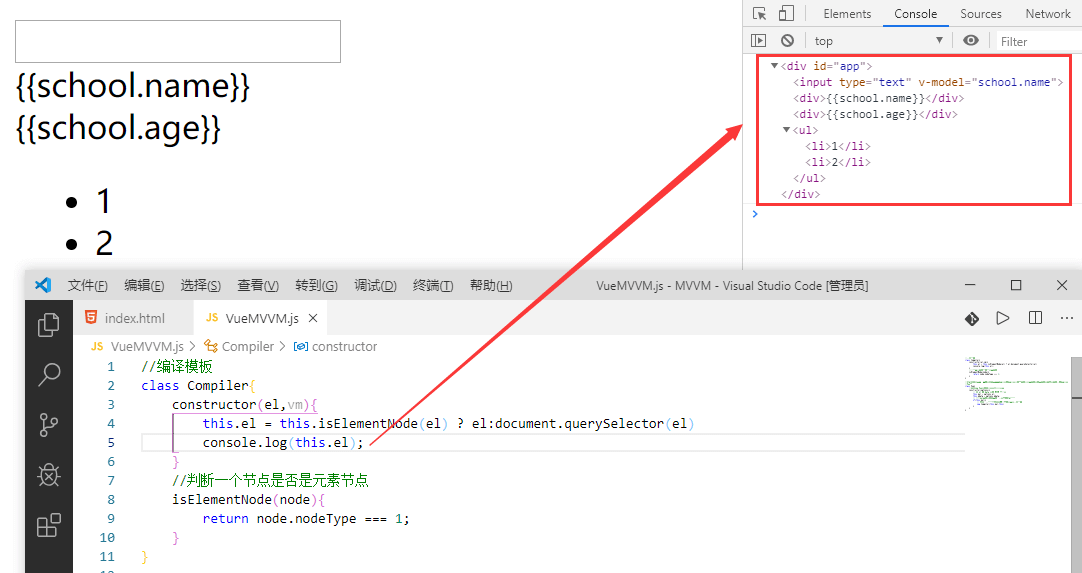
可以打印出我们index.html的模板:
把模板中的子节点存到文档碎片(相当于在内存中开辟了一块空间,用来存放HTML代码)中:
class Compiler{
    constructor(el,vm){
        this.el = this.isElementNode(el) ? el:document.querySelector(el)
    //把模板传给node2fragment,通过这个方法把模板存放到文档碎片中
    let fragment = this.node2fragment(this.el)

    //把替换完的数据重新给网页
    this.el.appendChild(fragment)
}
//定义一个方法,用来把模板存放到文档碎片里
node2fragment(node){
    //创建一个文档碎片,用来存放我们的html模板,注:他们是逐条进行存储的
    let fragment = document.createDocumentFragment()
    //第一个子节点
    let firstChild;
    // 循环取出根节点中的第一个子节点并放入文档碎片中
    while(firstChild = node.firstChild){
        fragment.appendChild(firstChild)
    }
    //返回模板
    return fragment;
}
isElementNode(node){
    return node.nodeType === 1;
}

}
Compile {#compile}
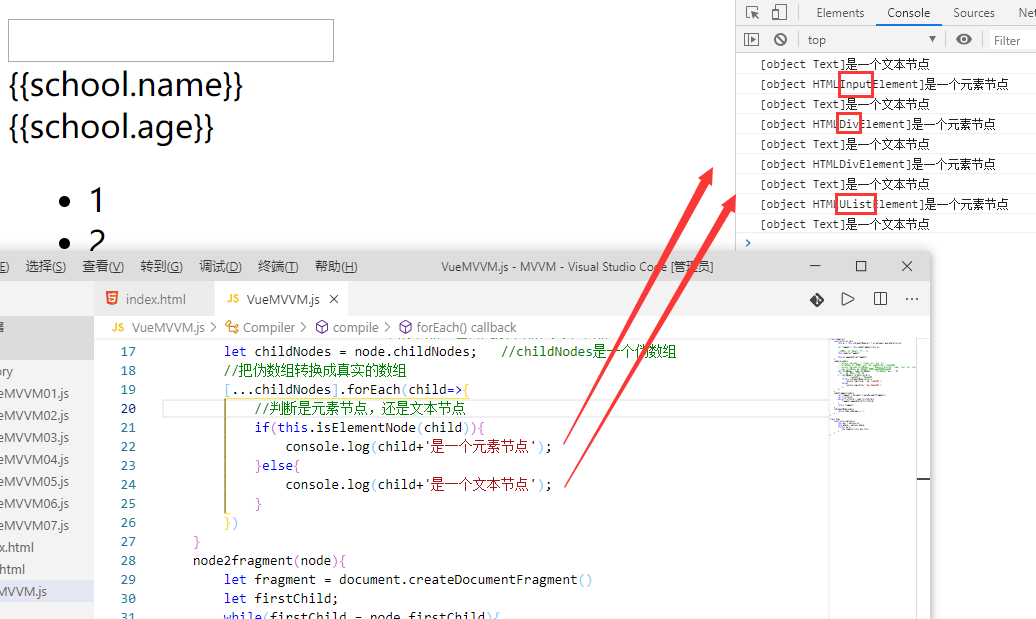
编译模板,判断是元素节点,还是文本节点:
constructor(el,vm){
	this.el = this.isElementNode(el) ? el:document.querySelector(el)
let fragment = this.node2fragment(this.el)

//替换(编译模板)用数据来编译
this.compile(fragment)

this.el.appendChild(fragment)

} compile(node){ // console.log(node) // [input, div, div, ul] // childNodes 并不包含li 仅仅是得到子节点,而不是子子节点 // console.log(node.childNodes); //NodeList(9) [text, input, text, div, text, div, text, ul, text] // node.childNodes 一堆的节点:包含元素节点和文本节点 let childNodes = node.childNodes; //childNodes是一个伪数组 //把伪数组转换成真实的数组 [...childNodes].forEach(child=>{ //判断是元素节点,还是文本节点 if(this.isElementNode(child)){ console.log(child+'是一个元素节点'); }else{ console.log(child+'是一个文本节点'); } }) }
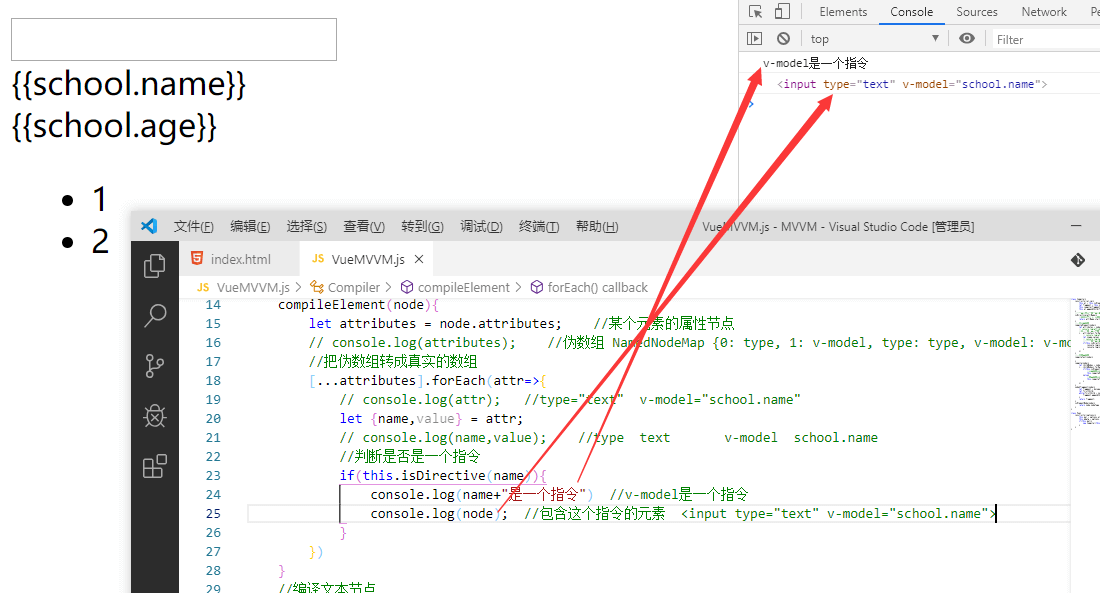
如果是元素节点,则找出是否是 指令:
constructor(el,vm){
	this.el = this.isElementNode(el) ? el:document.querySelector(el)
	let fragment = this.node2fragment(this.el)
	this.compile(fragment)
	this.el.appendChild(fragment)
}
//判断一个属性是否是一个指令
isDirective(attrName){
	//只要前面有 v- ,那么就是指令
	return attrName.startsWith('v-')
}
//编译元素节点
compileElement(node){
	let attributes = node.attributes;    //某个元素的属性节点
	// console.log(attributes);    //伪数组 NamedNodeMap {0: type, 1: v-model, type: type, v-model: v-model, length: 2}
	//把伪数组转成真实的数组
	[...attributes].forEach(attr=>{
		// console.log(attr);   //type="text"  v-model="school.name"
		let {name,value} = attr;
		// console.log(name,value);    //type  text       v-model  school.name
		//判断是否是一个指令
		if(this.isDirective(name)){
			console.log(name+"是一个指令")  //v-model是一个指令
			console.log(node);  //包含这个指令的元素  <input type="text" v-model="school.name">
		}
	})
}
//编译文本节点
compileText(node){
`}
compile(node){
let childNodes = node.childNodes;   //childNodes是一个伪数组
[...childNodes].forEach(child=>{
if(this.isElementNode(child)){
//元素节点,调用上面的编译元素节点的方法
this.compileElement(child);
}else{
//文本节点,调用上面的编译文本节点的方法
this.compileText(child)
}
})
}
`
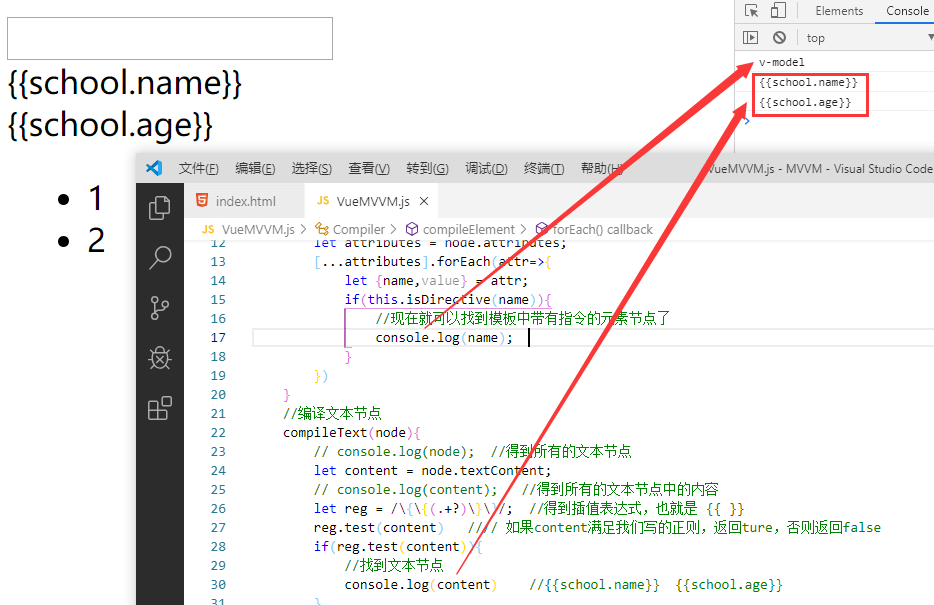
找到文本节点:
//编译文本节点
compileText(node){
	// console.log(node);  //得到所有的文本节点
	let content = node.textContent;
	// console.log(content);   //得到所有的文本节点中的内容
	let reg = /\{\{(.+?)\}\}/;  //得到插值表达式,也就是 {{ }}
	reg.test(content)   //// 如果content满足我们写的正则,返回ture,否则返回false
	if(reg.test(content)){
		//找到文本节点
		console.log(content)    //{{school.name}}  {{school.age}}
	}
}
compile(node){
	let childNodes = node.childNodes;
	[...childNodes].forEach(child=>{
		// child就表示每一个节点
		// 如果child元素节点,调用 compileElement
		if(this.isElementNode(child)){
			this.compileElement(child);
			// 可以一个元素节点中嵌套其它的元素点,还可能嵌套文本节点
			// 如果child内部还有其它节点,需要利用递归重新编译
			this.compile(child)
		}else{
			// 否则调用compileText
			this.compileText(child)
		}
	})
}
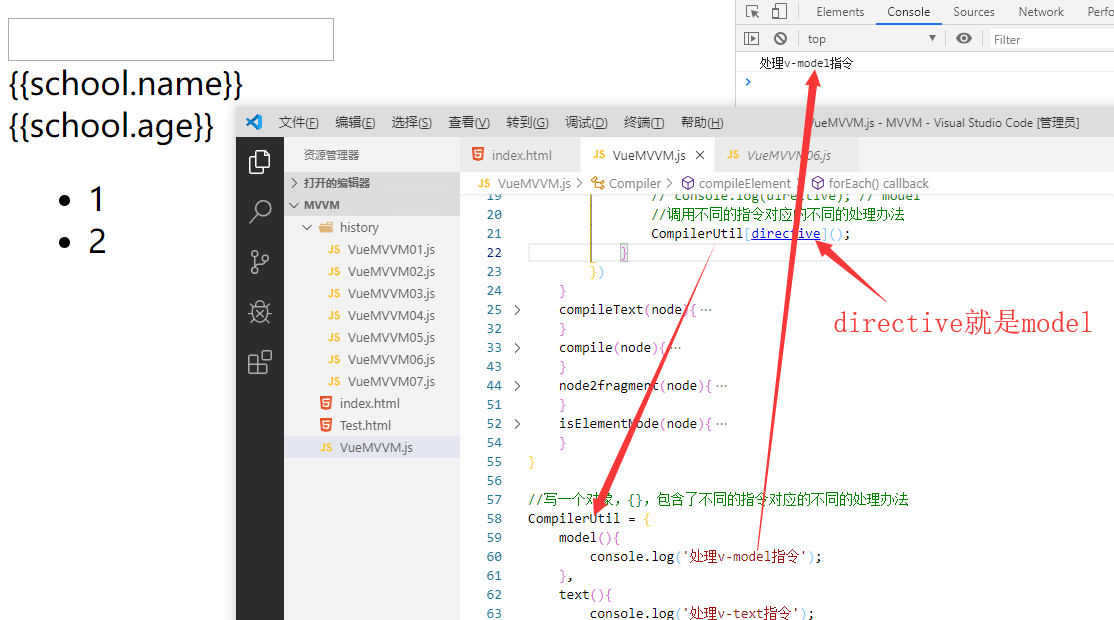
在最外面(与class Compiler{ }和class Vue{ }平级)定义一个对象,里面存放了不同指令对应的不同的处理办法:
//写一个对象,{},包含了不同的指令对应的不同的处理办法
CompilerUtil = {
    model(){
        console.log('处理v-model指令');
    },
    text(){
        console.log('处理v-text指令');
    },
    html(){
        console.log('处理v-html指令');
    },
}
然后在编译元素节点的方法中使用:
compileElement(node){
	let attributes = node.attributes;
	[...attributes].forEach(attr=>{
		let {name,value} = attr;
		if(this.isDirective(name)){
			// console.log(name);  // v-model
			//把 v-model 分割开,只要后面的model
			let [,directive] = name.split('-');
			// console.log(directive); // model
			//调用不同的指令对应的不同的处理办法
			CompilerUtil[directive]();
		}
	})
}
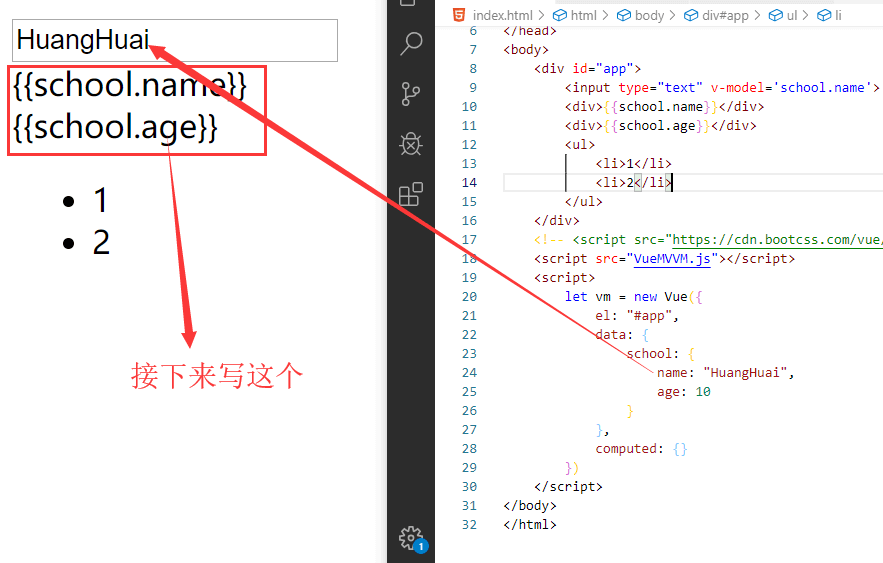
把数据渲染到元素节点上:
constructor(el,vm){
//把vm挂上
this.vm = vm

this.el = this.isElementNode(el) ? el:document.querySelector(el)
let fragment = this.node2fragment(this.el)
this.compile(fragment)
this.el.appendChild(fragment)

} /* .../
compileElement(node){
let attributes = node.attributes;

[...attributes].forEach(attr=>{
//给value起个别名叫expr :就是起别名的意思
let {name,value:expr} = attr;
if(this.isDirective(name)){
let [,directive] = name.split('-');
CompilerUtildirective;
}
})
}
/... */ CompilerUtil = { getVal(vm,expr){ console.log(expr.split('.')); //["school", "name"] // console.log(vm); // 第一次data是school:{name:xx,age:xx} current是"school" 好好看看reduce的用法 return expr.split(".").reduce((data,current)=>{ return data[current] },vm.$data); }, model(node,expr,vm){ // node是带指令的元素节点 expr是表达式 vm是vue对象 // console.log('处理v-model指令'); // console.log(node); //<input type="text" v-model="school.name"> // console.log(expr); //school.name console.log(vm);
// 在这里要做v-model要做的事 // 要给输入框一个value属性 node是输入框 node.value = xxxx let value = this.getVal(vm,expr) // console.log(value); //HuangHuai //把这个value显示到模板上的输入框里 let fn = this.updater['modelUpdater'] //调用fn方法 fn(node,value) }, text(){ console.log('处理v-text指令'); }, html(){ console.log('处理v-html指令'); }, //更新数据 updater:{ modelUpdater(node,value){ node.value = value }, htmlUpdater(){} }, }
这样就可以把html模板中的数据渲染到视图上了
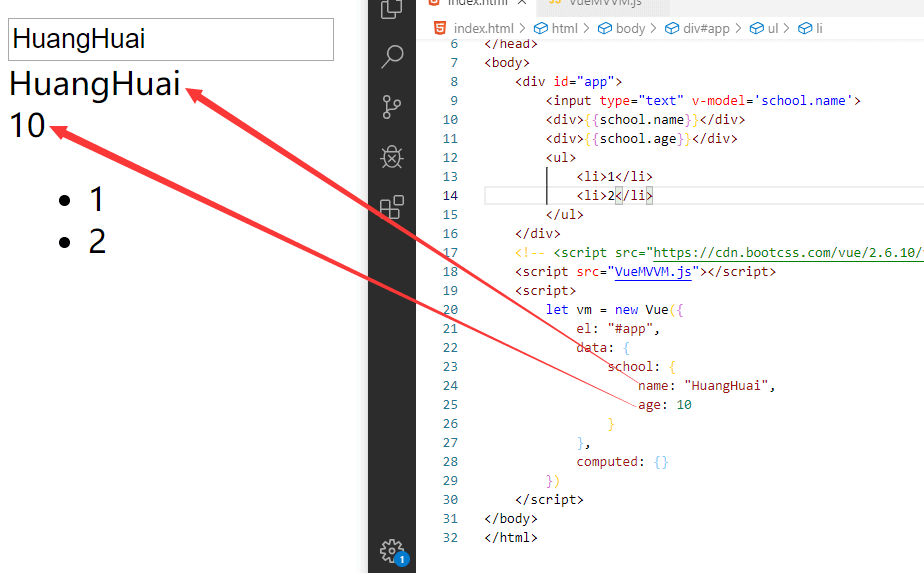
渲染文本节点(也就是{{ }})的内容:
compileText(node){
	let content = node.textContent;
	let reg = /\{\{(.+?)\}\}/;
	reg.test(content)
	if(reg.test(content)){
		// console.log(content);   // {{school.name}}  {{school.age}}
		// console.log(node);  //"{{school.name}}"  node是文本节点
		CompilerUtil['text'](node,content,this.vm)
	}
}
/*  ...  */
CompilerUtil = { getVal(vm,expr){ return expr.split(".").reduce((data,current)=>{ return data[current] },vm.$data); }, model(node,expr,vm){ let value = this.getVal(vm,expr) let fn = this.updater['modelUpdater'] fn(node,value) }, text(node,expr,vm){ // console.log('处理v-text指令'); // console.log(node); //"{{school.name}}" // console.log(expr); //{{school.name}} // console.log(vm); //vue实例 //把全局的{{}}全部替换 replace 是替换方法 let content = expr.replace(/{{(.+?)}}/g,(...args)=>{ // console.log(args); //["{{school.age}}", "school.age", 0, "{{school.age}}"] //拿到数据 // console.log(this.getVal(vm,args[1])); //HuangHuai 10 return this.getVal(vm,args[1]) }) //进行视图更新 let fn = this.updater['textUpdater'] fn(node,content) }, html(){ console.log('处理v-html指令'); }, updater:{ modelUpdater(node,value){ node.value = value }, textUpdater(node,value){ // textContent得到文本节点中内容 node.textContent = value }, htmlUpdater(){} }, }
这样就可以让数据代替{{ }}渲染到页面上了
Observer {#observer}
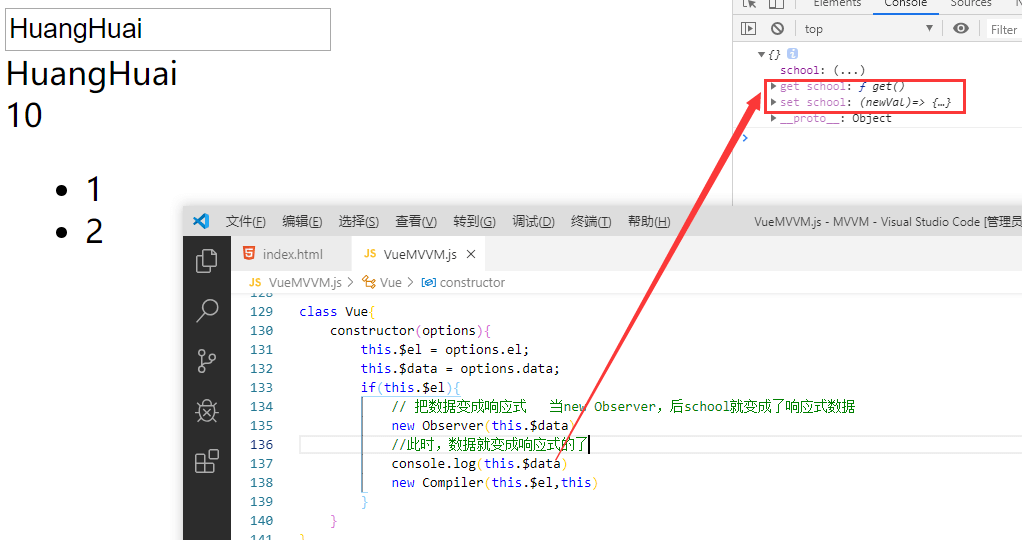
但是,此时,数据还不是响应式的,我们需要把数据变成响应式的,需要用到数据劫持:
// 实现数据的响应式  new
class Observer{
    constructor(data){
        // 此时,数据还不是响应式的
        // console.log(data)  // school: {name: "HuangHuai", age: 100}
        this.observer(data)
    }
    // 把上面的数据变成响应式数据 把一个对象数据做成响应式
    observer(data){
        //如果data存在且类型是object类型
        if(data && typeof data == 'object'){
            // console.log(data);  //school: {name: "HuangHuai", age: 10}
            //for in 循环一个js对象
            for(let key in data){
                // console.log(key);   //school
                // console.log(data[key])  //{name: "HuangHuai", age: 10}
                //调用defindReactive方法
                this.defindReactive(data,key,data[key])
            }
        }
    }
    defindReactive(obj,key,value){
        this.observer(value)    //如果一个数据是一个对象,也需要把这个对象中的数据变成响应式
        Object.defineProperty(obj,key,{
            // 当你获取school时,会调用get
            get(){
                // console.log('get...');
                return value
            },
            // 当你设置school时,会调用set
            set:(newVal)=>{
                // 当赋的值和老值一样,就不重新赋值
                if(newVal != value){
                    // console.log("set...")
                    this.observer(newVal)
                    value = newVal
                }
            }
        })
    }
}
class Vue{
constructor(options){
this.$el = options.el;
this.$data = options.data;
if(this.$el){
// 把数据变成响应式   当new Observer,后school就变成了响应式数据
new Observer(this.$data)
//此时,数据就变成响应式的了
console.log(this.$data)
new Compiler(this.$el,this)
}
}
}
看效果,有 get 和 set ,此时数据就变成响应式的了
Dep、Watcher {#dep%E3%80%81watcher}
数据变成响应式还不行,我们需要更改数据后,让他自动渲染到页面上,这时就要用到发布订阅了,(这里改的有点多,只粘改动后的代码,看注释,加注释的就是新增或改变的)
// 发布-订阅   观察者    观察者模式中包含发布-订阅模式
// 发布-订阅   发布和订阅之间是没有必然联系的
// 观察者(观察者和被观察者) 被观察者中包含观察者
// 存储观察者的类Dep
class Dep{
constructor(){
this.subs = []; // subs中存放所有的watcher
}
//添加watcher 订阅
addSub(watcher){
this.subs.push(watcher) //把每一个观察者都添加到subs里
}
//通知 发布 通知subs容器中的所有观察者
notify(){
this.subs.forEach(watcher=>watcher.update())
}
}
//观察者
class Watcher{
constructor(vm,expr,cb){
this.vm = vm
this.expr = expr
this.cb = cb    // cb表示当状态改变了,要干的事
//刚开始需要保存一个老的状态
this.oldValue = this.get()
}
//获取状态的方法
get(){
Dep.target = this;
let value = CompilerUtil.getVal(this.vm,this.expr)
//当通知后,把Dep.target置空
Dep.target = null;
return value
}
// 当状态发生改变后,会调用观察者的update方法来更新视图
update(){
let newVal = CompilerUtil.getVal(this.vm,this.expr)
if(newVal !== this.oldValue){
this.cb(newVal)
}
}
}
class Observer{
constructor(data){
this.observer(data)
}
observer(data){
if(data && typeof data == 'object'){
for(let key in data){
this.defindReactive(data,key,data[key])
}
}
}
defindReactive(obj,key,value){
this.observer(value)
//观察者
let dep = new Dep()
Object.defineProperty(obj,key,{
get(){
//使用
Dep.target && dep.subs.push(Dep.target)
return value
},
set:(newVal)=>{
if(newVal != value){
this.observer(newVal)
value = newVal
//执行watcher中的update方法
dep.notify()
}
}
})
}
}
/*  ...  */
CompilerUtil = { getVal(vm,expr){ return expr.split(".").reduce((data,current)=>{ return data[current] },vm.$data); }, model(node,expr,vm){ let fn = this.updater['modelUpdater'] // 给输入框添加一个观察者,如果后面数据改变了,则视图更新 new Watcher(vm,expr,(newVal)=>{ fn(node,newVal) }) let value = this.getVal(vm,expr) fn(node,value) }, //得到新的内容 getContentValue(vm,expr){ return expr.replace(/{{(.+?)}}/g,(...args)=>{ return this.getVal(vm,args[1]) }) }, text(node,expr,vm){ let fn = this.updater['textUpdater'] let content = expr.replace(/{{(.+?)}}/g,(...args)=>{ //添加观察者 new Watcher(vm,args[1],()=>{ fn(node,this.getContentValue(vm,expr)); }) return this.getVal(vm,args[1]) }) fn(node,content) }, html(){ console.log('处理v-html指令'); }, updater:{ modelUpdater(node,value){ node.value = value }, textUpdater(node,value){ node.textContent = value }, htmlUpdater(){} }, }
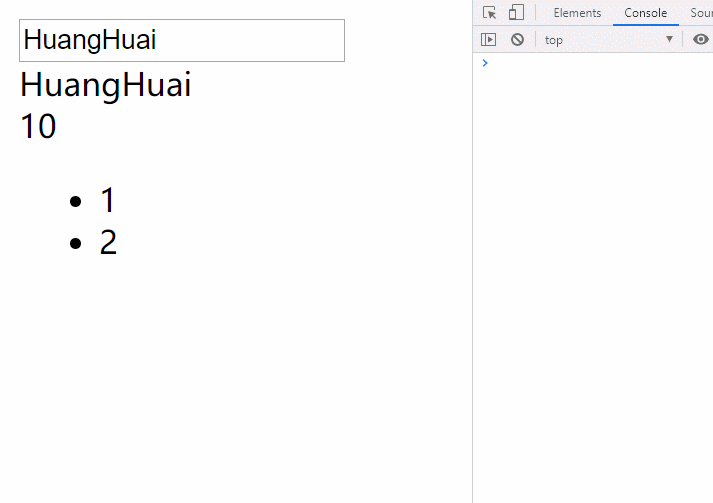
这时,只要我们改变数据,那么视图也会相应改变
视图变化,数据改变 {#%E8%A7%86%E5%9B%BE%E5%8F%98%E5%8C%96%2C%E6%95%B0%E6%8D%AE%E6%94%B9%E5%8F%98}
现在只完成了数据修改,则视图响应对应的内容,但是我们修改视图,对应的数据并没有改变,
这个时候,我们需要在CompilerUtil里设置数据:
CompilerUtil = {
    getVal(vm,expr){
        return expr.split(".").reduce((data,current)=>{
            return data[current]
        },vm.$data);
    },
    //设置数据
    setVal(vm,expr,value){
        expr.split('.').reduce((data,current,index,arr)=>{
            // 第1次:data是 school对象  current是"school"  index是0   arr是数组["school", "name"]
            // 第2次:data是undefined   cureent是"name"  index是1     arr是数组["school", "name"]
            // console.log(data,current,index,arr);
            if(index == arr.length-1){
                // console.log(current);   //name
                return data[current] = value
            }
            return data[current]
        },vm.$data)
    },
    model(node,expr,vm){
        let fn = this.updater['modelUpdater']
        new Watcher(vm,expr,(newVal)=>{
            fn(node,newVal)
        })
        //改变输入框数据本质是触发input方法
        node.addEventListener('input',(e)=>{
            let value = e.target.value  //e.target.value可以获得输入框中的内容
            //调用setVal方法,设置数据
            this.setVal(vm,expr,value)
        })
        let value = this.getVal(vm,expr)
        fn(node,value)
    },
    getContentValue(vm,expr){
        return expr.replace(/\{\{(.+?)\}\}/g,(...args)=>{
            return this.getVal(vm,args[1])
        })
    },
    text(node,expr,vm){
        let fn = this.updater['textUpdater']
        let content = expr.replace(/\{\{(.+?)\}\}/g,(...args)=>{
            new Watcher(vm,args[1],()=>{
                fn(node,this.getContentValue(vm,expr));
            })
            return this.getVal(vm,args[1])
        })
        fn(node,content)
    },
    html(){
        console.log('处理v-html指令');
    },
    updater:{
        modelUpdater(node,value){
            node.value = value
        },
        textUpdater(node,value){
            node.textContent = value
        },
        htmlUpdater(){}
    },
}
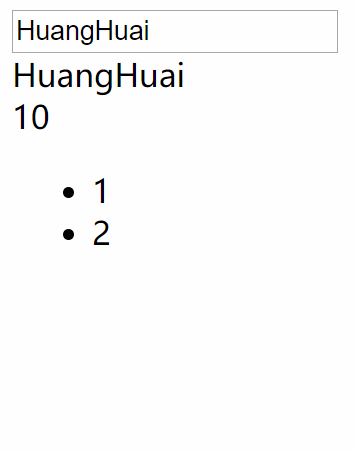
这个时候就实现我们的双向数据绑定了
补充 {#%E8%A1%A5%E5%85%85}
代理(Proxy) {#%E4%BB%A3%E7%90%86(proxy)}
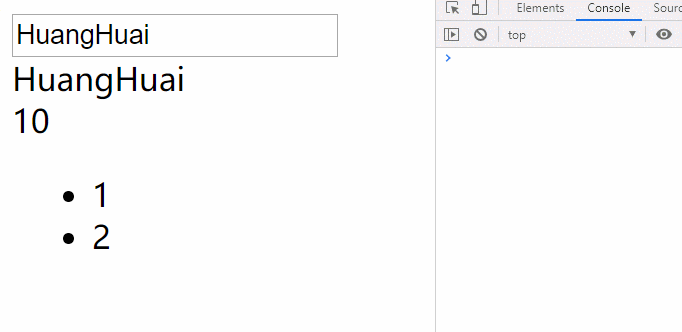
如果使用官方的话,人家设置的是有代理的,比如改变数据时,
我们必须输入:vm.$data.school.name="xxx"才可以更改数据,而官方的直接用vm.school.name="xxx"就可以直接更改数据,因为人家把$data用vm把他代理起来了,如下:
用官方的:
用自己的:(直接报错)
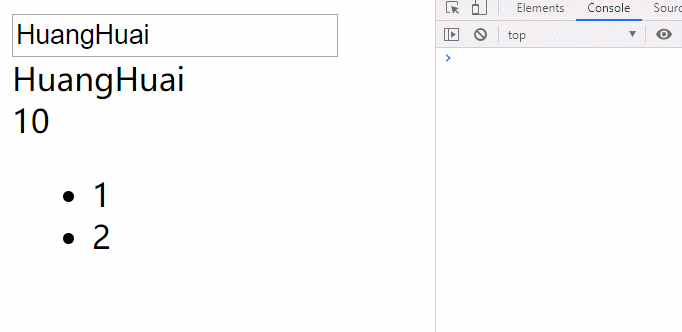
这时候,我们也想实现官方的那种方法,把$data用 vm 代理起来(非常简单):
class Vue{
    constructor(options){
        this.$el = options.el;
        this.$data = options.data;
        if(this.$el){
            new Observer(this.$data)
            // 现在也需要让vm代理this.$data
            this.proxyVm(this.$data)
            new Compiler(this.$el,this)
        }
    }
    //让vm代理data
    proxyVm(data){
        for(let key in data){ // {school:{name:HuangHuai,age:10}}
            // school---[object Object]-----[object Object]
            // console.log(key+"---"+data[key]+"-----"+data)
            Object.defineProperty(this,key,{
                // vm.school
                get(){
                    return data[key]
                }
            })
        }
    }
}
这样就可以实现官方那种方式了
计算属性(computed) {#%E8%AE%A1%E7%AE%97%E5%B1%9E%E6%80%A7(computed)}
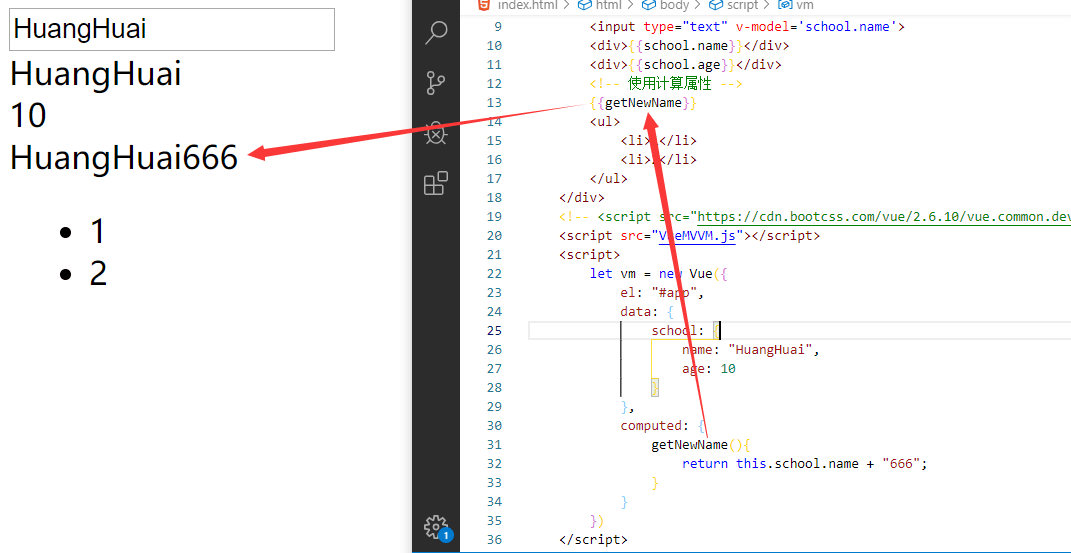
最后再实现一种功能,就是计算属性,计算属性可以当成数据来使用:
修改html模板的代码
<div id="app">
	<input type="text" v-model='school.name'>
	<div>{{school.name}}</div>
	<div>{{school.age}}</div>
	<!-- 使用计算属性 -->
	{{getNewName}}
	<ul>
		<li>1</li>
		<li>2</li>
	</ul>
</div>
`//计算属性
computed: {
getNewName(){
return this.school.name + "666";
}
}
`
默认是不行的,是undefined,接着改我们的代码:
class Vue{
constructor(options){
this.$el = options.el;
this.$data = options.data;
//挂上去
let computed = options.computed
if(this.$el){
new Observer(this.$data)
//遍历里面的方法,因为肯定有很多
for(let key in computed){
// console.log(key) // getNewName
Object.defineProperty(this.$data,key,{
get:()=&gt;{
return computed[key].call(this);
}
})
}
this.proxyVm(this.$data)
new Compiler(this.$el,this)
}
}
proxyVm(data){
for(let key in data){
Object.defineProperty(this,key,{
get(){
return data[key]
}
})
}
}
}
好了,这里我们就可以把计算属性当成数据来使用了
源码 {#%E6%BA%90%E7%A0%81}
点我获取源码
 51工具盒子


