在不久的将来,低代码/无代码平台将使应用程序创建、工作流自动化和数据分析更加民主化,从而实现为各种任务开发定制的AI Copilot
这种变革潜力支撑着对开源替代方案的极大兴趣,也引领我们迎来了激动人心的发展和机会。
**BigCode** 与 **NVIDIA** 合作推出了 **StarCoder2**,这是一系列专为编码而设计的开放式 LLM,我认为在尺寸和性能方面是目前最好的开源 LLM StarCoder2 模型有三种不同的大小,分别是 3B、7B 和 15B 参数,支持各种编程语言,并在准确性方面设立了新的benchmark
为了增强这些模型,每个模型变体都是在 The Stack v2 上进行训练的,这是目前可用于 LLM 预训练的最广泛的开放代码数据集
这些模型的亮点如下: * 3B(由 ServiceNow 提供),7B(由 Hugging Face 提供)和 15B 参数版本(由 NVIDIA 使用 NVIDIA NeMo 提供) * 所有模型都使用分组查询注意力 * 上下文窗口为 16,384 个tokens,滑动窗口注意力为 4,096 个tokens * 模型是使用填充中间目标进行训练的 * 在 3+ T(3B)、3.5+ T(7B)、4+ T(15B)标记和 600+种编程语言上进行训练 * StarCoder2-15B 在其尺寸类别中表现最佳,并在许多评估中与 33B+ 效果打平。StarCoder2-3B 与 StarCoder1-15B 的性能相匹配。 * 使用1024 x H100 NVIDIA GPU 用于训练 * 所有模型均具商用许可
Starcoder2 的能力也在性能指标中得到展示,特别是 15B 模型,明显优于其他相同规模的模型,并且它与 CodeLlama-34B 相匹配或优于后者,而 CodeLlama-34B 的规模是它的两倍以上。 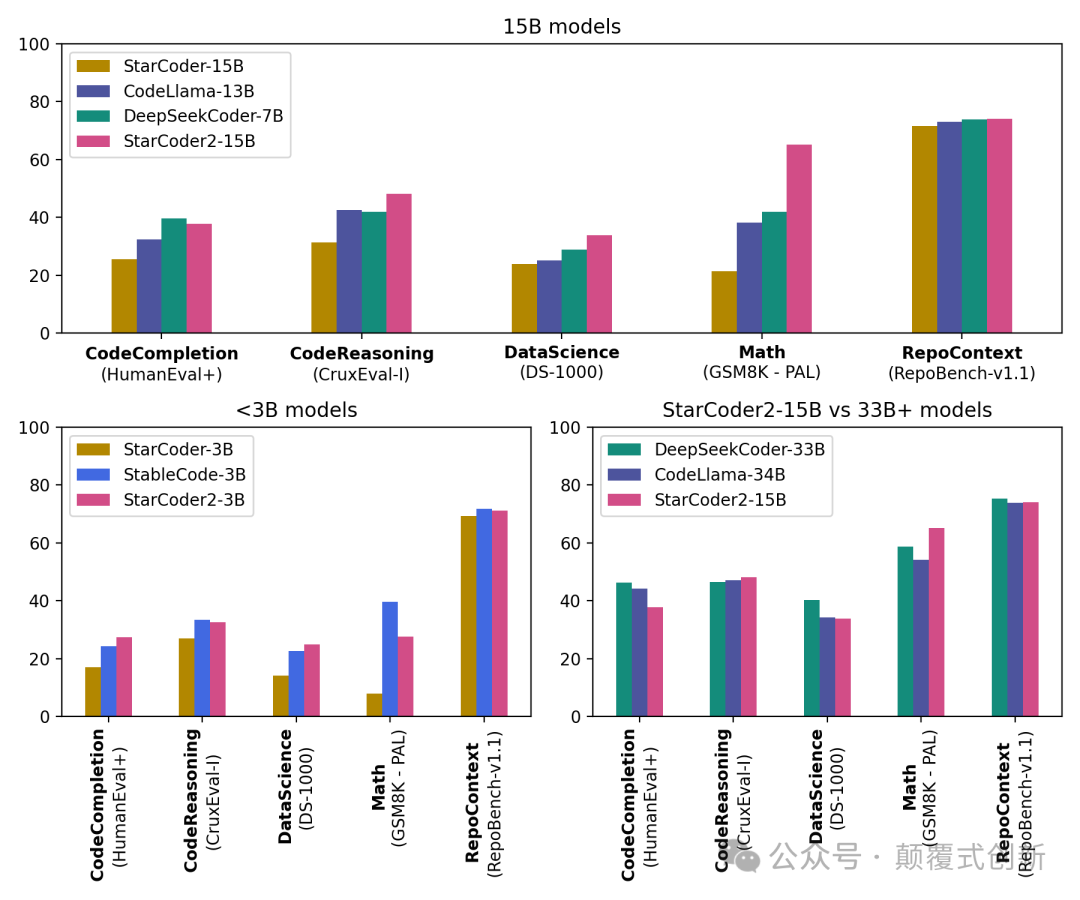 具有 16K 令牌的上下文长度,模型处理大量的代码库和指令,确保完整的代码理解和生成。 在这篇文章中,将介绍以下内容: •设置本地环境 •设置 StarCoder2-15B •测试其使用 Python、JavaScript、SQL、C++和 Java 的编码能力 •深入挖掘的资源  **开始使用 StarCoder 2** 首先,我们需要建立一个环境并安装一个库。 打开命令行界面,提示符,终端,或者您熟悉的任何其他 CLI 工具。 确保您已安装 Python,因为我们将使用 pip,Python 的软件包安装程序。 运行以下命令: \* \* \* \* ``` # Create a virtual environment mkdir starcoder2 &&cd starcoder2 python3 -m venv starcoder2-env source starcoder2-env/bin/activate ```
* * * * * * * * * * * * * * * * * ``` # Install dependencies pip3 install torch pip3 install git+https://github.com/huggingface/transformers.git pip3 install datasets pip3 install ipykernel jupyter pip3 install --upgrade huggingface_hub pip3 install accelerate # to run the model on a single / multi GPU pip3 install bitsandbytes # Loging to Huggingface Hub huggingface-cli login # Optionally, fire up VSCode or your favorite IDE and let's get rolling! ``` 设置了环境,检查了 Python 软件包索引,找到了一些软件包,并安装所有必要的依赖项。
以选择创建.py文件或者.ipynb文件(笔记本)。我将继续使用 Jupyter 笔记本在块中运行代码,并交互式地检查结果。
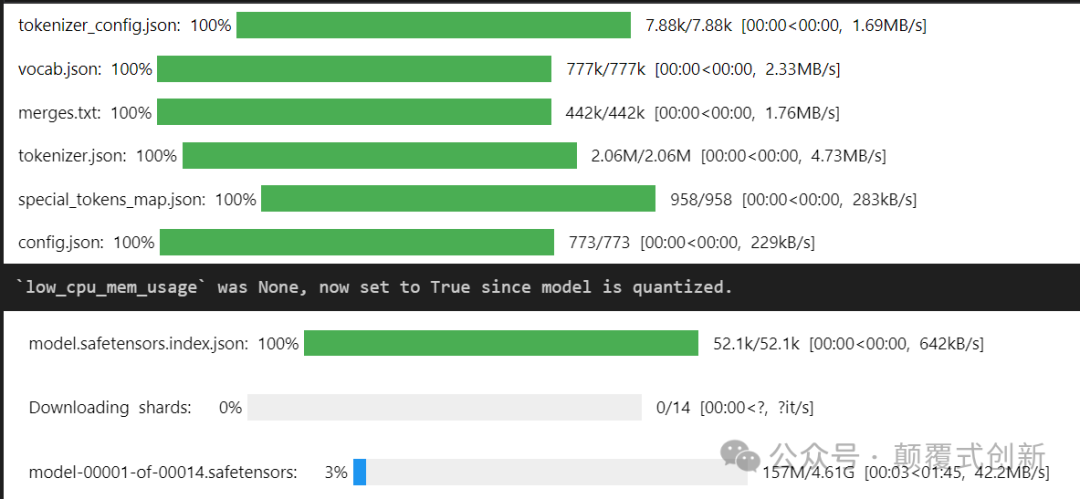
**设置 StarCoder2** 可以使用 24GB 的 GPU 运行这个练习,所以我必须选择适合我的精度,让我们来看看每个选项的内存占用情况: * * * ``` •torch.bfloat16,~32.2 GB•load_in_8bit, ~16.9 GB•load_in_8bit, ~9.2 GB ``` 此处使用load_in_8bit选项 * * * * * * * * * * * * ``` from transformers import AutoTokenizer, AutoModelForCausalLM, BitsAndBytesConfig # to use 4bit use `load_in_4bit=True` instead quantization_config = BitsAndBytesConfig(load_in_8bit=True) checkpoint = "bigcode/starcoder2-15b" tokenizer = AutoTokenizer.from_pretrained(checkpoint) model = AutoModelForCausalLM.from_pretrained(checkpoint, quantization_config=quantization_config) ```
 一旦完成,让我们检查模型的内存占用情况: * * ``` print(f"Memory footprint: {model.get_memory_footprint() / 1e6:.2f} MB") # Memory footprint: 16900.18 MB ```
将有来自不同语言(如 Python、JavaScript、SQL、C++和 Java)的 5 个编码问题,以评估其编码能力。 •数据操作 •算法 •数据库查询 •面向对象编程 •接口,类实现和多态性
让我们从一个简单的问题开始: * * * ``` inputs = tokenizer.encode("def factorial(n):", return_tensors="pt").to("cuda") outputs = model.generate(inputs, eos_token_id=tokenizer.eos_token_id, max_length=100, num_return_sequences=1) print(tokenizer.decode(outputs[0])) ``` * * * * * * * * * ``` def factorial(n): if n == 0: return1 else: return n * factorial(n-1) print(factorial(5)) ```
实现在 Python 中使用递归计算一个数的阶乘是正确的。当你调用factorial(5), 它正确计算 5。基本情况被正确定义(如果n == 0, return 1), 确保递归正确终止。 JavaScript 问题: * * * * ``` inputs = tokenizer.encode(""" function filterArray(arr) { // Complete the function to filter out numbers greater than 10 """, return_tensors="pt").to("cuda") ```
* * * * * * * * * * * ``` outputs = model.generate(inputs, eos_token_id=tokenizer.eos_token_id, max_length=100, num_return_sequences=1) print(tokenizer.decode(outputs[0])) # function filterArray(arr) { # // Complete the function to filter out numbers greater than 10 # return arr.filter(function(num){ # return num <= 10; # }); # } ```
函数使用Array.prototype.filter方法,它使用由提供的函数实现的测试来创建一个包含所有通过测试的元素的新数组。在这种情况下,测试是num \<= 10,因此新数组将只包括小于或等于 10 的数字,有效地过滤掉所有大于 10 的数字。
SQL 问题: * ``` inputs = tokenizer.encode(""" # generate a SQL query that selects all columns from a table named 'employees' where the 'salary' is greater than 50000. SELECT * FROM employees WHERE """, return_tensors="pt").to("cuda") outputs = model.generate(inputs, eos_token_id=tokenizer.eos_token_id, max_length=100, num_return_sequences=1) print(tokenizer.decode(outputs[0])) ```
* * ``` # SELECT * FROM employees WHERE # salary > 50000; ``` 这个很简单 C++ 问题:
``` inputs = tokenizer.encode(""" #include class Rectangle { private: int width, height; public: Rectangle(int w, int h) : width(w), height(h) {} // Complete the class with methods to calculate area and perimeter int getArea(); int getPerimeter(); }; """, return_tensors="pt").to("cuda") ```
* * ``` outputs = model.generate(inputs, eos_token_id=tokenizer.eos_token_id, max_length=500, num_return_sequences=1) print(tokenizer.decode(outputs[0])) ```
* * ``` # #include # class Rectangle { # private: # int width, height; # public: # Rectangle(int w, int h) : width(w), height(h) {} # // Complete the class with methods to calculate area and perimeter # int getArea(); # int getPerimeter(); # }; # int Rectangle::getArea() { # return width * height; # } # int Rectangle::getPerimeter() { # return 2 * (width + height); # } ```
``` # int main() { # int w, h; # std::cin >> w >> h; # Rectangle r(w, h); # std::cout << r.getArea() << std::endl; # std::cout << r.getPerimeter() << std::endl; # return 0; # } ``` 它正确定义了成员函数getArea和getPerimeter计算并返回矩形的面积和周长,分别。main函数从标准输入读取矩形的宽度和高度,然后创建一个Rectangle对象r并输出其面积和周长。 当你运行此程序时,它将等待用户输入两个整数(代表宽度和高度),然后根据这些值显示计算出的面积和周长。