安装fastlane
第一步:环境安装
安装fastlane,有多种途径,本人这边用Homebrew来安装它,因为本人用的是MAC ,相信用过MAC的同学都会知道,一般MAC里面是会安装好了Homebrew这个第三方包管理软件
brew cask install fastlane
第二步:配置环境参数
export LC_ALL=en_US.UTF-8 export.UTF-8
同时点按cmd + shift + . 三个按钮,显示user级别下的隐藏文件,找到 .bash_profile进行编辑,完成后保存一下,重启一下终端,让其生效。

image.png

image.png

image.png
第三步:验证一下fastlane
打开Terminal 终端,
fastlane --version
如果能看到类似下面的结果,那么恭喜你,fastlane安装成功

image.png
项目中使用fastlane
第一步:进入iOS工程目录
打开Terminal cd 到iOS工程目录,如下图

image.png
第二步:初始化fastlane
fastlane init
终端里面让您选择,本人这边是选择了4;
然后就会看到生成fastlane文件夹,并且里面有文件,如下:

image.png
然后,一路按几下,回车
第三步:编辑Fastfile脚本文件
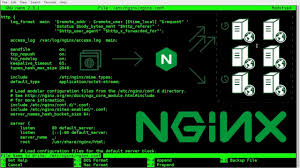
生成默认的文件,用文本打开如下:

image.png
暂时修改一下,(下面的脚本,如果复制过去,提示语法错误,一定要把里面的每一行,前后空格去掉,这些空格是肉眼看不到的,一定要把里面的每一行,前后空格去掉,这些空格是肉眼看不到的,一定要把里面的每一行,前后空格去掉,这些空格是肉眼看不到的)
# This file contains the fastlane.tools configuration# You can find the documentation at https://docs.fastlane.tools## For a list of all available actions, check out##     https://docs.fastlane.tools/actions## For a list of all available plugins, check out##     https://docs.fastlane.tools/plugins/available-plugins## Uncomment the line if you want fastlane to automatically update itself# update_fastlanedefault_platform(:ios)platform :ios do
    desc "Description of what the lane does"
    lane :smartowon do
    # add actions here: https://docs.fastlane.tools/actionsgym(
    # 每次打包之前clean一下
    clean: true,
    output_directory: './fastlane/release',
    output_name: 'smartowon.ipa',
    scheme: "Runner",
    configuration: 'Release',
    include_bitcode: false,
    include_symbols: true,
    export_method: 'app-store',
    export_xcargs: '-allowProvisioningUpdates')
    # mac上的通知弹窗,通知打包完毕
    notification(app_icon: './fastlane/icon.png', title: 'manager', subtitle: '打包成功,已导出安装包', message: '准备发布中……')
    # 配置上传到App Store connect的api_key
    # 通过这种设置可以绕过二次认证等验证操作,实现一键打包上传
    api_key = app_store_connect_api_key(
        # 通过苹果申请的key id,申请同时会生成issuer_id和一个授p8权文件,就是以下参数,文件只能下载一次,注意保存,申请方式https://appleid.apple.com/account/manage中的专用密钥
    key_id: 'J52H42C2FU',
    issuer_id: '69a6de8d-d9d7-47e3-e053-5b8c7c11a4d1',
        # 授权文件路径
    key_filepath: './fastlane/AuthKey_J52H42C2FU.p8',
    duration: 1200,
    in_house: false
    )
    # 上传到testflight
    upload_to_testflight(
        # 上边设置的授权信息
    api_key: api_key,
    skip_waiting_for_build_processing: true,
        # 打包好要上传的文件
    ipa: './fastlane/release/smartowon.ipa',
    skip_submission: true
    )
    # 通知上传成功
    notification(app_icon:"icon.png",title:"LoanManager",subtitle: "IPA上传成功", message: "自动打包完成!")
    end
    end

image.png
第四步:修改里面的参数
clean: true,#每次打包之前clean一下
output_directory: './fastlane/release', # 打包出ipa文件路径,后边上传的时候也会用到
output_name: 'yourName.ipa',# 打包的名称,换成自己的
scheme: "yourproscheme",# 项目的scheme,换成自己的(
后面有详细介绍)
configuration: 'Release',# 默认Release,Release or Debug
include_bitcode: true,# 是否包含bitcode
include_symbols: true,# 是否包含symbols
export_method: 'app-store',# 打包导出方式,包含app-store, validation, ad-hoc, package, enterprise, development, developer-id and mac-application
export_xcargs: '-allowProvisioningUpdates',# 这个设置是为了设置xcode自动配置证书和配置文件,当然也可以手动配置,可以参考文档
key_id: 'your key_id',# 通过苹果申请的key id,申请同时会生成issuer_id和一个授p8权文件,就是以下参数,文件只能下载一次,注意保存,申请方式https://appleid.apple.com/account/manage中的专用密钥(
后面有详细介绍)
issuer_id: 'your issuer id',
key_filepath: './fastlane/AuthKey_yours.p8', # 授权文件路径(
后面有详细介绍)
第五步:详细介绍其中的几个参数
scheme,很多可能不知道这个地方,应该填什么,那就如下图操作,就能找到scheme了
打开iOS工程,点击如下图的箭头地方,点击“Edit Scheme”
image.png


image.png
如下图的位置, 文本就是scheme

image.png
key_id issuer_id ,这两个参数,需要登录https://appstoreconnect.apple.com/login,去生成

image.png

image.png
点击添加后,按提示框输入信息,生成成功,刷新一下浏览器,就可以下载 API密钥 文件,如下图

image.png
这样key_id,issuer_id就有了,同时key_filepath,要填写的文件也有了。
key_filepath
点击下载,把.p8文件,放到工程目录文件下的fastlane文件夹下,如下图

image.png
到此为止,需要详细介绍的参数,全部完成。然后就是把上面生成的参数,修改一下Fastfile脚本。
第六步:最终Fastfile脚本文件

image.png
第七步:运行脚本,进行自动化打包
打开Terminal cd 到iOS工程目录fastlane XXX
这个XXX,就是Fastfile文件里面,lane:后面的文字,如下图

image.png
不出意外的话,就会自动执行起来,其中有几个关键步骤

image.png

image.png
同时,mac上会收到通知

image.png
??? 最后,全部流程完成

image.png
结尾
今天的分享至此接近尾声喽,小伴们,觉得有点用的话,或者已经看到这里面来的请点赞加关注吧~~ 后续分享更多iOS原生技术相关文章。如果有疑问的话,欢迎在下方留言~ 新年好运!!!!
补充
使用一段时间后体验,总体感觉还是很爽的,只需要第一次配置一下fastlane文件,后面每次使用就是执行一次命令,fastlane XXX;就可以轻松打包,上传。
遇到错误Communication error.please use diagnostic mode to check connectivity.you need to have outbound access to tcp port 443.,
这个问题一般是网络造成的,本人电脑用了梯子的,关闭梯子(翻墙工具)就好了