一、lnmp简介
LNMP代表的就是:Linux系统下(Nginx+MySQL(MariaDB)+PHP)这种网站服务器架构。
Linux是一类Unix计算机操作系统的统称,是目前最流行的免费操作系统。代表版本有:debian、centos、ubuntu、fedora、gentoo等。
Nginx (engine x) 是一个高性能的HTTP和反向代理web服务器,同时也提供了IMAP/POP3/SMTP服务。Nginx是由伊戈尔·赛索耶夫为俄罗斯访问量第二的Rambler.ru站点(俄文:Рамблер)开发。
MariaDB数据库管理系统是MySQL的一个分支,主要由开源社区在维护,采用GPL授权许可MariaDB的目的是完全兼容MySQL,包括API和命令行,使之能轻松成为MySQL的代替品。在存储引擎方面,使用XtraDB来代替MySQL的InnoDB。 MariaDB由MySQL的创始人Michael Widenius主导开发,MariaDB名称来自Michael Widenius的女儿Maria的名字。
PHP(Hypertext Preprocessor)是一种广泛使用的开源服务器端脚本语言,尤其适用于Web开发。它最初由Rasmus Lerdorf于1994年创建,旨在简化网页开发过程。PHP可以嵌入到HTML中,并与多种数据库集成,最常用的是Mariadb。其灵活性、易学性和强大的社区支持使得PHP成为开发动态网页和Web应用程序的首选语言之一。PHP代码在服务器上执行,生成的HTML发送到客户端,从而实现网页的动态交互。它广泛应用于各种Web开发项目,包括内容管理系统、电子商务平台和社交媒体网站。
这四种软件均为免费开源软件,组合到一起,成为一个免费、高效、扩展性强的网站服务系统。
二、WordPress简介
WordPress是使用PHP语言开发的博客平台,WordPress基于PHP和MySQL的免费开源内容管理系统(CMS)。它是全球使用最广泛的CMS软件。
三、Debian 12.7基于lnmp环境部署WordPress
1、安装Nginx
1)安装Nginx
root@debian:~# apt -y update
root@debian:~# apt -y install nginx
2、安装MariaDB
1)安装MariaDB
root@debian:~# apt -y install mariadb-server
2)登录MariaDB
root@debian:~# mysql
Welcome to the MariaDB monitor. Commands end with ; or \g.
Your MariaDB connection id is 31
Server version: 10.11.6-MariaDB-0+deb12u1 Debian 12
Copyright (c) 2000, 2018, Oracle, MariaDB Corporation Ab and others.
Type 'help;' or '\h' for help. Type '\c' to clear the current input statement.
MariaDB [(none)]> select version();
+---------------------------+
| version() |
+---------------------------+
| 10.11.6-MariaDB-0+deb12u1 |
+---------------------------+
1 row in set (0.000 sec)
3)配置MariaDB
root@debian:~# cp /etc/mysql/mariadb.conf.d/50-server.cnf{,_bak}
root@debian:~# sed -i 's/#user/user/' /etc/mysql/mariadb.conf.d/50-server.cnf
root@debian:~# sed -i 's/#datadir/datadir/' /etc/mysql/mariadb.conf.d/50-server.cnf
root@debian:~# sed -i 's/#tmpdir/tmpdir/' /etc/mysql/mariadb.conf.d/50-server.cnf
root@debian:~# sed -i '/bind-address/s/127.0.0.1/0.0.0.0/g' /etc/mysql/mariadb.conf.d/50-server.cnf
root@debian:~# sed -i -e '/max_connections/s/#//' -e '/max_connections/s/100/1000/' /etc/mysql/mariadb.conf.d/50-server.cnf
root@debian:~# sed -i -e '/general_log/s/#//g' -e '/general_log/s/mysql.log/general.log/' /etc/mysql/mariadb.conf.d/50-server.cnf
root@debian:~# sed -i -e '/log_error/s/#//g' -e '/log_error/s/error.log/mariadb.log/' /etc/mysql/mariadb.conf.d/50-server.cnf
root@debian:~# sed -i '/server-id/s/#//' /etc/mysql/mariadb.conf.d/50-server.cnf
root@debian:~# sed -i '/log_bin/s/#//' /etc/mysql/mariadb.conf.d/50-server.cnf
root@debian:~# sed -i -e '/max_binlog_size/s/#//' -e '/max_binlog_size/s/100M/512M/' /etc/mysql/mariadb.conf.d/50-server.cnf
root@debian:~# sed -i '/log_slow_query/s/#//g' /etc/mysql/mariadb.conf.d/50-server.cnf
root@debian:~# sed -i '/skip-external-locking/ilower_case_table_names = 1' /etc/mysql/mariadb.conf.d/50-server.cnf
root@debian:~# mkdir -p /var/log/mysql
root@debian:~# chown -R mysql:mysql /var/log/mysql
4)重启MariaDB
root@debian:~# systemctl restart mariadb
root@debian:~# systemctl status mariadb
5)配置root密码
root@debian:~# mysql -u root 2>/dev/null -e "ALTER USER 'root'@'localhost' IDENTIFIED BY 'G7#Wv8eDQbwdEBCL';"
root@debian:~# mysql -uroot -pG7#Wv8eDQbwdEBCL
Welcome to the MariaDB monitor. Commands end with ; or \g.
Your MariaDB connection id is 34
Server version: 10.11.6-MariaDB-0+deb12u1-log Debian 12
Copyright (c) 2000, 2018, Oracle, MariaDB Corporation Ab and others.
Type 'help;' or '\h' for help. Type '\c' to clear the current input statement.
MariaDB [(none)]>
3、安装PHP
1)安装PHP
root@debian:~# apt -y install php-fpm php-mysqli php-redis
2)配置PHP
root@debian:~# cp /etc/php/8.2/fpm/pool.d/www.conf{,_bak}
root@debian:~# sed -i 's/^listen = .*/listen = 0.0.0.0:9000/' /etc/php/8.2/fpm/pool.d/www.conf
root@debian:~# sed -i -e "/pm.max_requests/s/;//" -e '/pm.max_requests/s/500/3000/' /etc/php/8.2/fpm/pool.d/www.conf
root@debian:~# sed -i '/pm.status_listen/s/;//' /etc/php/8.2/fpm/pool.d/www.conf
root@debian:~# sed -i '/pm.status_path/s/;//' /etc/php/8.2/fpm/pool.d/www.conf
root@debian:~# sed -i 's/www-data/nginx/g' /etc/php/8.2/fpm/pool.d/www.conf
root@debian:~# useradd -s /sbin/nologin nginx
3)重启PHP-FPM
root@debian:~# systemctl restart php8.2-fpm.service
root@debian:~# systemctl status php8.2-fpm.service
4、安装WordPress
1)下载WordPress软件包
root@debian:~# apt -y install wget
root@debian:~# wget -c https://cn.wordpress.org/wordpress-6.6.2-zh_CN.zip
2)解压至Nginx发布目录
root@debian:~# apt -y install unzip
root@debian:~# unzip -o wordpress-6.6.2-zh_CN.zip -d /usr/share/nginx/html
3)授权
root@debian:~# chown -R nginx:nginx /usr/share/nginx/html/wordpress
4)配置Nginx
root@debian:~# vim /etc/nginx/nginx.conf
    user nginx nginx;
    worker_processes auto;
    pid /var/run/nginx.pid;
events {
    use epoll;
    worker_connections 10240;
    multi_accept on;
    }
http {
    include mime.types;
    default_type application/octet-stream;
    log_format json escape=json
                    '{"访问者IP":"$remote_addr",'
                    '"访问时间":"$time_iso8601",'
                    '"访问页面":"$uri",'
                    '"请求返回时间":"$request_time/S",'
                    '"请求方法类型":"$request_method",'
                    '"请求状态":"$status",'
                    '"请求体大小":"$body_bytes_sent/B",'
                    '"访问者搭载的系统配置和软件类型":"$http_user_agent",'
                    '"虚拟服务器IP":"$server_addr"}';
    access_log /var/log/nginx/access.log json;
    error_log /var/log/nginx/error.log warn;
    sendfile on;
    tcp_nopush on;
    keepalive_timeout 120;
    tcp_nodelay on;
    server_tokens off;
    gzip on;
    gzip_min_length 1k;
    gzip_buffers 4 64k;
    gzip_http_version 1.1;
    gzip_comp_level 4;
    gzip_types text/plain application/x-javascript text/css application/xml;
    gzip_vary on;
    client_max_body_size 512m;
    client_body_buffer_size 128k;
    proxy_connect_timeout 90;
    proxy_send_timeout 90;
    proxy_buffer_size 4k;
    proxy_buffers 4 32k;
    proxy_busy_buffers_size 64k;
    large_client_header_buffers 4 4k;
    client_header_buffer_size 4k;
    open_file_cache_valid 30s;
    open_file_cache_min_uses 1;
    include /etc/nginx/conf.d/*.conf;
}
创建引用目录
root@debian:~# mkdir -p /etc/nginx/conf.d
创建WordPress配置文件
root@debian:~# vim /etc/nginx/conf.d/wordpress.conf
server {
    listen 80;
    server_name localhost;
    access_log /var/log/nginx/access_wordpress.log json;
    error_log /var/log/nginx/error_wordpress.log warn;
    location / {
    root /usr/share/nginx/html/wordpress;
    index index.php index.html index.htm;
    }
    location ~* .php$ {
    root /usr/share/nginx/html/wordpress;
    fastcgi_connect_timeout 300s;
    fastcgi_send_timeout 300s;
    fastcgi_read_timeout 300s;
    fastcgi_buffer_size 64k;
    fastcgi_buffers 4 64k;
    fastcgi_busy_buffers_size 128k;
    fastcgi_temp_file_write_size 256k;
    fastcgi_pass 127.0.0.1:9000;
    fastcgi_index index.php;
    fastcgi_param SCRIPT_FILENAME $document_root$fastcgi_script_name;
    include fastcgi_params;
    }
}
5)重启Nginx
root@debian:~# nginx -t
nginx: the configuration file /etc/nginx/nginx.conf syntax is ok
nginx: configuration file /etc/nginx/nginx.conf test is successful
root@debian:~# systemctl restart nginx
root@debian:~# systemctl status nginx
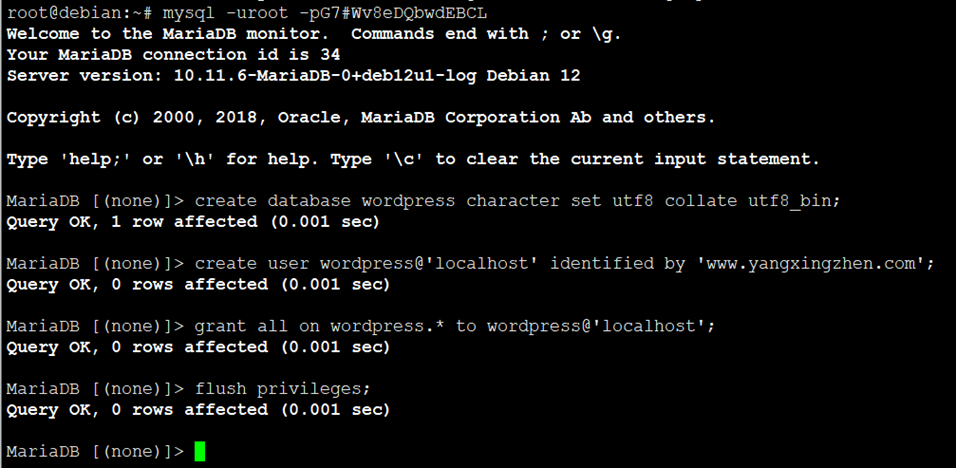
6)创建WordPress数据库及授权
root@debian:~# mysql -uroot -pG7#Wv8eDQbwdEBCL
Welcome to the MariaDB monitor. Commands end with ; or \g.
Your MariaDB connection id is 34
Server version: 10.11.6-MariaDB-0+deb12u1-log Debian 12
Copyright (c) 2000, 2018, Oracle, MariaDB Corporation Ab and others.
Type 'help;' or '\h' for help. Type '\c' to clear the current input statement.
MariaDB [(none)]> create database wordpress character set utf8 collate utf8_bin;
Query OK, 1 row affected (0.001 sec)
MariaDB [(none)]> create user wordpress@'localhost' identified by 'www.yangxingzhen.com';
Query OK, 0 rows affected (0.001 sec)
MariaDB [(none)]> grant all on wordpress.* to wordpress@'localhost';
Query OK, 0 rows affected (0.001 sec)
MariaDB [(none)]> flush privileges;
Query OK, 0 rows affected (0.001 sec)
7)WordPress安装配置
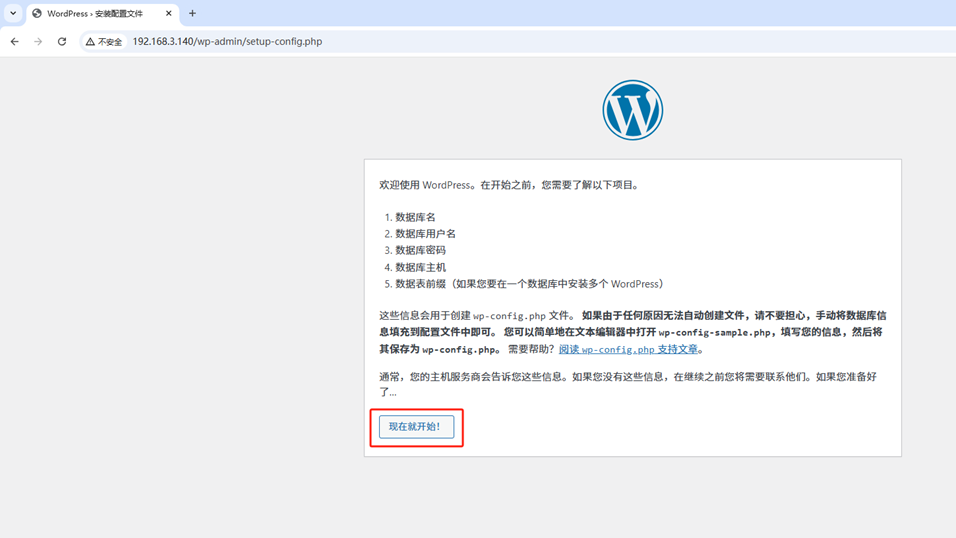
1、浏览器访问:http://192.168.3.140,如下图所示
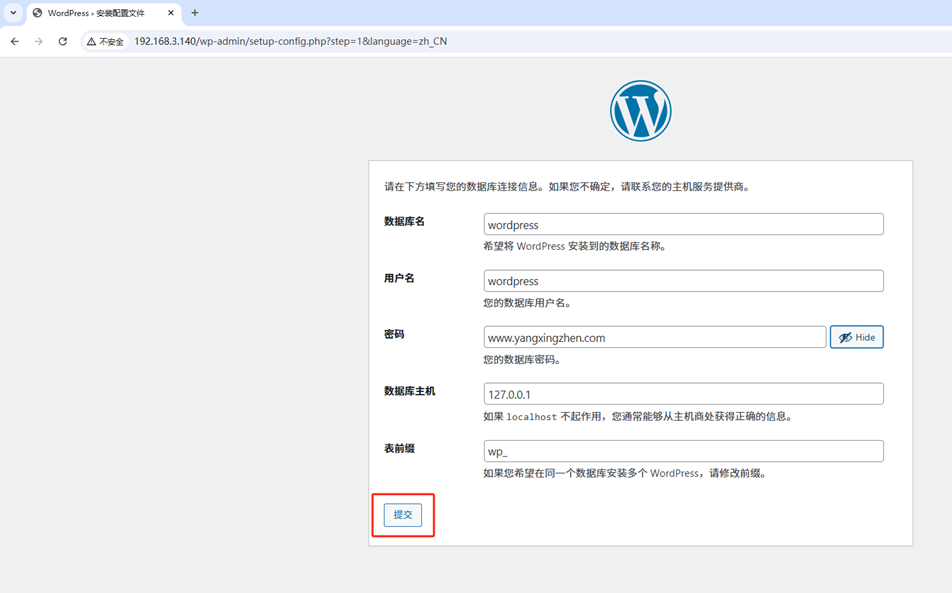
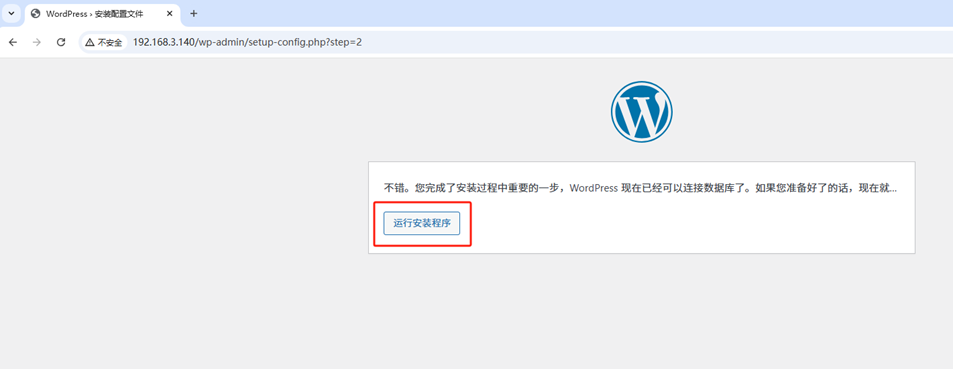
2、填写数据库名、用户名、密码和数据库主机信息,填写完成后点击提交按钮
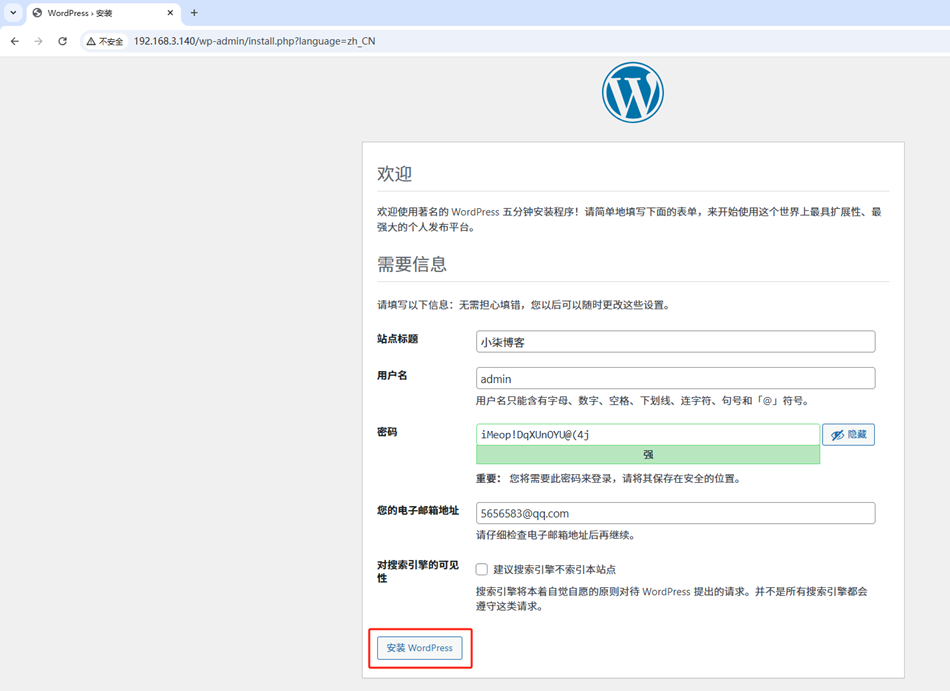
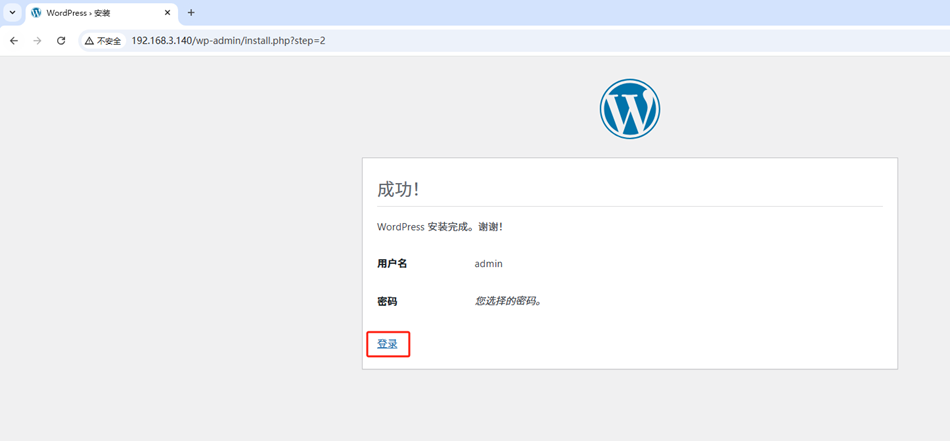
3、填写站点标题、用户名、密码及邮箱地址,填写完成后点击安装WordPress按钮
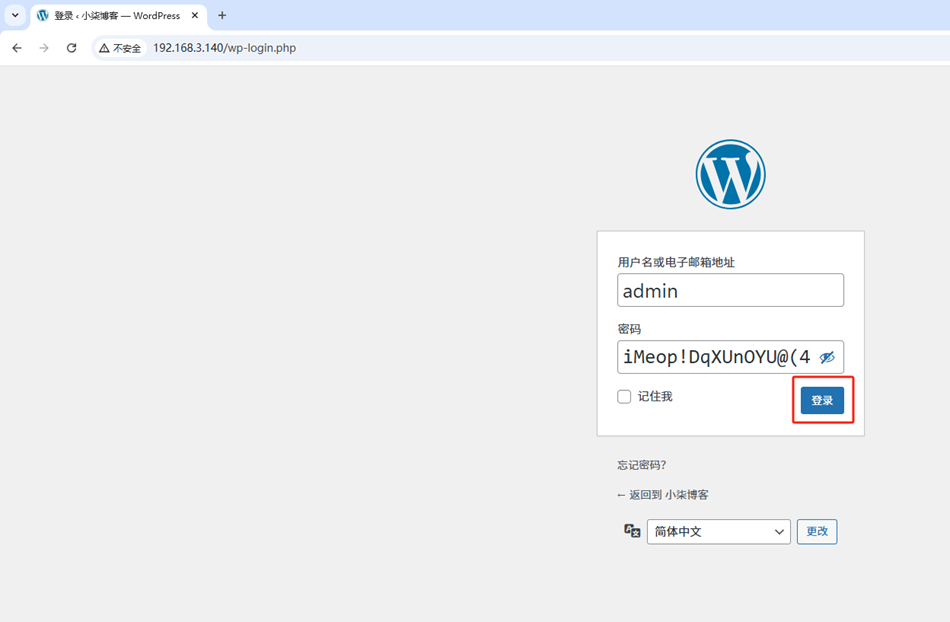
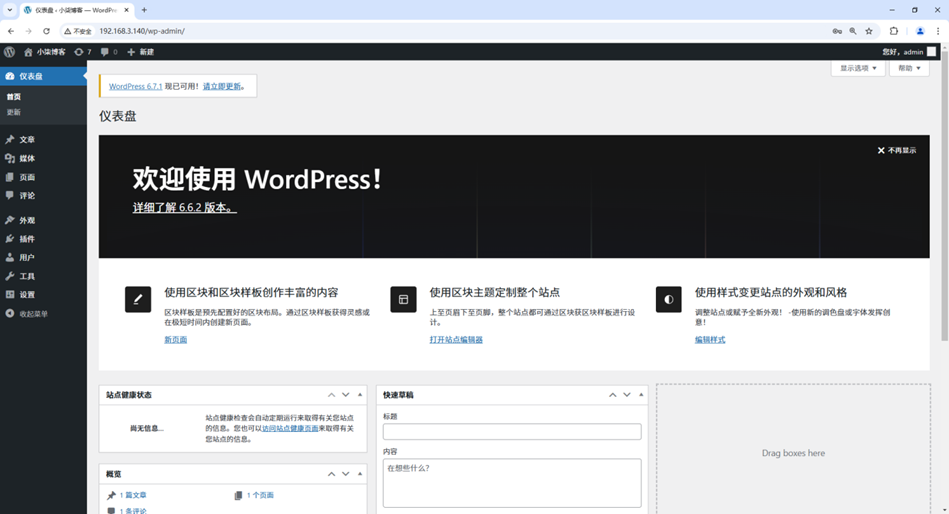
4、登录WordPress
输入刚才配置好的用户名和密码,如下图所示
历史上的今天
11 月
26
 51工具盒子