环境信息:
操作系统:CentOS 7.4
文章源自小柒网-https://www.yangxingzhen.cn/5467.html
IP:192.168.0.111
文章源自小柒网-https://www.yangxingzhen.cn/5467.html
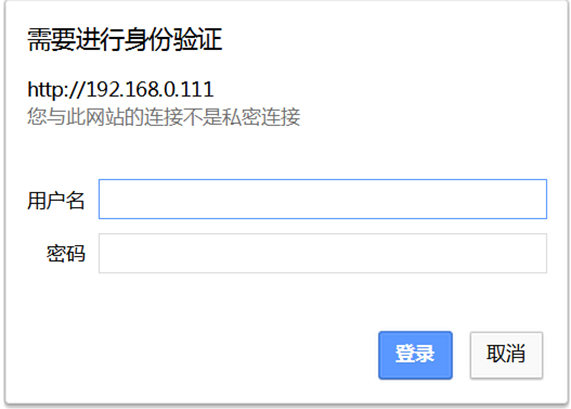
如果我们在 Nginx 下搭建了一些站点,但是由于站点内容或者流量的关系,我们并不想让所有人都能正常访问,那么我们可以设置访问认证。只有让用户输入正确的用户名和密码才能正常访问。效果图如下:
文章源自小柒网-https://www.yangxingzhen.cn/5467.html
 文章源自小柒网-https://www.yangxingzhen.cn/5467.html
在 Nginx 下,提供了 ngx_http_auth_basic_module 模块实现让用户只有输入正确的用户名密码才允许访问web内容。默认情况下,Nginx 已经安装了该模块。所以整体的一个过程就是先用第三方工具设置用户名、密码(其中密码已经加过密),然后保存到文件中,接着在 Nginx 配置文件中根据之前事先保存的文件开启访问验证。
文章源自小柒网-https://www.yangxingzhen.cn/5467.html
生成密码可以使用 htpasswd,或者使用 openssl 。下面以 htpasswd 为例。
文章源自小柒网-https://www.yangxingzhen.cn/5467.html
一、安装htpassed工具
文章源自小柒网-https://www.yangxingzhen.cn/5467.html
1、通过YUM安装httpd-tools
文章源自小柒网-https://www.yangxingzhen.cn/5467.html
[root@localhost ~]# yum -y install httpd-tools
文章源自小柒网-https://www.yangxingzhen.cn/5467.html
2、设置用户名和密码,并把用户名、密码保存到指定文件中:
文章源自小柒网-https://www.yangxingzhen.cn/5467.html
[root@localhost ~]# mkdir /usr/local/nginx/auth
[root@localhost ~]# htpasswd -c /usr/local/nginx/auth/passwd admin
注意:/usr/local/nginx/auth/passwd是生成密码后的文件保存路径(passwdfile),admin是用户名(username)
查看最后生成的密码文件的内容:(admin分号后的内容就是加密过的密码)
[root@localhost ~]# cat /usr/local/nginx/auth/passwd
admin:$apr1$YiiyRyOe$C7voJqf8XHqsneZpbuI.31
二、修改配置文件
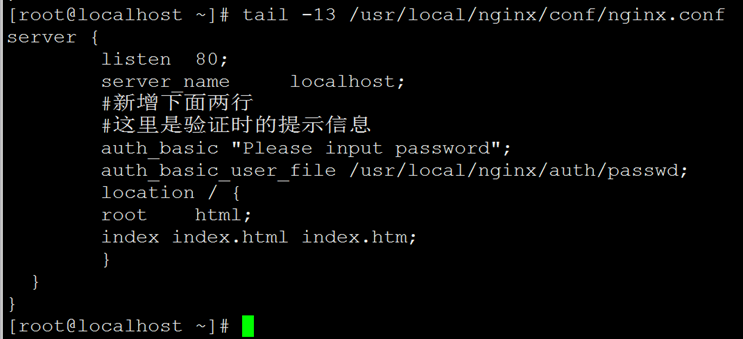
1、编辑Nginx配置文件,在对应的站点server段加入以下内容
[root@localhost ~]# vim /usr/local/nginx/conf/nginx.conf
#这里是验证时的提示信息
auth_basic "Please input password";
auth_basic_user_file /usr/local/nginx/auth/passwd;
2、重启Nginx服务
[root@localhost ~]# /usr/local/nginx/sbin/nginx -t
nginx: the configuration file /usr/local/nginx/conf/nginx.conf syntax is ok
nginx: configuration file /usr/local/nginx/conf/nginx.conf test is successful
[root@localhost ~]# /usr/local/nginx/sbin/nginx -s reload
3、验证
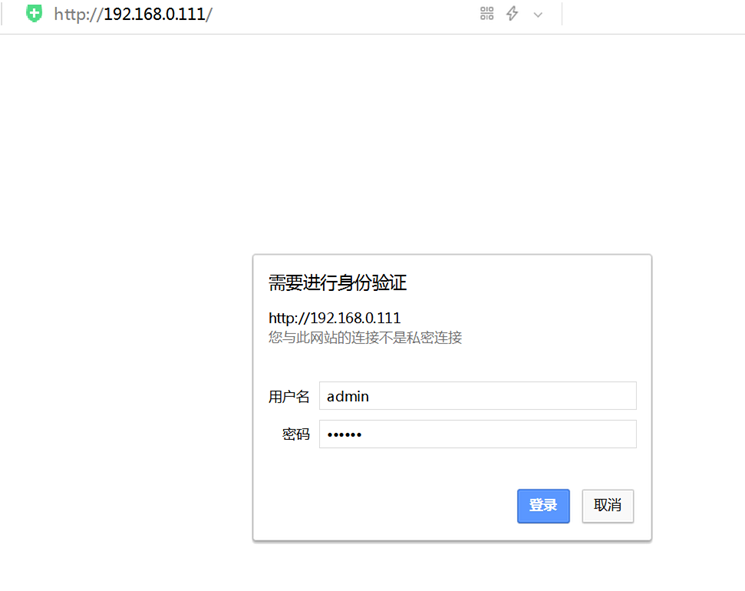
#浏览器访问服务器IP,出现以下界面
登录前
登录后(这里只是演示,就没写页面)
不输入用户名密码,效果图如下
三、htpasswd参数详解
htpasswd [-cmdpsD] [passwdfile] [username]
htpasswd -b[cmdpsD] [passwdfile] [username] password
htpasswd -n[mdps] username
htpasswd -nb[mdps] username password
htpasswd命令选项参数说明
-c 创建一个加密文件;
-n 不更新加密文件,只将htpasswd命令加密后的用户名密码显示在屏幕上;
-m 默认htpassswd命令采用MD5算法对密码进行加密;
-d htpassswd命令采用CRYPT算法对密码进行加密;
-p htpassswd命令不对密码进行进行加密,即明文密码;
-s htpassswd命令采用SHA算法对密码进行加密;
-b htpassswd命令行中一并输入用户名和密码而不是根据提示输入密码;
-D 删除指定的用户。
部分参数使用演示
1、新增用户
用法:htpasswd -b [passwdfile] [username] [passwd]
[root@localhost ~]# htpasswd -b /usr/local/nginx/auth/passwd test 123456
Adding password for user test
2、删除用户
用法:htpasswd -D [passwdfile] [username]
[root@localhost ~]# htpasswd -D /usr/local/nginx/auth/passwd test
Deleting password for user test
3、创建文件,添加用户(注意密码文件,否则已存在文件会覆盖原内容)
用法:htpasswd -bc [passedfile] [username]
[root@localhost ~]# htpasswd -bc /usr/local/nginx/auth/passwd Test 123
Adding password for user Test
[root@localhost ~]# cat /usr/local/nginx/auth/passwd
Test:$apr1$a/jfDg9p$lzeItTUOP6SO/x8Is6act.

继续阅读
Nginx最后更新:2022-11-23
 51工具盒子


