一、系统环境
{#1028-1506572825053}系统环境:LNMP(可选择LAMP)
{#4257-1506572697088}系统版本:CentOS 6.9 (Minimal)
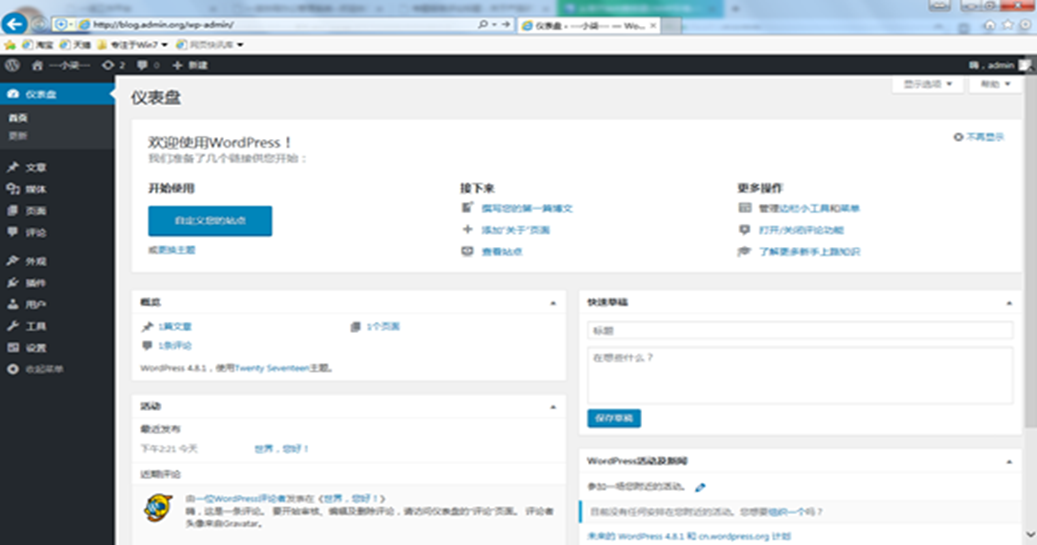
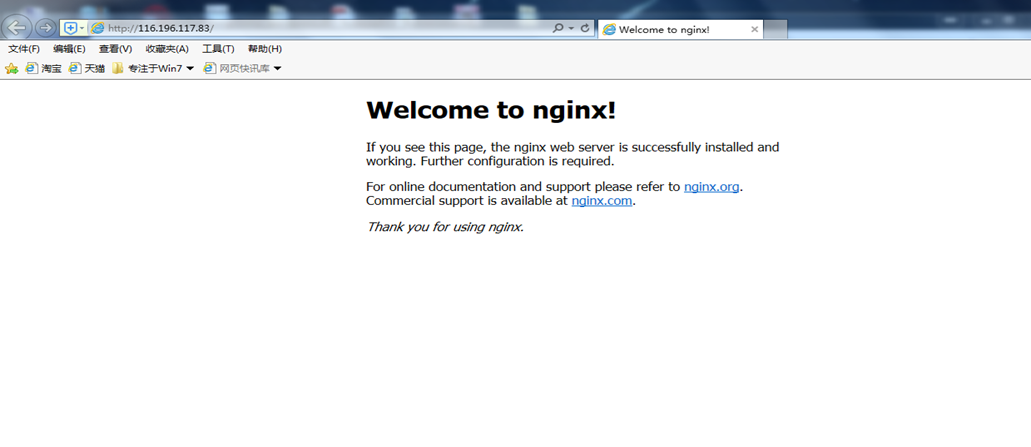
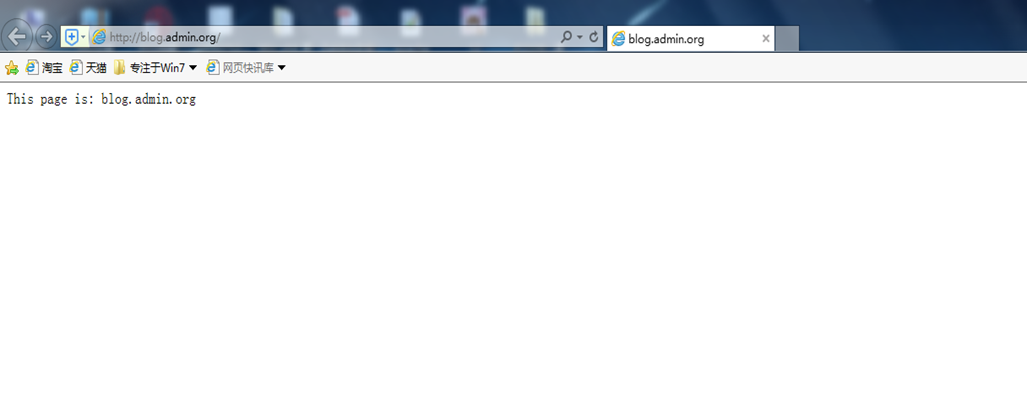
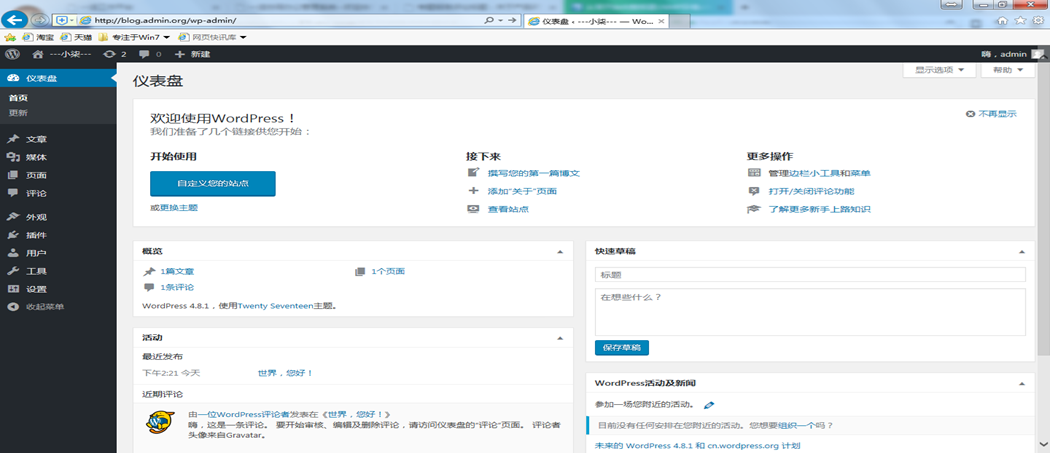
{#3054-1506572717853}下面用一个以最小化方式(Minimal)安装的CentOS 6.9操作系统为例,演示LNMP环境完整搭建过程,并且最后部署了一个WordPress博客,最后完成的效果如下:
二、安装Nginx
{#6067-1506600831815}1、安装Nginx依赖函数库pcre、openssl
{#3570-1506600896387}[root@localhost ~]# yum -y install pcre pcre-devel openssl-devel openssh
{#5867-1506601149343}[root@localhost ~]# rpm -qa pcre pcre-devel openssl openssl-devel
{#5329-1506601211821}2、下载安装Nginx,这里使用的是nginx-1.13.4
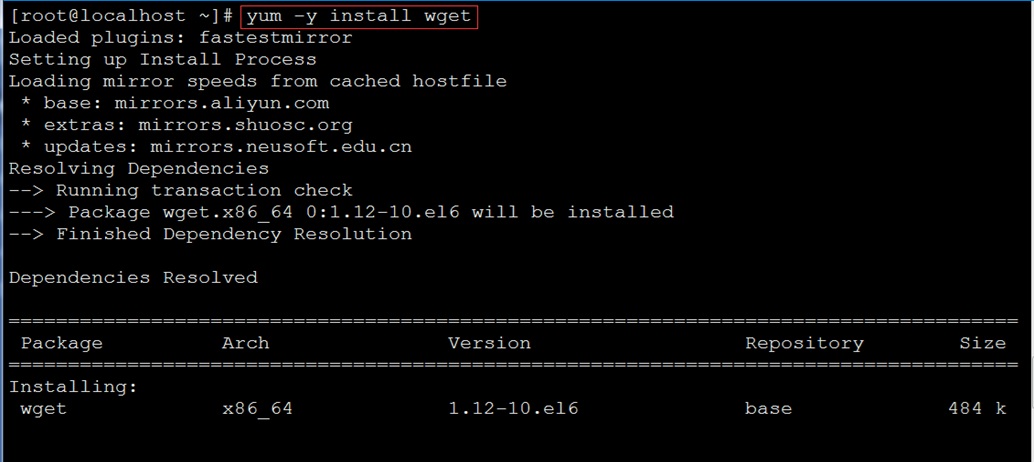
[root@localhost ~]# yum -y install wget
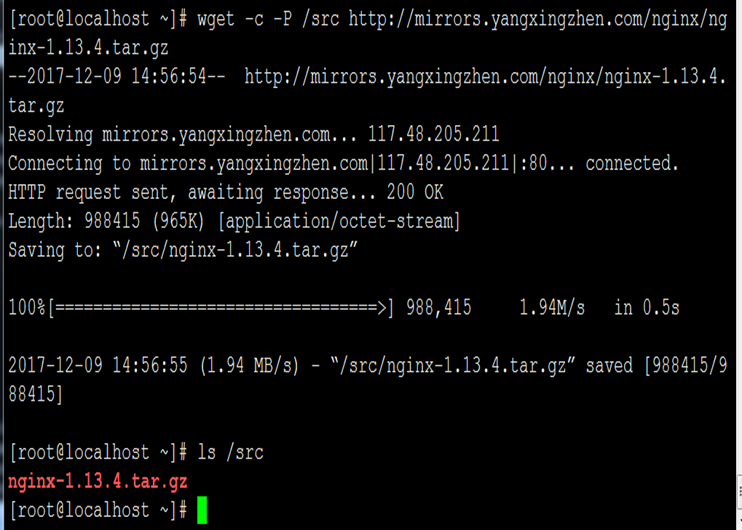
[root@localhost ~]# wget -c -P /src https://mirrors.yangxingzhen.com/nginx/nginx-1.13.4.tar.gz
[root@localhost ~]# ls /src
{#3055-1506601568695}2、解压软件包
[root@localhost ~]# cd /src
[root@localhost src]# tar zxf nginx-1.13.4.tar.gz
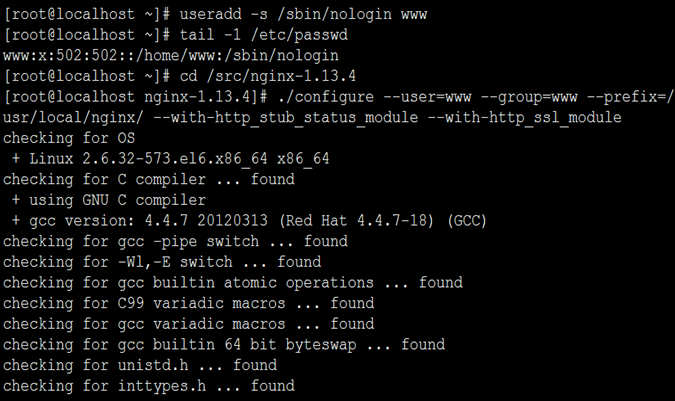
{#4068-1506601726797}3、指定编译参数(需要安装gcc编译器)
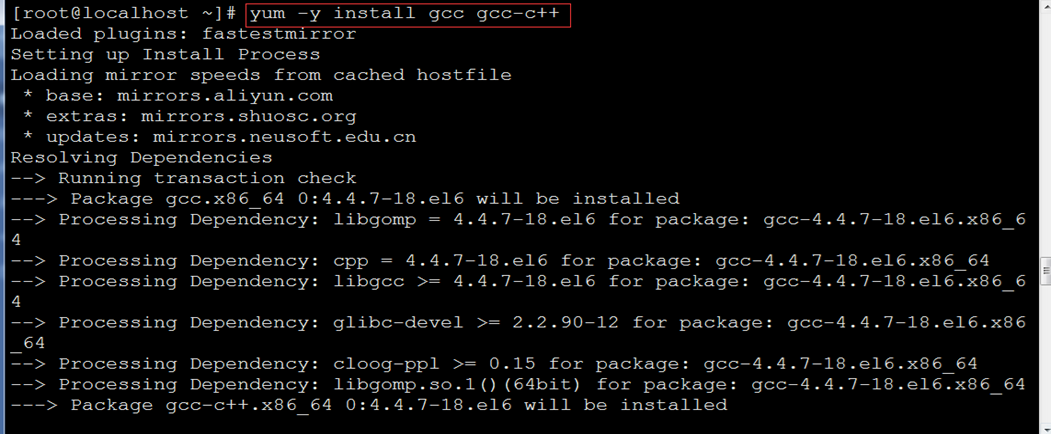
[root@localhost ~]# yum -y install gcc gcc-c++
[root@localhost ~]# useradd -s /sbin/nologin www
[root@localhost ~]# cd /src/nginx-1.13.4
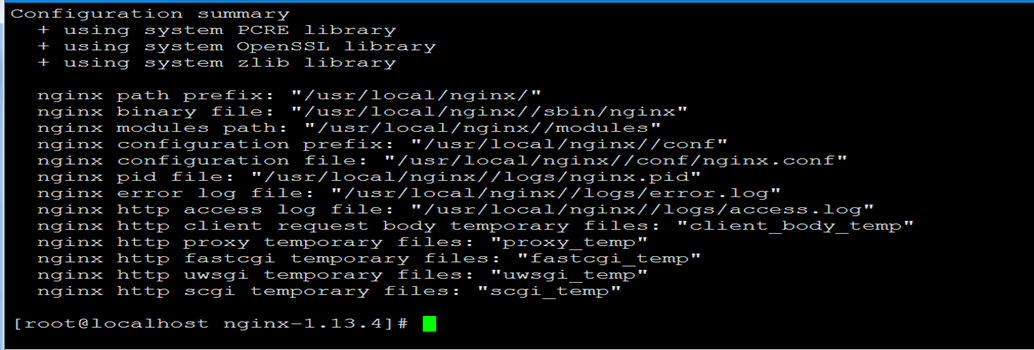
[root@localhost nginx-1.13.4]# ./configure --user=www --group=www --prefix=/usr/local/nginx/ --with-http_stub_status_module --with-http_ssl_module
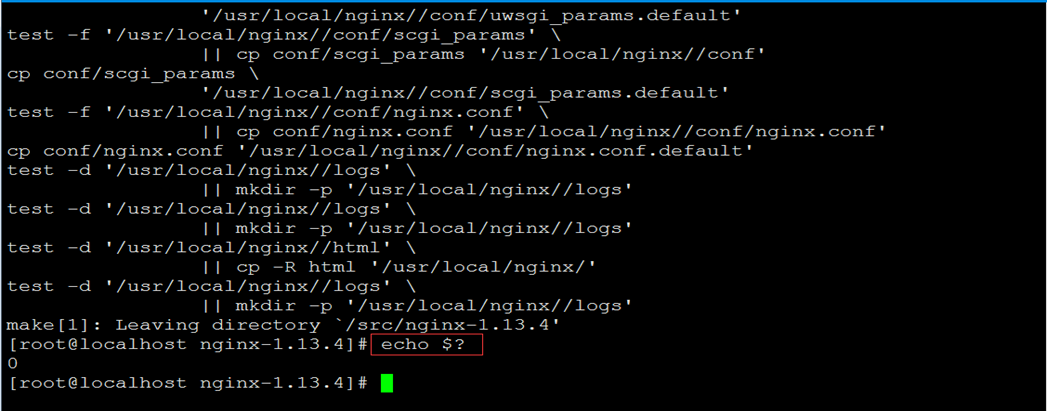
{#3933-1506602749933}#结果输出0则说明命令执行成功
[root@localhost nginx-1.13.4]# echo $?
{#8033-1506602749933}4、安装nginx
[root@localhost nginx-1.13.4]# make && make install
{#4067-1506602957548}# 结果输出0则说明命令执行成功
[root@localhost nginx-1.13.4]# echo $?
5、测试Nginx,启动Nginx
[root@localhost nginx-1.13.4]# /usr/local/nginx/sbin/nginx -t
[root@localhost nginx-1.13.4]# /usr/local/nginx/sbin/nginx
{#5089-1506603239086}#浏览器输入本机ip
{#8542-1506603198202}6、域名配置
{#9060-1506603425842}#因为要搭建一个博客服务,所以这里配置的域名为blog.admin.org,操作过程如下:
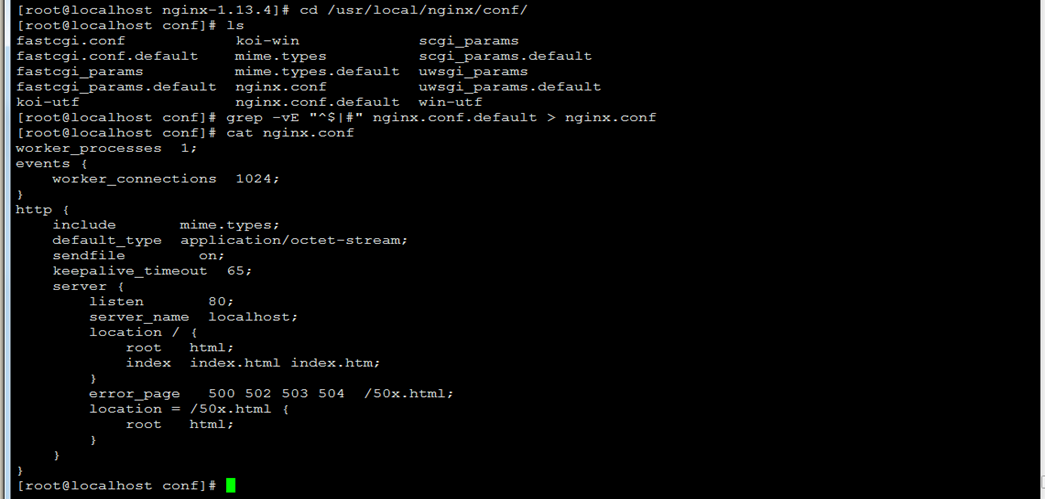
[root@localhost conf]# cd /usr/local/nginx/conf/
[root@localhost conf]# grep --vE "^$|#" nginx.conf.default > nginx.conf (过滤空行跟#开头的注释行)
[root@localhost conf]# cat nginx.conf
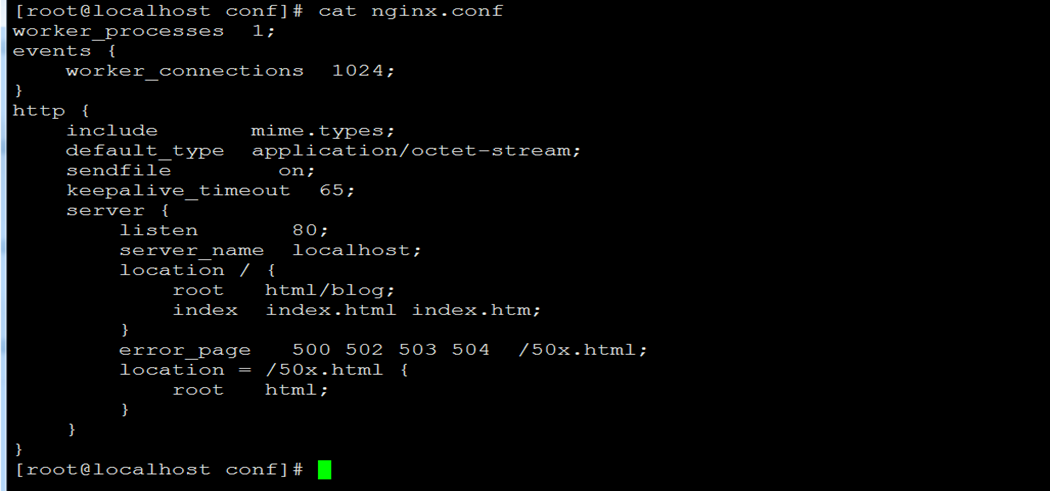
7、修改Nginx配置文件
{#9122-1506603819861}编辑nginx.conf,内容如下:
[root@localhost conf]# vim nginx.conf
8、创建域名对应的站点目录及文件
[root@localhost conf]# cd ../html
[root@localhost html]# mkdir blog
[root@localhost html]# echo "This page is: blog.admin.org" > blog/index.html
[root@localhost html]# cat blog/index.html
9{#7220-1506603004224}、重启nginx
[root@localhost html]# ../sbin/nginx -t
[root@localhost html]# ../sbin/nginx -s reload (平滑重启)
10、本机上进行测试
{#5077-1506605648077}先修改/etc/hosts
[root@localhost html]# echo "127.0.0.1 blog.admin.org" >> /etc/hosts
{#1021-1506605688315}再使用命令测试:
[root@localhost html]# curl blog.admin.org
[root@localhost html]# wget blog.admin.org
11、在Windows 7测试(需要添加hosts文件)
C:\Windows\System32\drivers\etc\hosts,添加116.196.117.83 blog.admin.org
三、安装MySQL
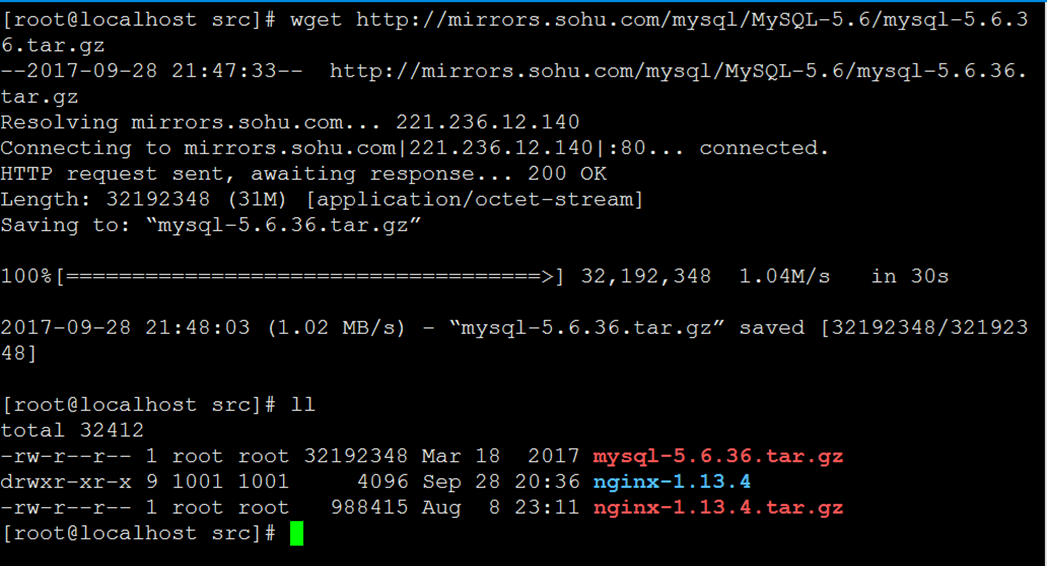
{#2822-1506606254039}1、下载MySQL软件包
[root@localhost ~]# cd /src
[root@localhost src]# wget -c https://mirrors.yangxingzhen.com/mysql/mysql-5.6.36.tar.gz
[root@localhost src]# ls -l
{#6861-1506606216704}2、解压软件包
[root@localhost src]# tar zxf mysql-5.6.36.tar.gz
{#7556-1506606570372}3、预编译(MySQL-5.5版本及以上需要cmake)
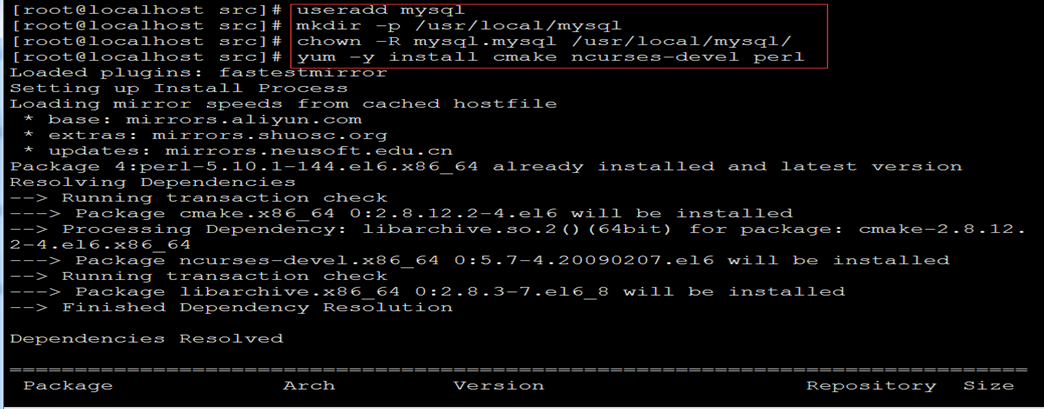
[root@localhost src]# useradd -s /sbin/nologin mysql
[root@localhost src]# mkdir -p /usr/local/mysql
[root@localhost src]# chown -R mysql.mysql /usr/local/mysql
[root@localhost src]# yum -y install cmake ncurses-devel perl
[root@localhost src]# cd mysql-5.6.36
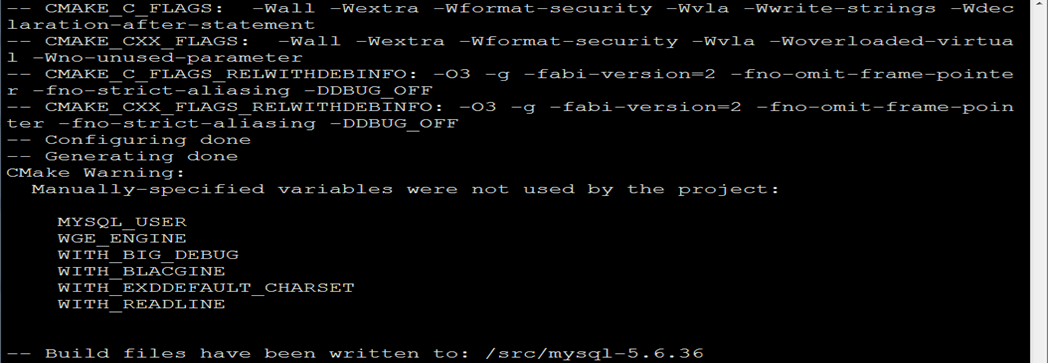
[root@localhost mysql-5.6.36]# cmake . -DCMAKE_INSTALL_PREFIX=/usr/local/mysql \
{#4426-1506658095733}-DMYSQL_DATADIR=/data/mysql \
{#3630-1506658095733}-DSYSCONFDIR=/etc \
{#6497-1506658095733}-DMYSQL_UNIX_ADDR=/tmp/mysql.sock \
{#8085-1506658095733}-DMYSQL_USER=mysql \
{#4037-1506658095733}-DMYSQL_TCP_PORT=3306 \
{#5426-1506658095733}-DWGE_ENGINE=1 \
{#3099-1506658095733}-DWITH_INNOBASE_STORAGE_ENGINE=1 \
{#3463-1506658095733}-DWITH_PARTITION_STORAGE_ENGINE=1 \
{#9331-1506658095733}-DWITH_BLACGINE=1 \
{#3051-1506658095733}-DWITH_MYISAM_STORAGE_ENGINE=1 \
{#6741-1506658095733}-DWITH_READLINE=1 \
{#7938-1506658095733}-DENABLED_LOCAL_INFILE=1 \
{#4134-1506658095733}-DWITH_EXDDEFAULT_CHARSET=utf8 \
{#9784-1506658095733}-DDEFAULT_COLLATION=utf8_general_ci \
{#3650-1506658095733}-DEXTRA_CHARSETS=all \
{#3240-1506658095733}-DWITH_BIG_DEBUG=0
{#9921-1506644028469}4、编译及安装MySQL
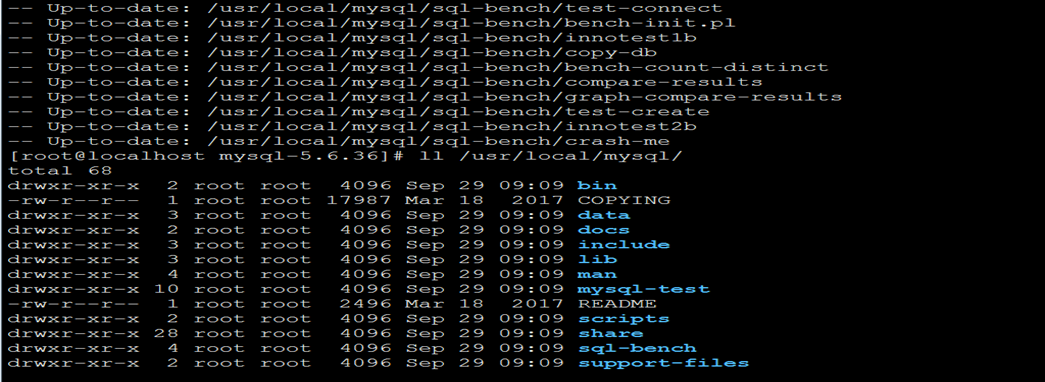
[root@localhost mysql-5.6.36]# make &&make install
5、修改配置文件
编辑vim /etc/my.cnf,内容如下
[root@localhost mysql-5.6.36]# vim /etc/my.cnf
[mysqld]
datadir = /data/mysql
socket = /tmp/mysql.sock
user = mysql
log-error = /var/log/mysqld.log
character_set_server = utf8

\[client\]
default-character-set = utf8


\[mysql\]
default-character-set = utf8
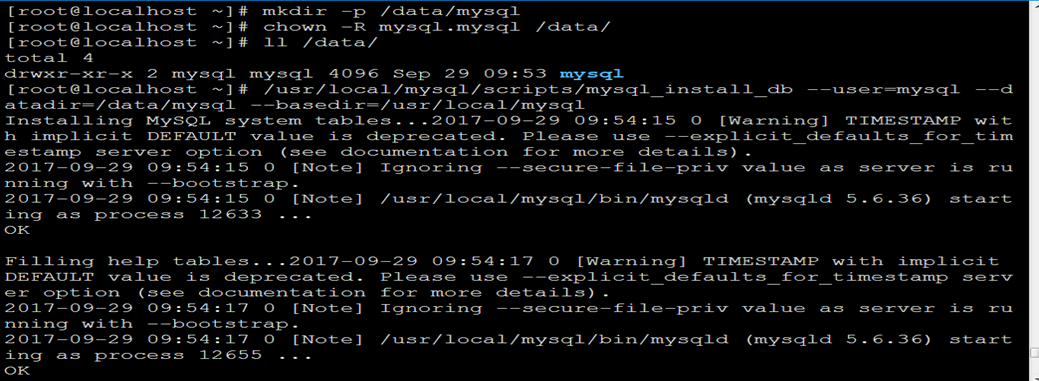
6、初始化数据库
[root@localhost ~]# mkdir -p /data/mysql
[root@localhost ~]# chown -R mysql.mysql /data/mysql
[root@localhost ~]# /usr/local/mysql/scripts/mysql_install_db --user=mysql --datadir=/data/mysql --basedir=/usr/local/mysql
{#7022-1506643473743}7、配置并启动MySQL数据库
[root@localhost ~]# ln -s /usr/local/mysql/bin/* /usr/bin
[root@localhost ~]# cp /usr/local/mysql/support-files/mysql.server /etc/init.d/mysqld
[root@localhost ~]# chmod o+x /etc/init.d/mysqld
[root@localhost ~]# /etc/init.d/mysqld start
#检查端口、进程
[root@localhost ~]# netstat -lntup | grep mysqld
[root@localhost ~]# ps -ef | grep mysqld
8、设置MySQL开机启动
[root@localhost ~]# chkconfig --add mysqld
[root@localhost ~]# chkconfig mysqld on
[root@localhost ~]# chkconfig --list mysqld
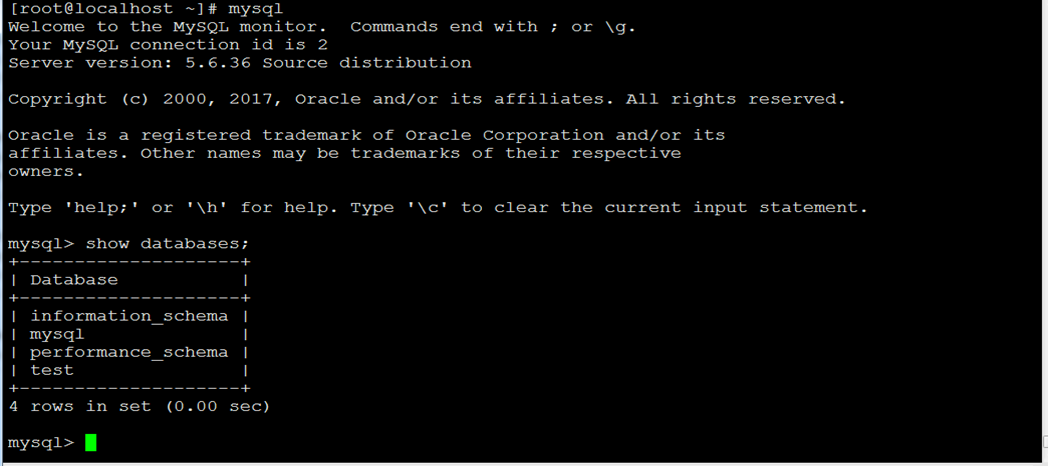
{#9049-1506653384999}9、登录MySQL测试
[root@localhost ~]# mysql
mysql> show databases;
四、安装PHP
安装Libiconv
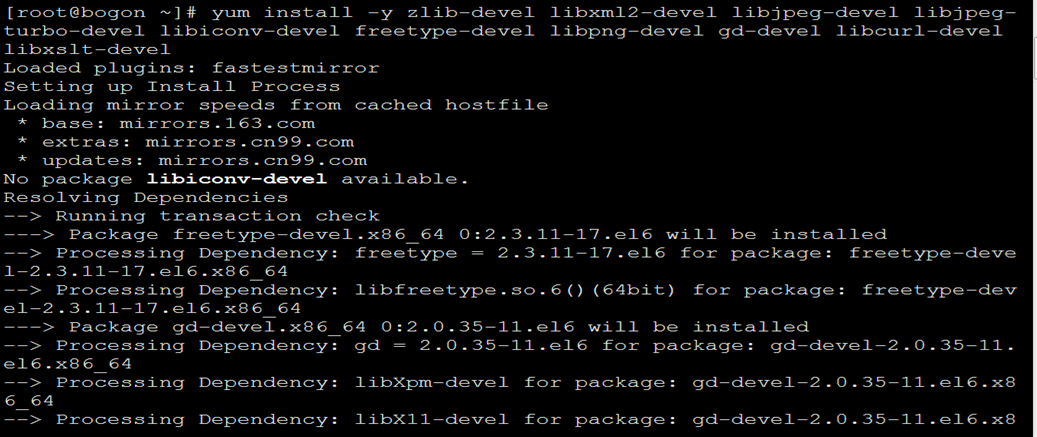
1、安装PHP依赖函数库
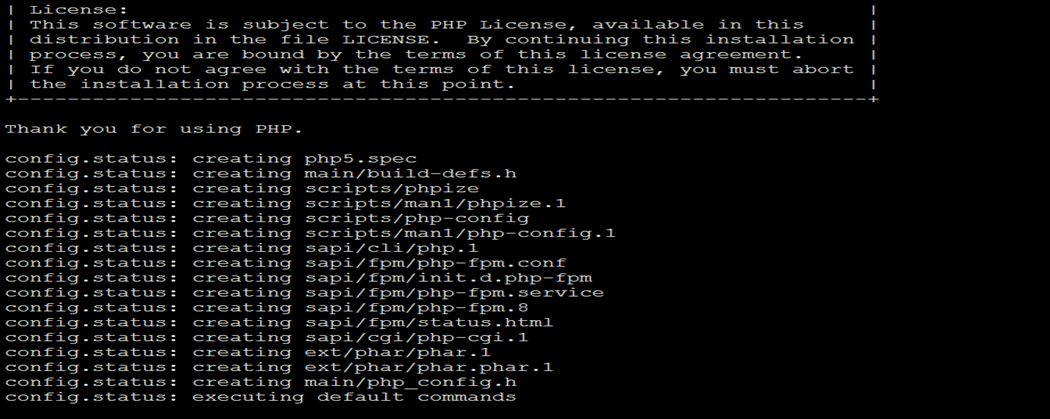
[root@localhost ~]# yum install -y zlib-devel libxml2-devel libjpeg-devel libjpeg-turbo-devel libiconv-devel freetype-devel libpng-devel gd-devel libcurl-devel libxslt-devel
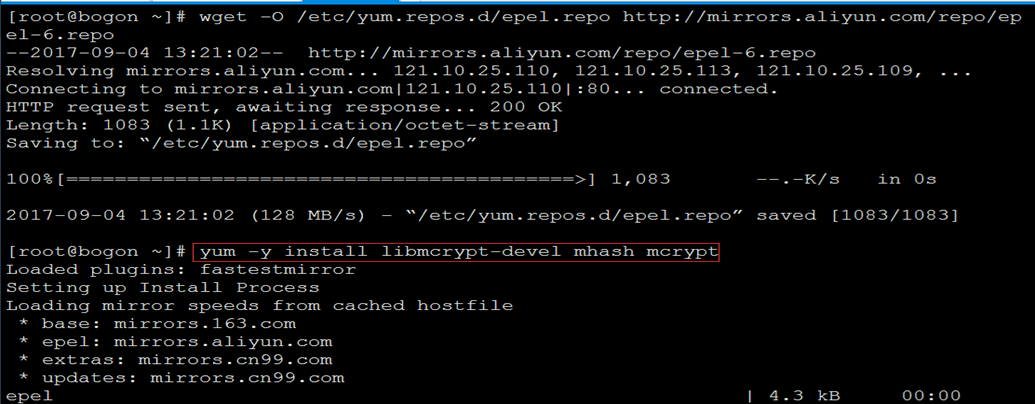
{#1453-1506653860608}2、安装libmcrypt库、mhash加密扩展库、mcrypt加密扩展库
[root@localhost ~]# wget -O /etc/yum.repos.d/epel.repo http://mirrors.aliyun.com/repo/epel-6.repo
[root@localhost ~]# yum -y install libmcrypt-devel mhash mcrypt
{#5667-1506654277945}3、源码安装libiconv
[root@localhost ~]# wget -c https://mirrors.yangxingzhen.com/libiconv/libiconv-1.14.tar.gz
[root@localhost ~]# tar zxf libiconv-1.14.tar.gz
[root@localhost ~]# cd libiconv-1.14
[root@localhost libiconv-1.14]# ./configure --prefix=/usr/local/libiconv
[root@localhost libiconv-1.14]# make &&make install
安装PHP
{#7864-1506654925264}1、下载php源码包,这里采用的是php-5.6.29
[root@localhost libiconv-1.14]# cd /src
[root@localhost src]# wget -c http://mirrors.sohu.com/php/php-5.6.29.tar.gz
{#8714-1506653699015}2、解压软件包
[root@localhost src]# tar zxf php-5.6.29.tar.gz
[root@localhost src]# ls -l
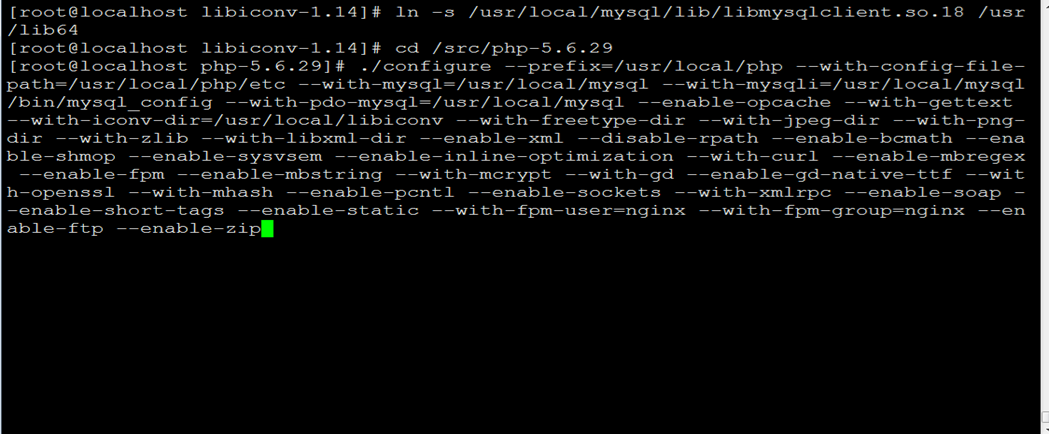
{#2845-1506653790617}3、配置PHP的安装参数
[root@localhost src]# cd /src/php-5.6.29
[root@localhost php-5.6.29]# ln -s /usr/local/mysql/lib/libmysqlclient.so.18 /usr/lib64
[root@localhost php-5.6.29]# ./configure --prefix=/usr/local/php \
{#9776-1506657859583}--with-config-file-path=/usr/local/php/etc \
{#1011-1506657859583}--with-mysql=/usr/local/mysql \
{#4065-1506657859583}--with-mysqli=/usr/local/mysql/bin/mysql_config \
{#1021-1506657859583}--with-pdo-mysql=/usr/local/mysql \
{#2040-1506657859583}--enable-opcache \
{#5770-1506658461266}--with-gettext \
{#2340-1506658437500}--with-iconv-dir=/usr/local/libiconv \
{#6923-1506657859583}--with-freetype-dir \
{#8758-1506657859583}--with-jpeg-dir \
{#7528-1506657859583}--with-png-dir \
{#3738-1506657859583}--with-zlib \
{#3320-1506657859583}--with-libxml-dir \
{#6082-1506657859583}--enable-xml \
{#6890-1506657859583}--disable-rpath \
{#8843-1506657859583}--enable-bcmath \
{#6410-1506657859583}--enable-shmop \
{#8522-1506657859583}--enable-sysvsem \
{#4261-1506657859583}--enable-inline-optimization \
{#2023-1506657859583}--with-curl \
{#1022-1506657859583}--enable-mbregex \
{#6857-1506657859583}--enable-fpm \
{#7283-1506657859583}--enable-mbstring \
{#8469-1506657859583}--with-mcrypt \
{#4663-1506657859583}--with-gd \
{#1783-1506657859583}--enable-gd-native-ttf \
{#8118-1506657859583}--with-openssl \
{#8734-1506657859583}--with-mhash \
{#4541-1506657859583}--enable-pcntl \
{#0041-1506657859583}--enable-sockets \
{#6000-1506657859583}--with-xmlrpc \
{#5732-1506657859583}--enable-soap \
{#4552-1506657859583}--enable-short-tags \
{#7798-1506657859583}--enable-static \
{#6173-1506657859583}--with-fpm-user=www \
{#2160-1506657859583}--with-fpm-group=www \
{#9550-1506657859583}--enable-ftp \
{#1851-1506657859583}--enable-zip
{#8455-1506657994536}4、编译及安装PHP
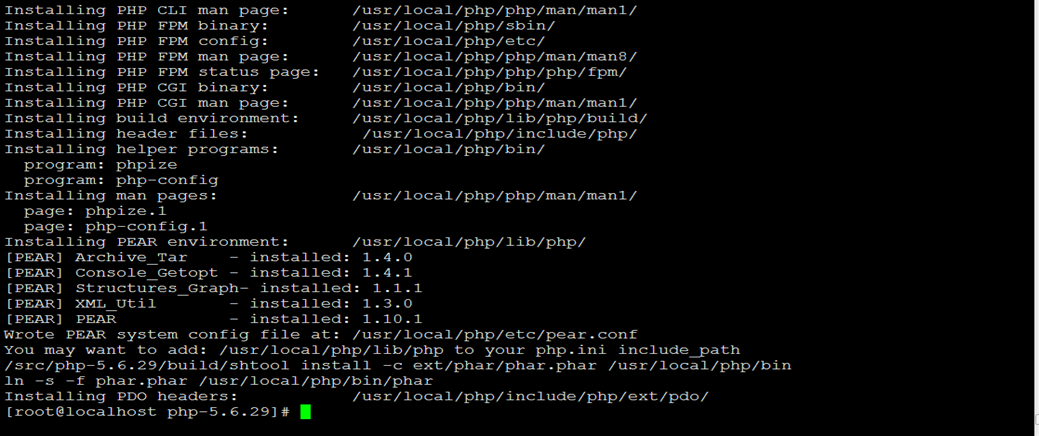
[root@localhost php-5.6.29]# make &&make install
{#4563-1506658117762}5、配置与启动PHP
[root@localhost php-5.6.29]# cp /usr/local/php/etc/php-fpm.conf.default /usr/local/php/etc/php-fpm.conf
[root@localhost php-5.6.29]# /usr/local/php/sbin/php-fpm
#LNMP环境测试
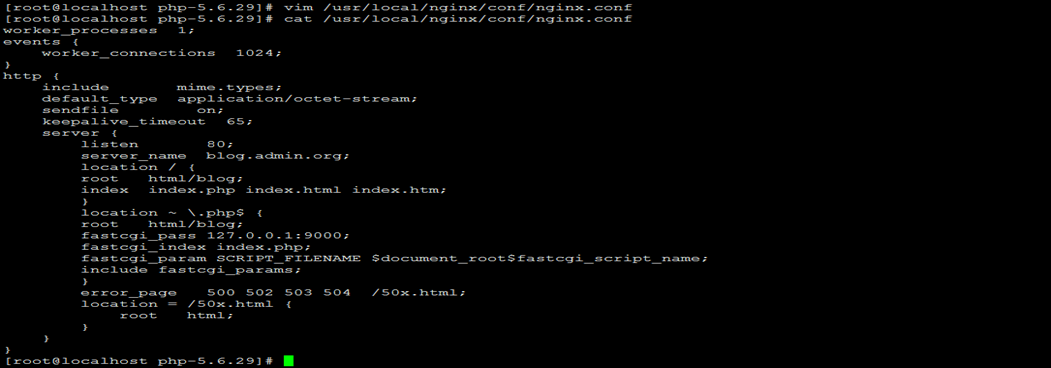
{#1010-1506659212013}1、修改nginx.conf配置文件
{#3017-1506659540799}2、配置域名站点目录
[root@localhost php-5.6.29]# cd /usr/local/nginx/html/blog/
[root@localhost blog]# echo "<? phpinfo(); ?>" > test.php
[root@localhost blog]# /usr/local/nginx/sbin/nginx -t
[root@localhost blog]# /usr/local/nginx/sbin/nginx -s reload
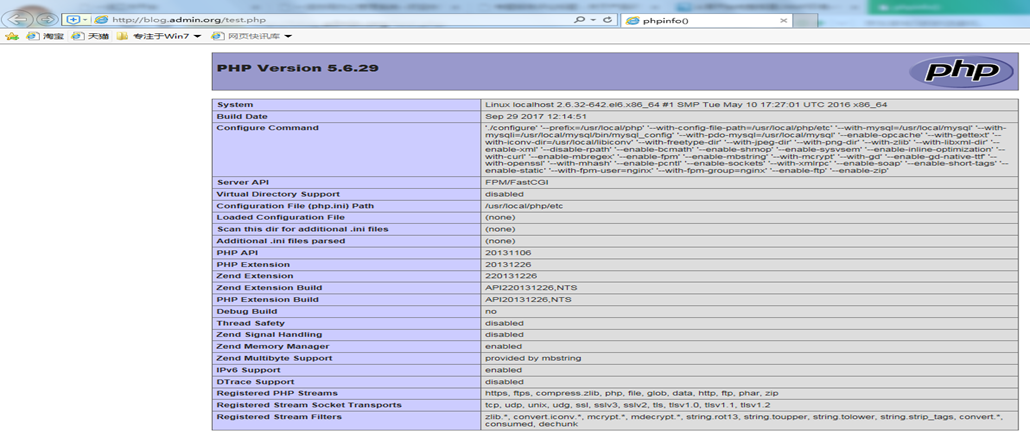
{#9049-1506659898411}3、Windows7主机上在浏览器中输入地址http://blog.admin.org/test.php进行访问
五、安装WordPress
{#9842-1506660108262}1、MYSQL数据库准备
{#7162-1506660146692}#进入mysql终端命令行
[root@localhost blog]# mysql
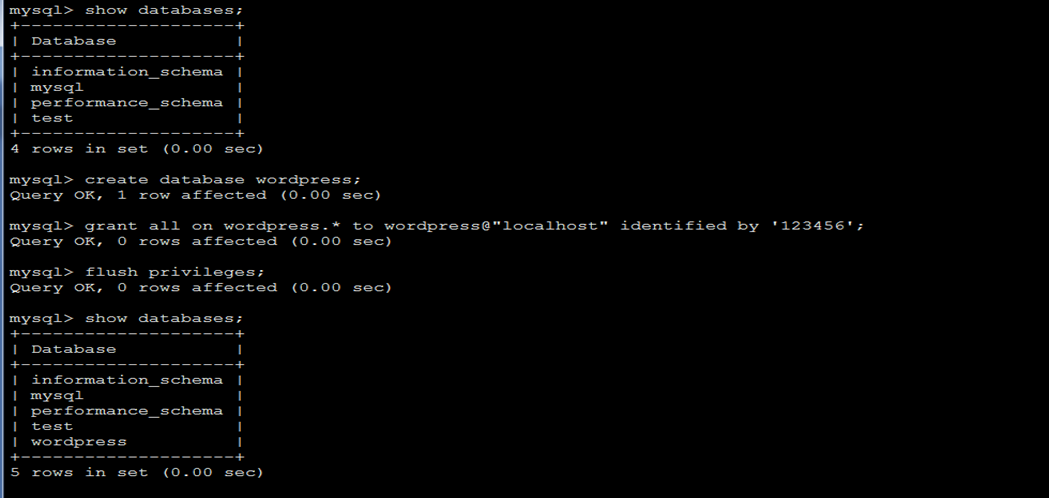
{#9898-1506660097674}#创建数据库wordpress、创建wordpress用户并授权
mysql> create database wordpress;
mysql> grant all on wordpress.* to wordpress@"localhost" identified by '123456';
mysql> flush privileges;
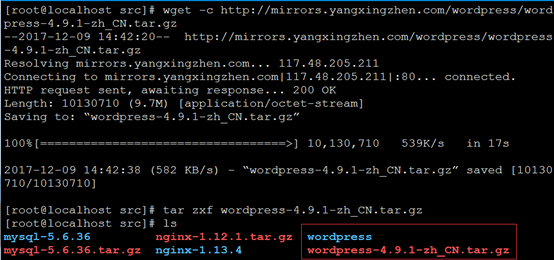
{#8621-1506660354981}2、下载wordpress安装包
[root@localhost blog]# cd /src
[root@localhost src]# wget -c https://mirrors.yangxingzhen.com/wordpress/wordpress-4.9.1-zh_CN.tar.gz
3、解压软件包
[root@localhost src]# tar zxf wordpress-4.9.1-zh_CN.tar.gz
{#1346-1506660793952}4、拷贝WordPress程序到blog目录下,对blog下所有文件授予www用户和组的权限
[root@localhost src]# cd wordpress
[root@localhost wordpress]# cp -a * /usr/local/nginx/html/blog
[root@localhost wordpress]# chown -R www.www /usr/local/nginx/html/blog
5、访问安装WordPress
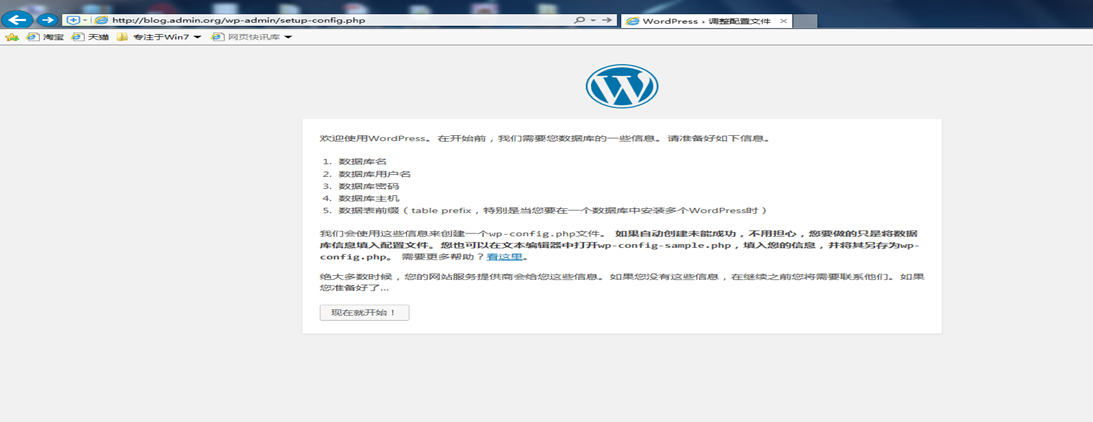
#在windows7主机浏览器输入http://blog.admin.org
{#1483-1506664403492}接下来的安装都是非常人性化的,点击"现在就开始",出现下面的页面:
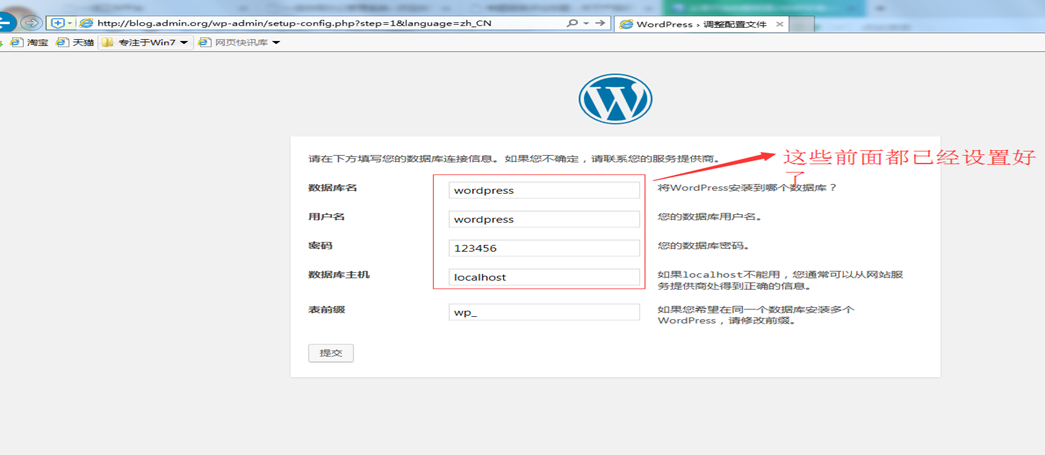
{#5150-1506664685324}填好信息后,点击"提交",如下:
{#3427-1506664768112}点击"进行安装",接下来就会让我们填写一些信息,如下:
{#3325-1506666015956}点击"安装WordPress",之后就会显示如下页面:
{#3051-1506666161268}输入账号和密码,会显示如下页面:
{#2577-1506666108214}显示上面的页面,就说明我们的WordPress安装成功了!接下来就可以好好管理自己的个人WordPress博客站点了!
继续阅读
历史上的今天
12 月
14
- 2024CentOS 7.9搭建Postfix邮件服务器
- 2024SSH的三种代理方式 Linux最后更新:2024-1-24
 51工具盒子