Nexus是一个很强大的私服软件,不仅仅是作为Java的Maven打包使用,同样的也支持pypi、yum源、apt源、npm等等。
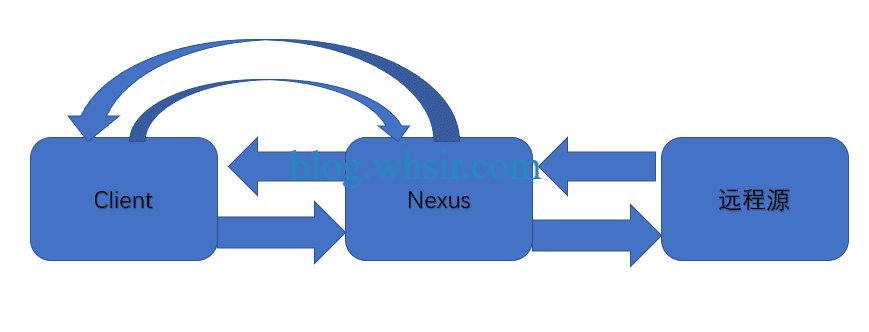
如果没有私服,我们所有maven、pypi等下载的包都需要通过官方的仓库或是第三方的镜像仓库,如果整个Team都这么做,那么每次打包下载的时候就会浪费大量的时间花费在网路IO上。
私服的概念就是在本地架设一个中央仓库,在这个中央仓库上配置远程服务器源,当我们客户端需要某些包时,如果本地Nexus中央仓库没有这个包,就去远程服务器源中下载,下载成功后,这个包会保存在中央仓库中,下次再使用这个包时,直接从Nexus中央仓库获取,就无需从远程服务器下载了。

当前安装环境:4c4g、关闭selinux、关闭firewalld/iptables(或自行配置)、ulimit设置65536、Centos7.x、jdk1.8
1、安装jdk1.8和nginx
rpm -ivh http://mirrors.wlnmp.com/centos/wlnmp-release-centos.noarch.rpm yum install jdk1.8 wnginx -y
|-----|-------------------------------------------------------------------------------------------------------| | 1 2 | rpm -ivh http://mirrors.wlnmp.com/centos/wlnmp-release-centos.noarch.rpm yum install jdk1.8 wnginx -y |
2、下载Nexus包
访问nexus官网:https://www.sonatype.com/nexus-repository-oss


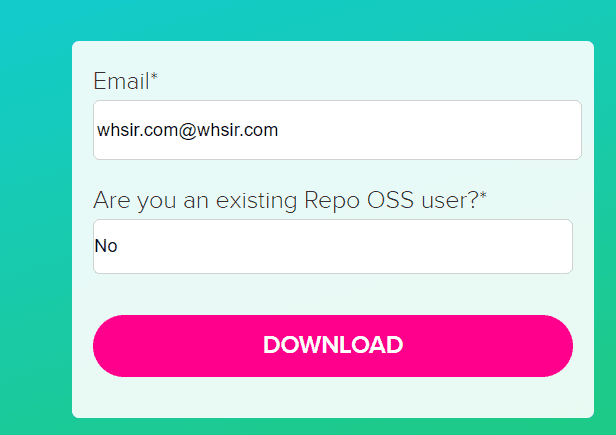
随便输入个邮箱地址


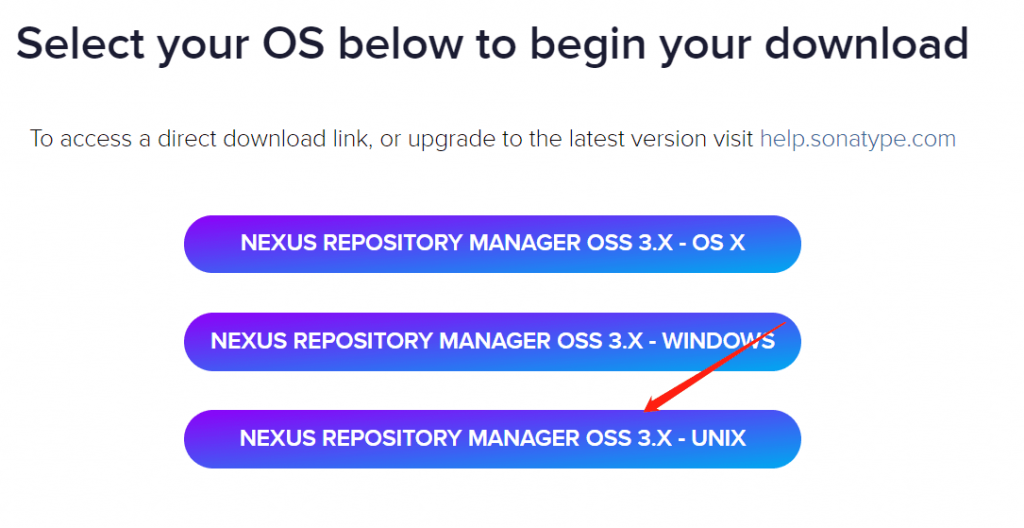
网盘下载:链接: https://pan.baidu.com/s/1vDMVRWpJcoUUXHG0u01Wug 提取码: 6rdv
3、上传包到服务器
我这里上传到了/data/nexus目录下
tar xf nexus-3.25.1-04-unix.tar.gz
|---|------------------------------------| | 1 | tar xf nexus-3.25.1-04-unix.tar.gz |
解压缩后会创建两个文件夹,nexus-3.25.1-04是主程序,所有配置都是在这里,sonatype-work是仓库目录
4、启动服务
ln -sv /data/nexus/nexus-3.25.1-04/bin/nexus /usr/bin/nexus nexus start
|-----|-------------------------------------------------------------------------| | 1 2 | ln -sv /data/nexus/nexus-3.25.1-04/bin/nexus /usr/bin/nexus nexus start |
启动后默认会开启8081端口
5、配置nginx反向代理
vi /usr/local/nginx/conf/vhost/demo.conf
|---|------------------------------------------| | 1 | vi /usr/local/nginx/conf/vhost/demo.conf |
server { listen 80; server_name 10.10.189.160; root /data/nexus/nexus-3.25.1-04; # allow large uploads of files client_max_body_size 1G; # optimize downloading files larger than 1G # proxy_max_temp_file_size 2G; location / { # Use IPv4 upstream address instead of DNS name to avoid attempts by nginx to use IPv6 DNS lookup proxy_pass http://127.0.0.1:8081/; proxy_set_header Host $host; proxy_set_header X-Real-IP $remote_addr; proxy_set_header X-Forwarded-For $proxy_add_x_forwarded_for; } }
|-------------------------------------------------|--------------------------------------------------------------------------------------------------------------------------------------------------------------------------------------------------------------------------------------------------------------------------------------------------------------------------------------------------------------------------------------------------------------------------------------------------------------------------------------------------------------| | 1 2 3 4 5 6 7 8 9 10 11 12 13 14 15 16 17 18 19 | server { listen 80; server_name 10.10.189.160; root /data/nexus/nexus-3.25.1-04; # allow large uploads of files client_max_body_size 1G; # optimize downloading files larger than 1G # proxy_max_temp_file_size 2G; location / { # Use IPv4 upstream address instead of DNS name to avoid attempts by nginx to use IPv6 DNS lookup proxy_pass http://127.0.0.1:8081/; proxy_set_header Host $host; proxy_set_header X-Real-IP $remote_addr; proxy_set_header X-Forwarded-For $proxy_add_x_forwarded_for; } } |
6、访问nexus
默认账号admin,密码在/data/nexus/sonatype-work/nexus3/admin.password
第一次登录需要更改密码


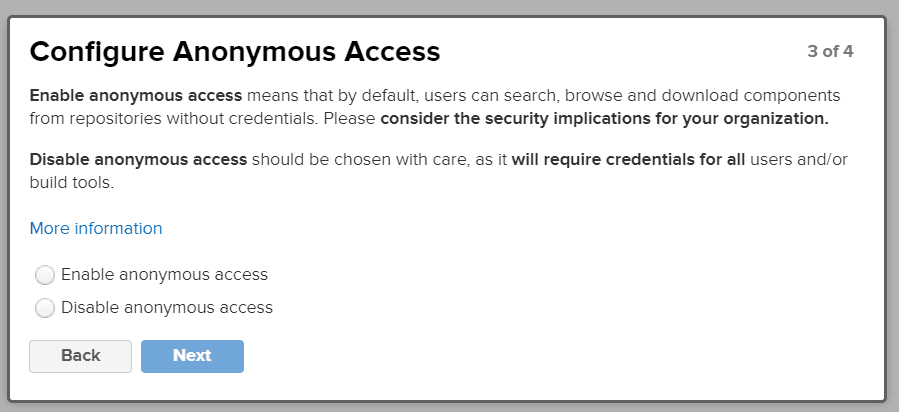
是否启用匿名访问,我这里直接启用匿名了,这个选项后期可随时更改

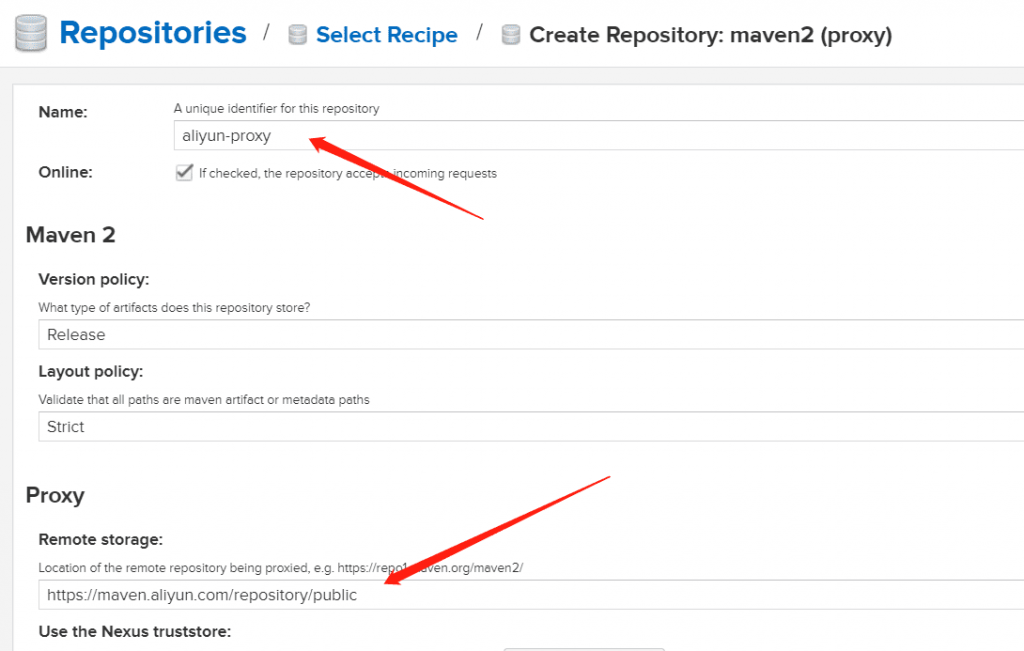
7、增加阿里云镜像仓库

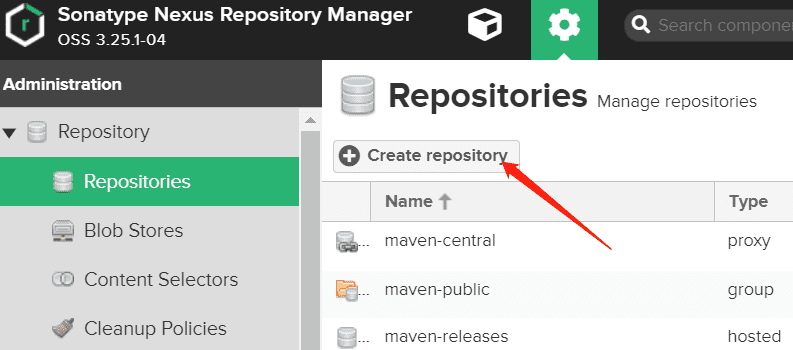
选择maven2(proxy)
name名称随便写
地址:https://maven.aliyun.com/repository/public
其他选项默认即可,点击创建

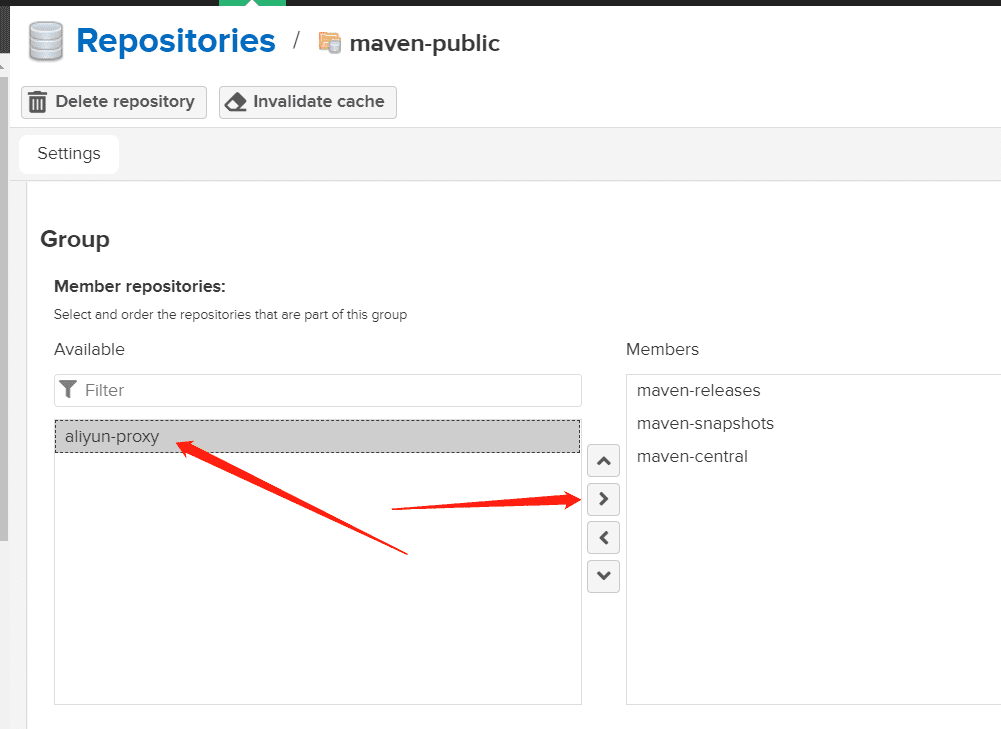
点击maven-public,将刚刚创建的aliyun-proxy添加进来


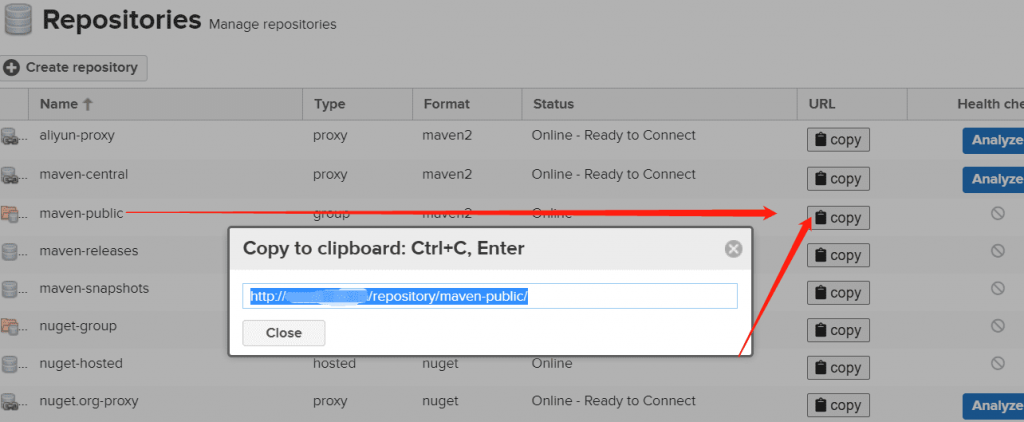
复制maven-public地址
8、maven私服配置
maven配置私服有两种方法:
setting.xml是全局模式,pom.xml是单独模式,若setting.xml和pom.xml同时配置了,以pom.xml为准。
setting.xml设置
在https://mirrors.tuna.tsinghua.edu.cn/apache/maven/maven-3/选择版本,在binaries/目录中下载tar.gz包到服务器中,解压缩后复制maven-public地址添加到maven的conf/settings.xml中
<mirrors> <mirror> <id>maven-public</id> <mirrorOf>*</mirrorOf> <name>maven-public</name> <url>http://10.10.189.160/repository/maven-public/</url> </mirror> </mirrors>
|-----------------|--------------------------------------------------------------------------------------------------------------------------------------------------------------------------------------------------| | 1 2 3 4 5 6 7 8 | <mirrors> <mirror> <id>maven-public</id> <mirrorOf>*</mirrorOf> <name>maven-public</name> <url>http://10.10.189.160/repository/maven-public/</url> </mirror> </mirrors> |
pom.xml设置
<repositories> <repository> <id>maven-public</id> <name>maven-public</name> <url>http://10.10.189.160/repository/maven-public/</url> <releases> <enabled>true</enabled> </releases> <snapshots> <enabled>true</enabled> </snapshots> </repository> </repositories>
|-------------------------------|--------------------------------------------------------------------------------------------------------------------------------------------------------------------------------------------------------------------------------------------------------------------------------------------------------| | 1 2 3 4 5 6 7 8 9 10 11 12 13 | <repositories> <repository> <id>maven-public</id> <name>maven-public</name> <url>http://10.10.189.160/repository/maven-public/</url> <releases> <enabled>true</enabled> </releases> <snapshots> <enabled>true</enabled> </snapshots> </repository> </repositories> |
如果是Jenkins发布,就按以上配置maven即可,如果开发本地使用,只需要把maven-public地址丢给开发就好了,如果开发有特殊要求,可以按照阿里云镜像添加方式,继续添加其他源仓库。


 51工具盒子

