前言
在使用博客的时候,发现用户评论文章,但是我没有第一时间看到信息(没有邮箱推送)。这样子会导致于用户的交互性变差,我相信评论的人还是希望可以回额复一下的。所以博客评论如果有了回复通过邮箱提醒,可以增加用户的体验。
设置SMTP
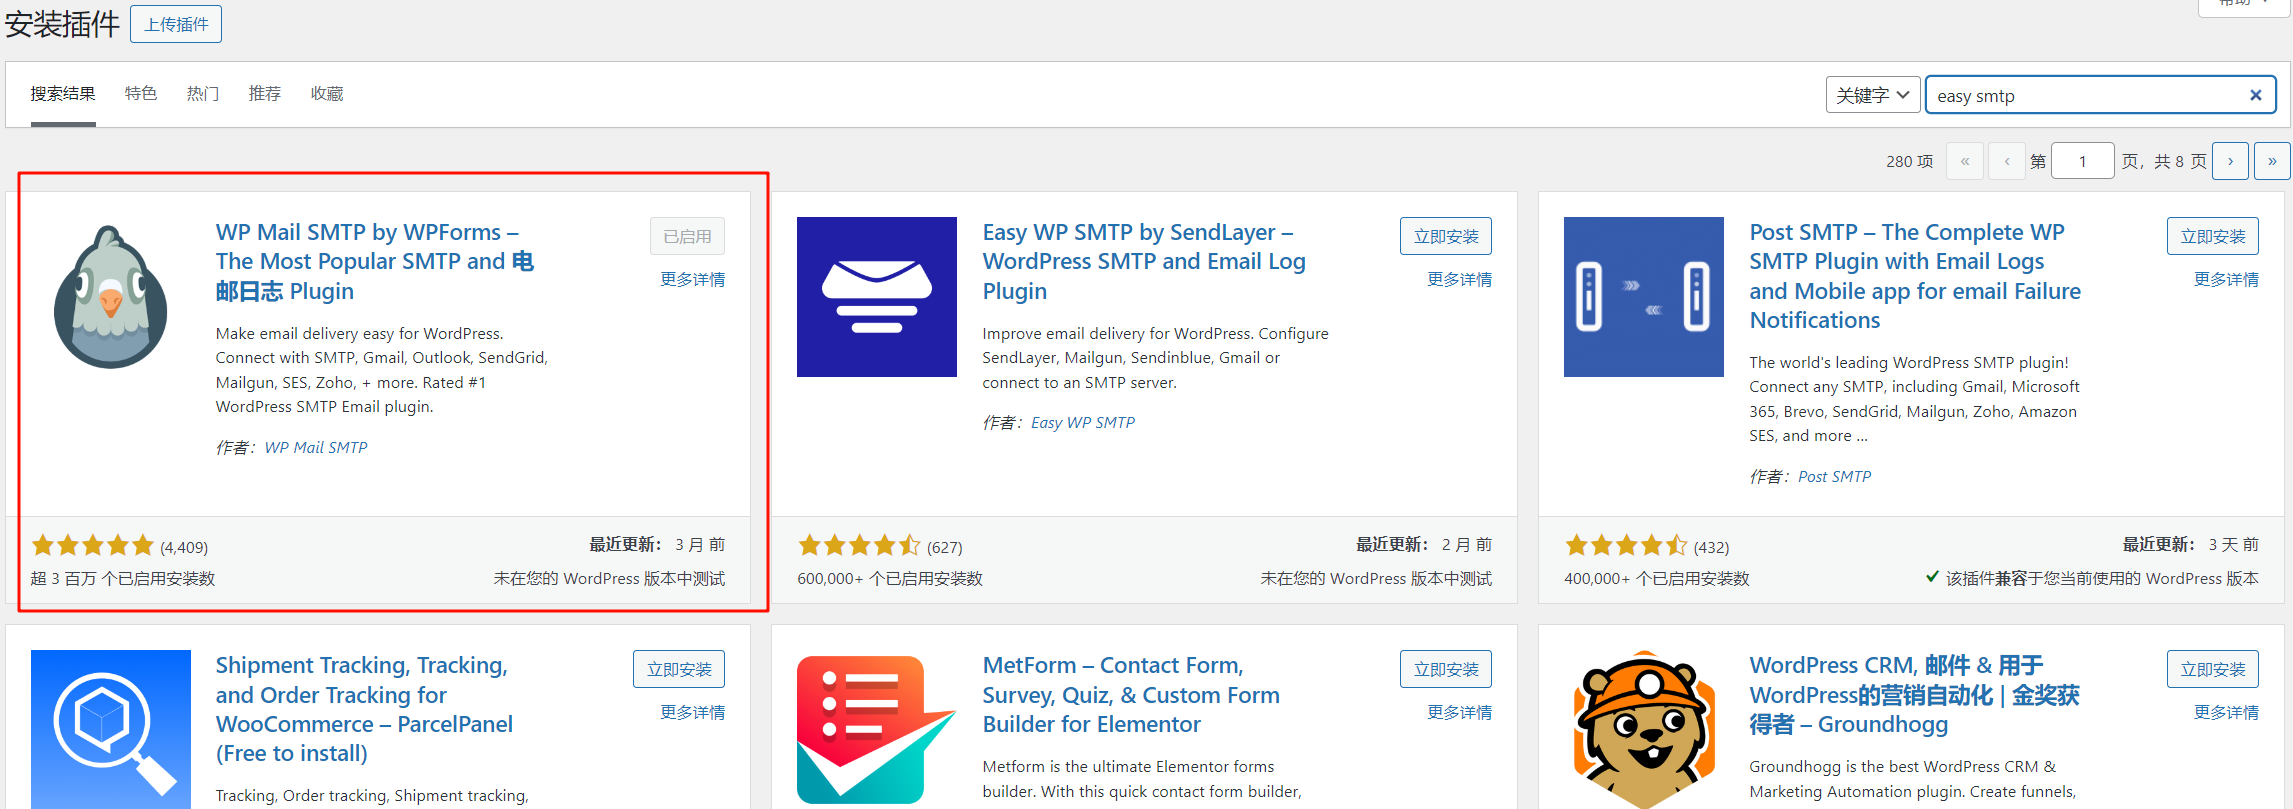
其实实现这个过程还是很简单的,我们只需要使用STMP服务器向用户发送邮件即可。那具体我们怎么实现呢。首先,设置SMTP需要使用插件,因为我使用的是wordpress搭建的博客,直接在插件中搜索easy smtp。这里我们选择第一个红框选择的插件:WP Mail SMTP by WPForms -- The Most Popular SMTP and 电邮日志 Plugin。(因为安装数比较多)你也可以选择其他插件,原理都是类似的。
- 选择SMTP邮箱
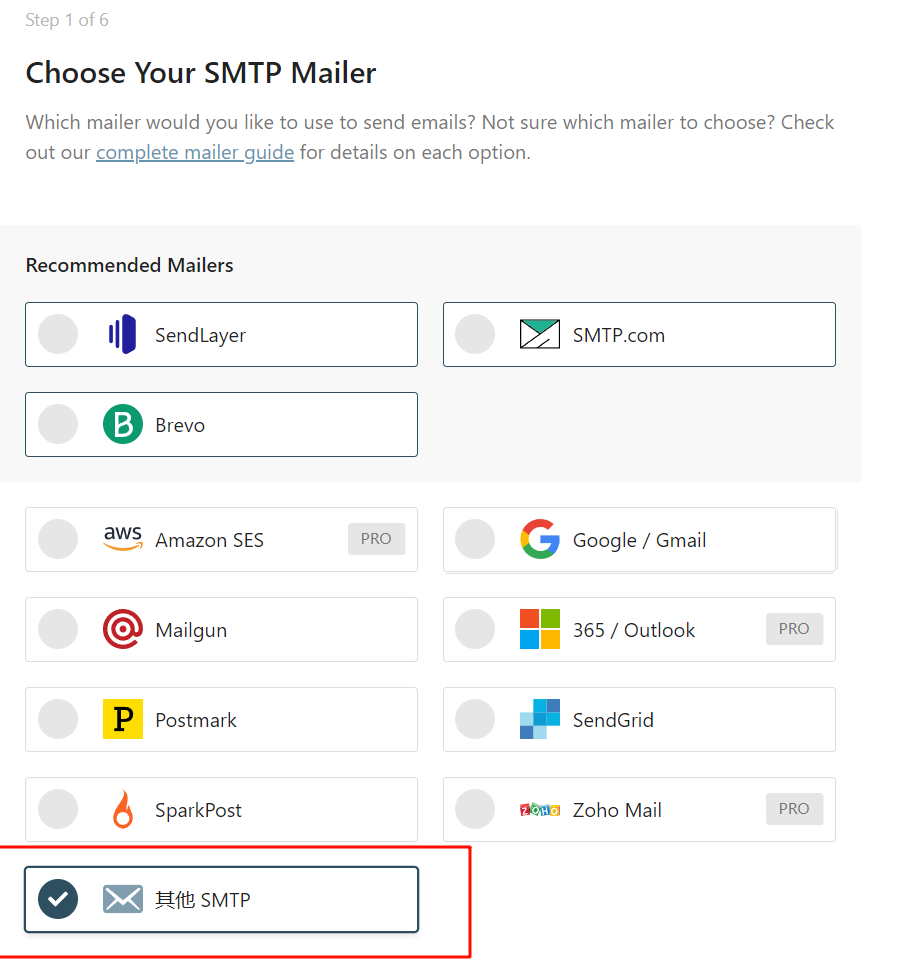
这里我们使用QQ邮箱举例,其他邮箱按需配置即可。
- 配置SMTP
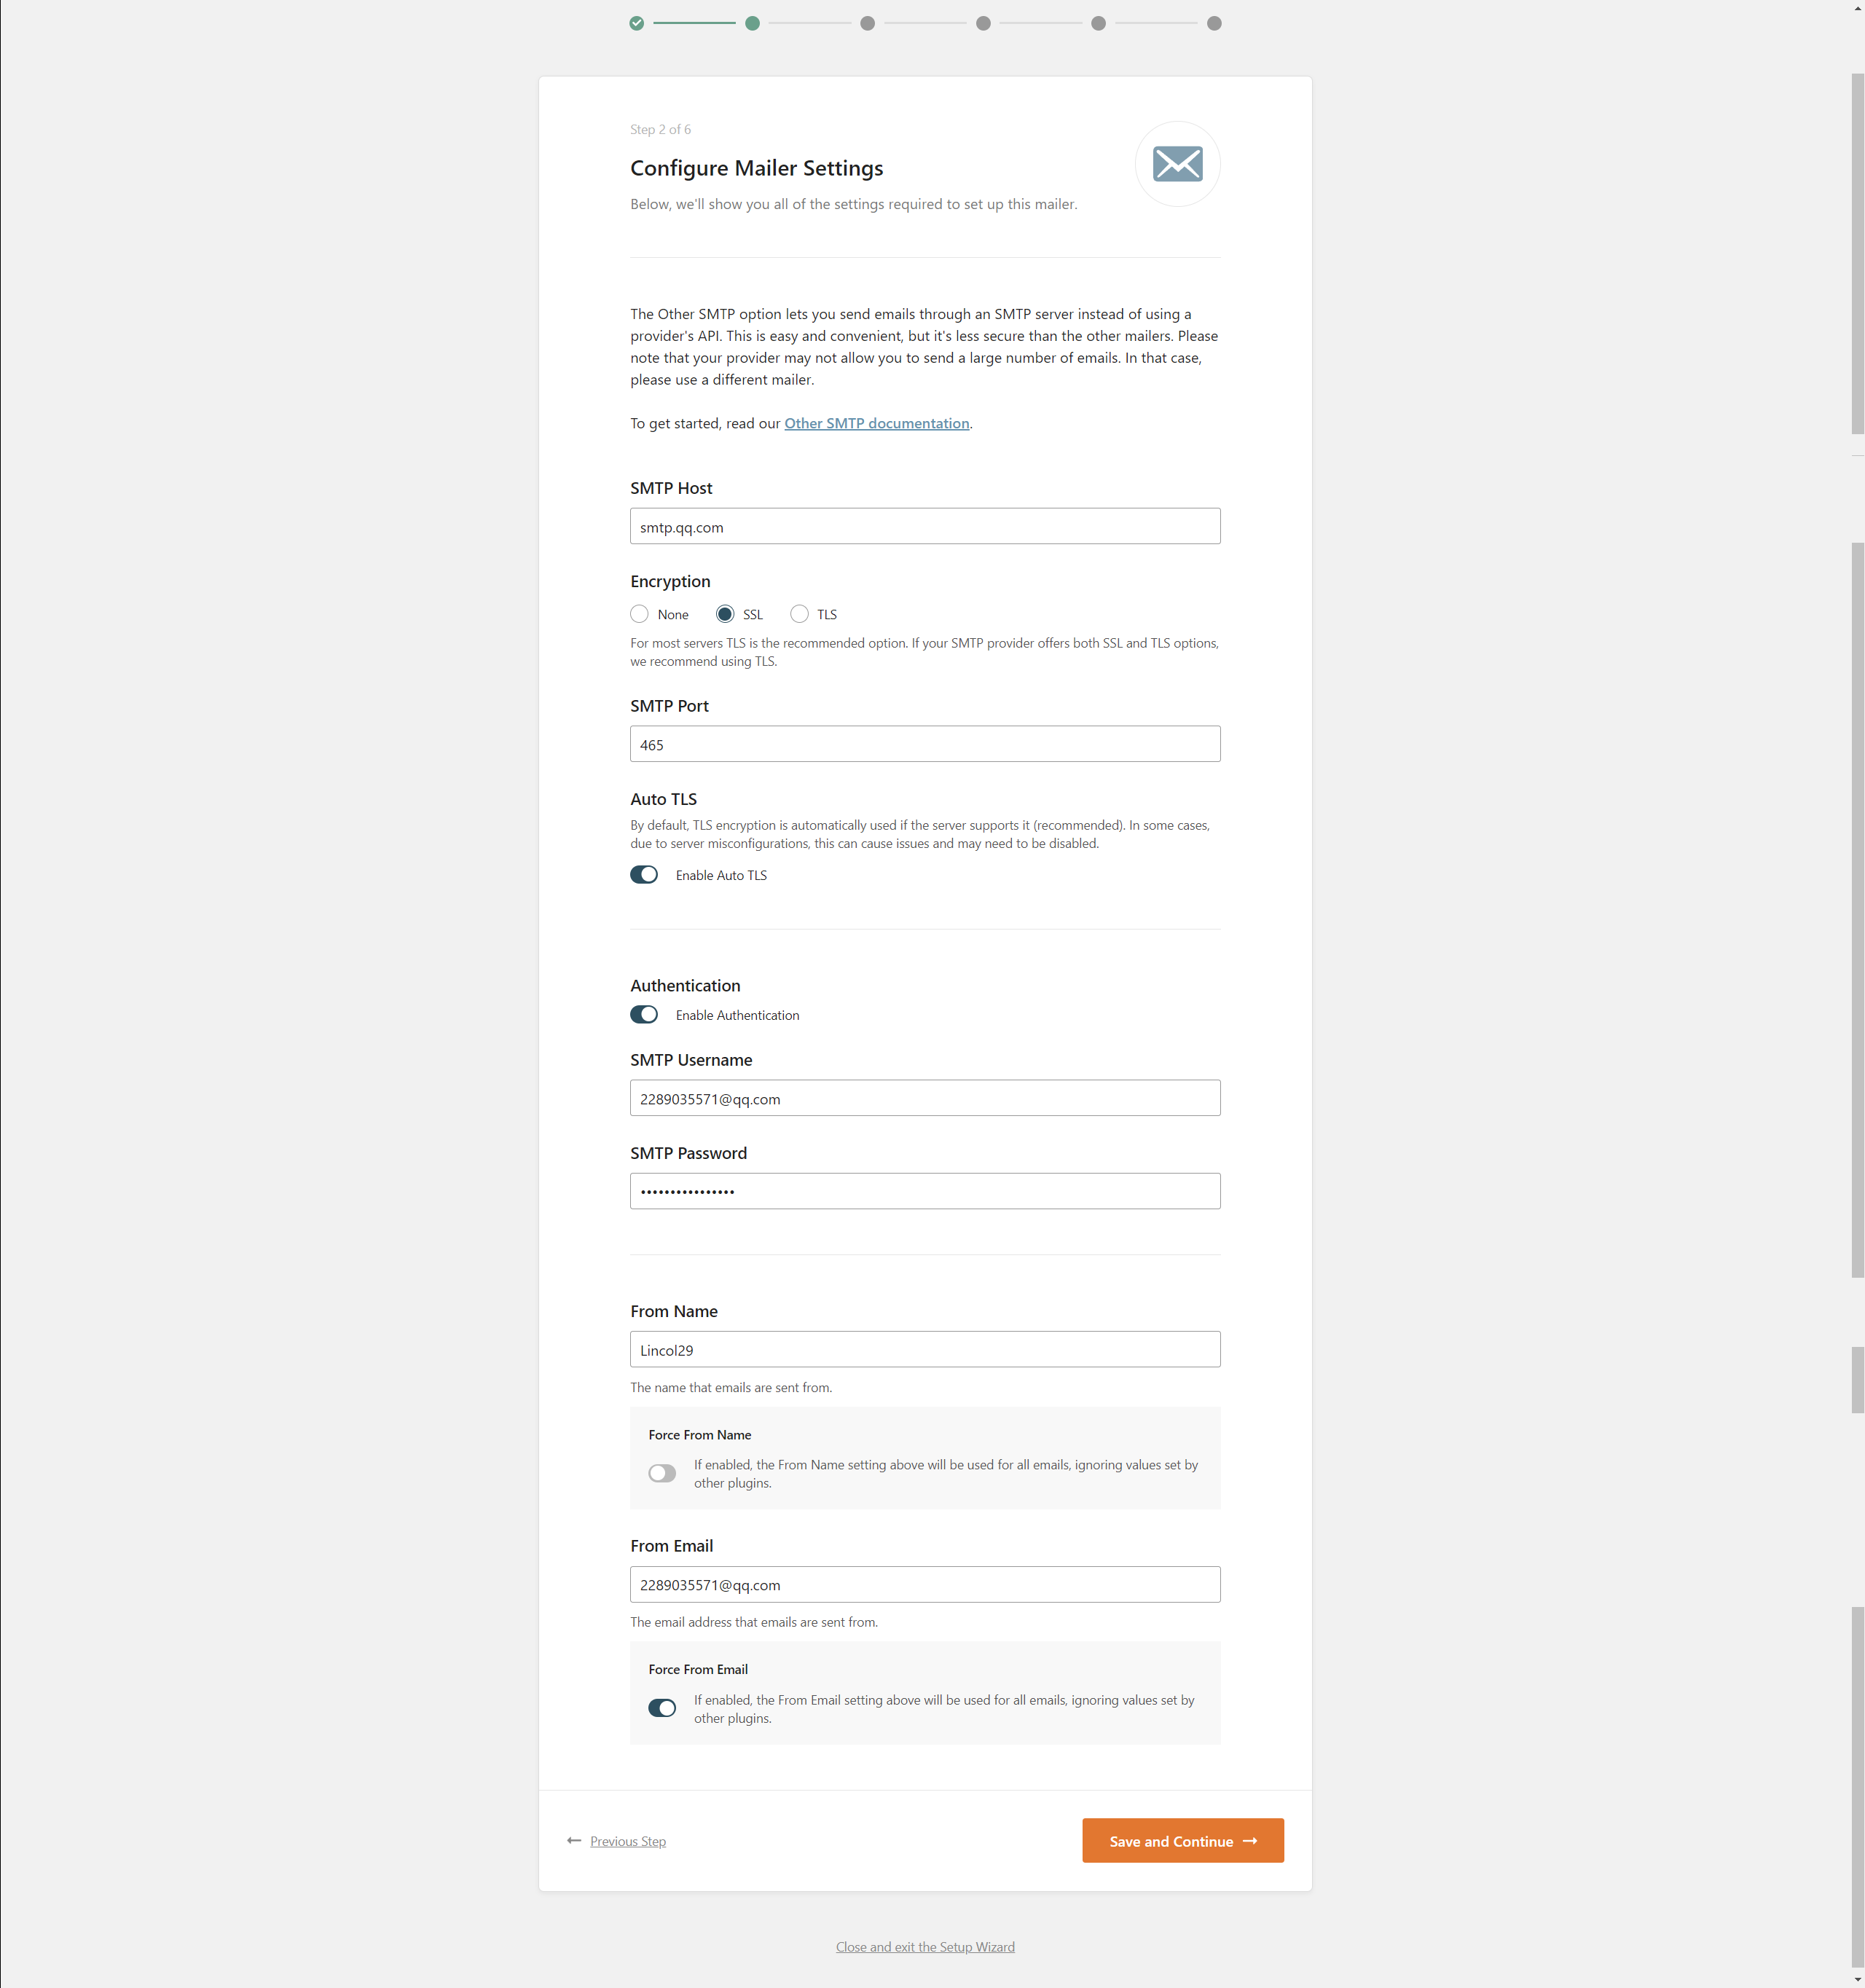
我们一般填写这些信息
- SMTP HOST -> 可以到邮箱的客户端设置中找到(例如QQ邮箱:smtp.qq.com)
- Encryption -> 选择加密协议SSL
- SMTP端口 -> 同上,一般ssl端口号为465;普通端口25
- SMTP认证 -> YES
- SMTP UserName -> 邮箱地址
- SMTP Password -> 一般为生成的专门为客户端登录的密码
- 发件人地址 -> 你用来发送邮件的邮箱地址
- 发件人昵称 -> 用于显示发件人
注意,SMTP Password可以参考如下:
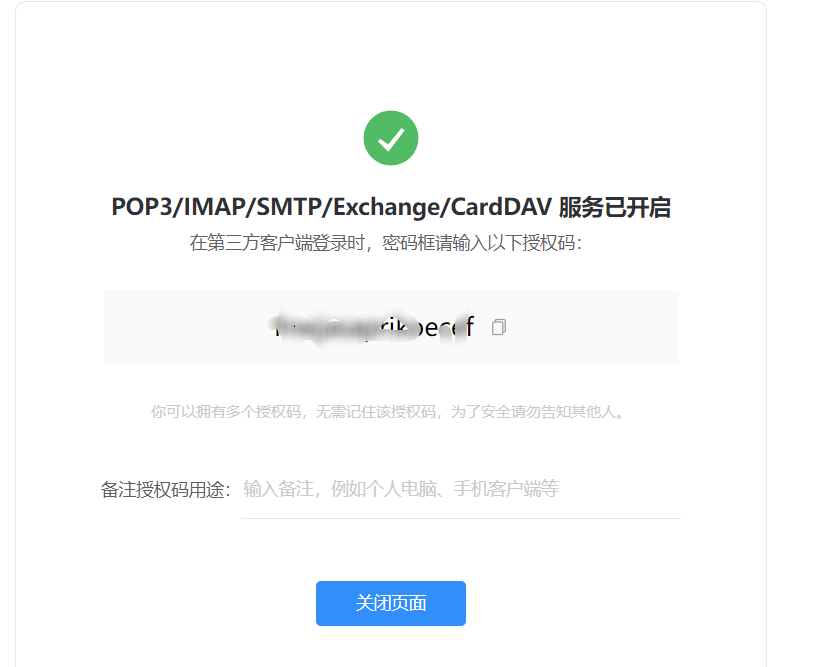
在qq邮箱 -- 设置 -- 账号 -- SMTP服务 ,点击开启服务,获取授权密码
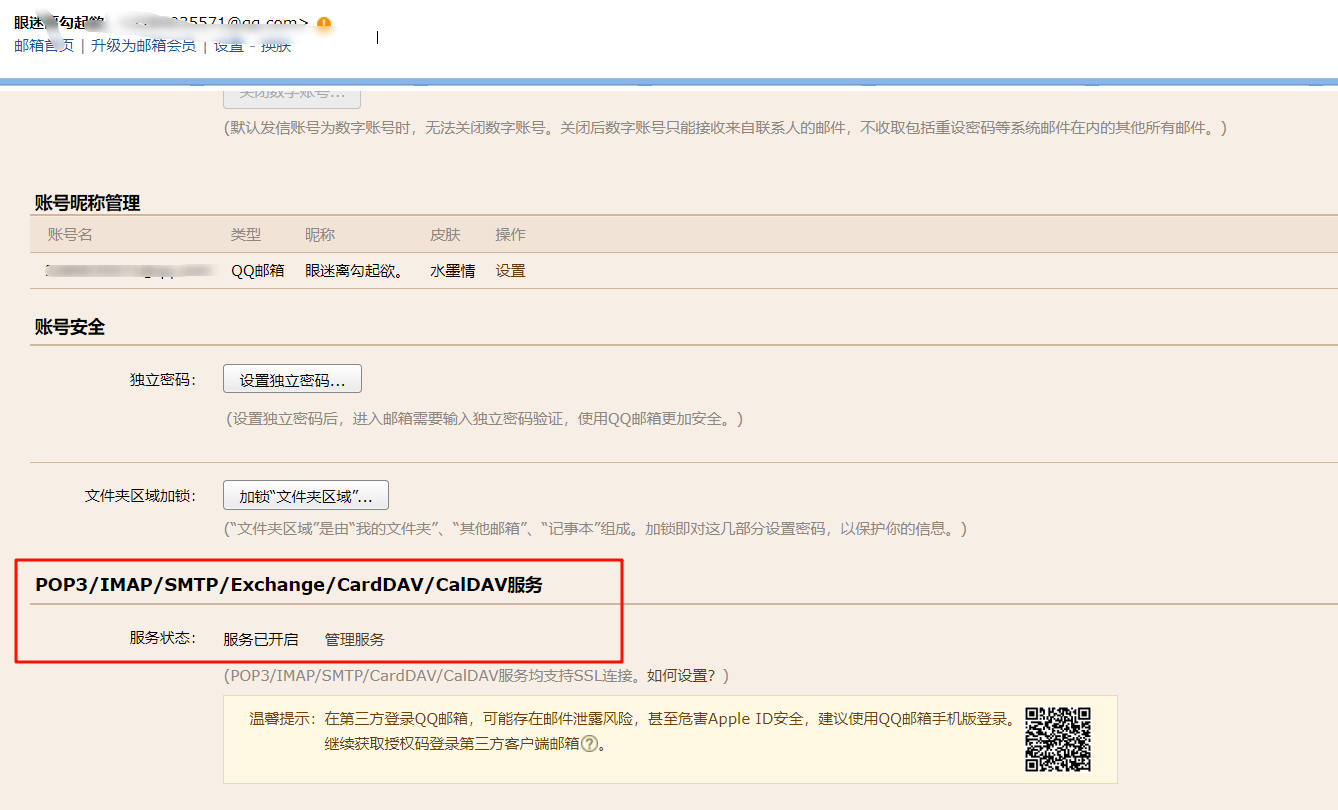
当你开启服务后,会给你发送一串字符。这个就是你的授权码。请复制粘贴到记事本中,在设置插件会使用到
- 添加function.php代码
我使用的是Argon主题,主题中自带了这个代码。如果你的主题并没有带下述这段代码,请直接拷贝。填写完测试通过后,接下来在function.php中添加一下代码:设置完毕即可实现该功能
function comment_mail_notify($comment_id) {
    $comment = get_comment($comment_id);
    $parent_id = $comment->comment_parent ? $comment->comment_parent : '';
    $spam_confirmed = $comment->comment_approved;
    if (($parent_id != '') && ($spam_confirmed != 'spam')) {
        $wp_email = 'no-reply@' . preg_replace('#^www\.#', '', strtolower($_SERVER['SERVER_NAME']));
        $to = trim(get_comment($parent_id)->comment_author_email);
        $subject = '[通知]您的留言有了新的回复';
        $message = '
            <div style="background:#ececec;width: 100%;padding: 50px 0;text-align:center;">
            <div style="background:#fff;width:750px;text-align:left;position:relative;margin:0 auto;font-size:14px;line-height:1.5;">
                    <div style="zoom:1;padding:25px 40px;background:#518bcb; border-bottom:1px solid #467ec3;">
                        <h1 style="color:#fff; font-size:25px;line-height:30px; margin:0;"><a href="' . get_option('home') . '" style="text-decoration: none;color: #FFF;">' . htmlspecialchars_decode(get_option('blogname'), ENT_QUOTES) . '</a></h1>
                    </div>
                <div style="padding:35px 40px 30px;">
                    <h2 style="font-size:18px;margin:5px 0;">Hi ' . trim(get_comment($parent_id)->comment_author) . ':</h2>
                    <p style="color:#313131;line-height:20px;font-size:15px;margin:20px 0;">您有一条留言有了新的回复,摘要信息请见下表。</p>
                        <table cellspacing="0" style="font-size:14px;text-align:center;border:1px solid #ccc;table-layout:fixed;width:500px;">
                            <thead>
                                <tr>
                                    <th style="padding:5px 0;text-indent:8px;border:1px solid #eee;border-width:0 1px 1px 0;white-space:nowrap;overflow:hidden;text-overflow:ellipsis;font-weight:normal;color:#a0a0a0;background:#eee;border-color:#dfdfdf;" width="235px;">原文</th>
                                    <th style="padding:5px 0;text-indent:8px;border:1px solid #eee;border-width:0 1px 1px 0;white-space:nowrap;overflow:hidden;text-overflow:ellipsis;font-weight:normal;color:#a0a0a0;background:#eee;border-color:#dfdfdf;" width="235px;">回复</th>
                                    <th style="padding:5px 0;text-indent:8px;border:1px solid #eee;border-width:0 1px 1px 0;white-space:nowrap;overflow:hidden;text-overflow:ellipsis;font-weight:normal;color:#a0a0a0;background:#eee;border-color:#dfdfdf;" width="100px;">作者</th>
                                    <th style="padding:5px 0;text-indent:8px;border:1px solid #eee;border-width:0 1px 1px 0;white-space:nowrap;overflow:hidden;text-overflow:ellipsis;font-weight:normal;color:#a0a0a0;background:#eee;border-color:#dfdfdf;" width="90px;" >操作</th>
                                </tr>
                            </thead>
                            <tbody>
                                <tr>
                                    <td style="padding:5px 0;text-indent:8px;border:1px solid #eee;border-width:0 1px 1px 0;white-space:nowrap;overflow:hidden;text-overflow:ellipsis;">' . trim(get_comment($parent_id)->comment_content) . '</td>
                                    <td style="padding:5px 0;text-indent:8px;border:1px solid #eee;border-width:0 1px 1px 0;white-space:nowrap;overflow:hidden;text-overflow:ellipsis;">'. trim($comment->comment_content) . '</td>
                                    <td style="padding:5px 0;text-indent:8px;border:1px solid #eee;border-width:0 1px 1px 0;white-space:nowrap;overflow:hidden;text-overflow:ellipsis;">' . trim($comment->comment_author) . '</td>
                                    <td style="padding:5px 0;text-indent:8px;border:1px solid #eee;border-width:0 1px 1px 0;white-space:nowrap;overflow:hidden;text-overflow:ellipsis;"><a href="'.get_comment_link( $comment->comment_ID ).'" style="color:#1E5494;text-decoration:none;vertical-align:middle;" target="_blank">查看回复</a></td>
                                </tr>
                            </tbody>
                        </table>
                        <br>
                    <div style="font-size:13px;color:#a0a0a0;padding-top:10px">该邮件由系统自动发出,如果不是您本人操作,请忽略此邮件。</div>
                    <div class="qmSysSign" style="padding-top:20px;font-size:12px;color:#a0a0a0;">
                        <p style="color:#a0a0a0;line-height:18px;font-size:12px;margin:5px 0;">' . htmlspecialchars_decode(get_option('blogname'), ENT_QUOTES) . '</p>
                        <p style="color:#a0a0a0;line-height:18px;font-size:12px;margin:5px 0;"><span style="border-bottom:1px dashed #ccc;" t="5" times="">' . date("Y年m月d日",time()) . '</span></p>
                    </div>
                </div>
            </div>
        </div>';
        $from = "From: \"" . htmlspecialchars_decode(get_option('blogname'), ENT_QUOTES) . "\" <$wp_email>";
        $headers = "$from\nContent-Type: text/html; charset=" . get_option('blog_charset') . "\n";
        wp_mail( $to, $subject, $message);
    }
}
add_action('comment_post', 'comment_mail_notify');
报错解决
无法验证SMTP邮箱,发现是因为之前修改了QQ账号密码导致,重新按照上述步骤去验证SMTP邮箱

文章参考资料
- C#文章集合:更全面的C#知识点文章
- 在WordPress中利用wp_mail()实现评论回复提醒
 51工具盒子


